> For the complete documentation index, see [llms.txt](https://help.verkada.com/llms.txt). Markdown versions of documentation pages are available by appending `.md` to page URLs; this page is available as [Markdown](https://help.verkada.com/guest/ja/she-ding/door-access-for-guests.md).
# ゲストのドアアクセス
訪問者にドアへの限定アクセスを付与し、避難時の点呼レポートに含めます。
Verkada Guest は Verkada アクセスコントロールと連携して、組織が訪問者に制御されたドアアクセスを付与できるようにします。この連携により、組織は訪問者を [点呼レポート](/access-control/ja/jin-ji-dui-ying/roll-call-reports.md).
ゲストタイプと訪問者固有のアクセスコントロール権限セットを関連付けることで、訪問者向けのドアアクセスを設定できます、 [訪問アクセス種別。](/access-control/ja/yzto/add-a-user-to-the-verkada-access-system/visitor-access-visit-access-type.md)
***
## 構成
{% hint style="danger" %}
ユーザーは、最低でも次のアクセスコントロールの役割を持っている必要があります。 **アクセスサイトマネージャー** および最低限の Workplace の役割である **Workplace サイト管理者** ドアアクセスを持つゲストタイプを構成する必要があります。
{% endhint %}
ドアアクセス付きのゲストタイプを設定するには、 [新しいゲストタイプを作成する](/guest/ja/she-ding/configure-guest-types.md) または、次の手順で既存のものに移動します:
{% stepper %}
{% step %}
**Verkada Command で、All Products > Workplace >**  **Guest。**
{% endstep %}
{% step %}
**左側のナビゲーションで、ゲスト設定をクリックします。**
{% endstep %}
{% step %}
**Sites > ご利用のサイトを選択します。**
{% endstep %}
{% step %}
**Guest Types の下で、Manage Guest Types をクリックします。**
{% endstep %}
{% step %}
**ゲストタイプを選択します。**
{% endstep %}
{% step %}
**右下で、ドアアクセスと点呼を選択します。**
{% endstep %}
{% step %}
**Visit Access Type を選択し、** [**訪問アクセス種別**](/access-control/ja/yzto/add-a-user-to-the-verkada-access-system/visitor-access-visit-access-type.md) **または新しいものを作成します。**
{% endstep %}
{% step %}
**ゲストタイプに戻り、訪問アクセス種別を追加します。**
{% endstep %}
{% endstepper %}
{% hint style="danger" %}
ドアアクセス付きのゲストタイプを構成する際は、管理者の判断で行うことをお勧めします。次の設定を含めることを検討してください: **ホスト承認**, **承認済みリストのみ**、および **セキュリティ審査** 設定を有効にして、許可された訪問者のみがドアを開けられるようにします。
{% endhint %}
***
## サポートされている訪問者アクセス認証情報
Verkada Guest では、訪問者に次の認証情報を発行できます:
1. [キーカード](https://help.verkada.com/guest/~/revisions/EoCxP3hpfoyJZDsFs6y8/configuration/door-access-for-guests/assigning-a-keycard-in-guest)
2. 解錠リンク
3. 入室コード
4. QRコード
5. 顔認証解錠
### キーカード
訪問者には、Guest 内で一時的なキーカードをネイティブに割り当てることができます。
次の詳細はこちら: [訪問者へのキーカード割り当て](/guest/ja/she-ding/door-access-for-guests/assigning-a-keycard-in-guest.md).
### 解錠リンク
{% hint style="danger" %}
訪問者向けに解錠リンクを有効にするには、Guest Type に次を含める必要があります: **連絡先情報** 手順。
{% endhint %}
訪問者には、サインイン後にその訪問専用の Guest Portal リンクを送信できます。このリンクから、訪問者は遠隔でドアを解錠できます。
### 入室コード
{% hint style="danger" %}
訪問者に入室コードと解錠手順を送信するには、Guest Type に次を含める必要があります: **連絡先情報** 手順。
{% endhint %}
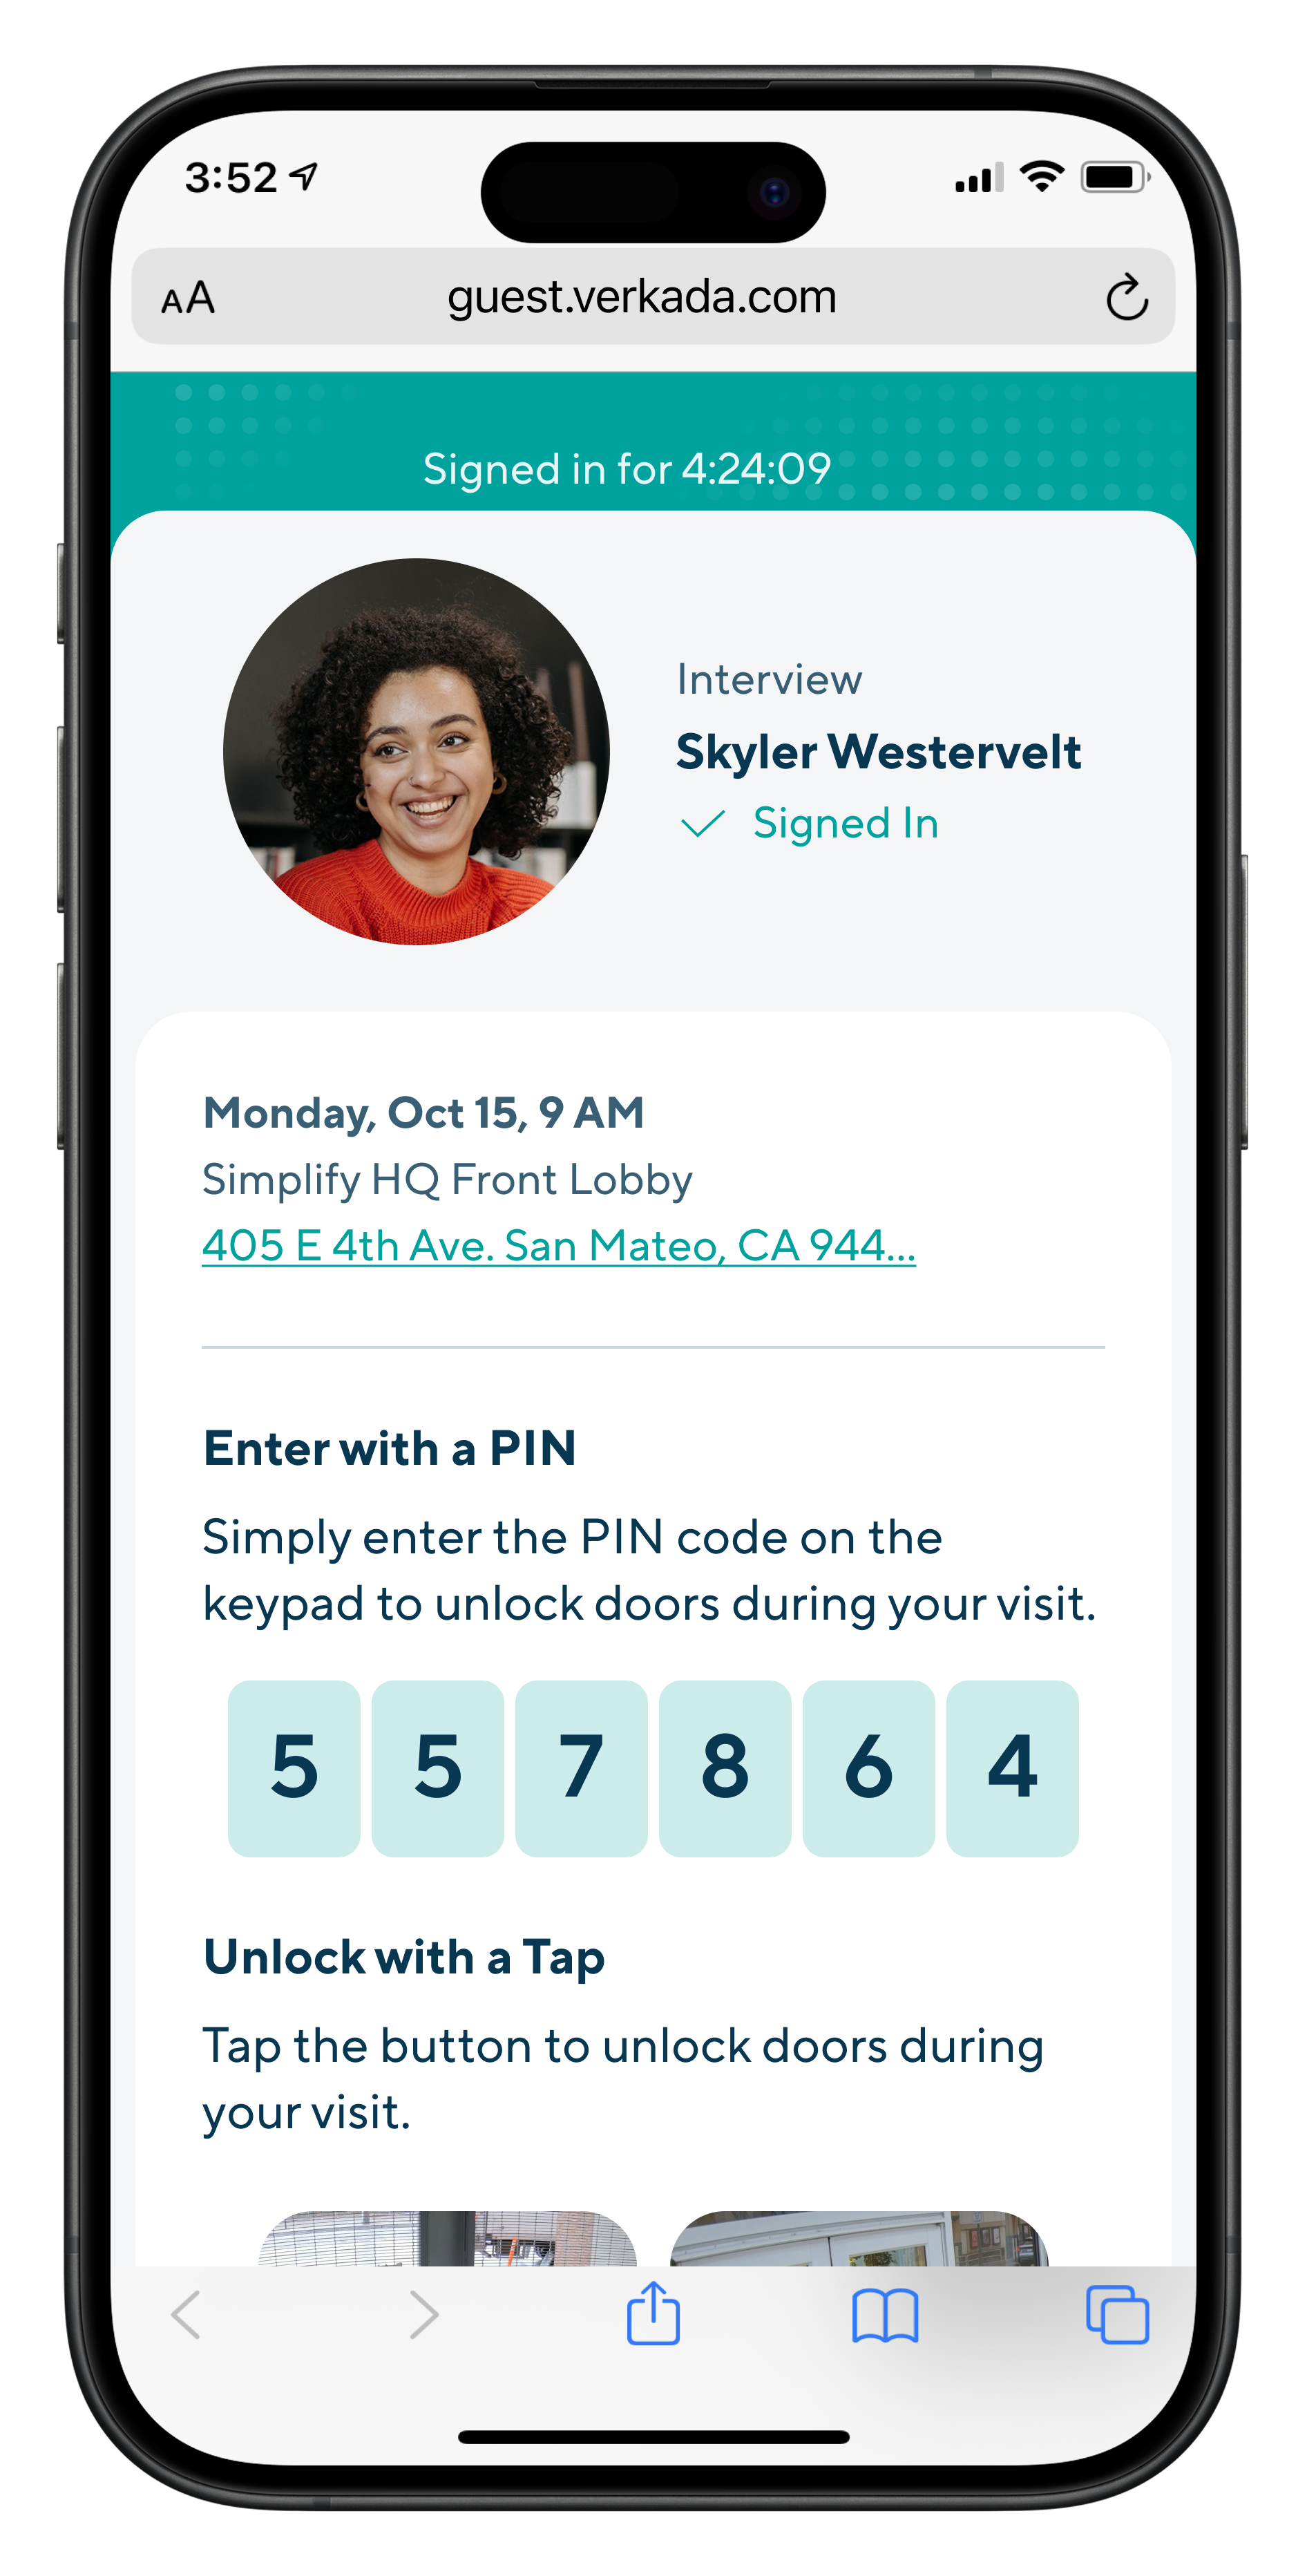
訪問者には、PINコードリーダーでアクセスコントロールされたドアを解錠するための入室コードを送信できます。訪問者向けの入室コードは 6 桁です。訪問者は、送信されたリンクから入室コードを確認できます:
{% hint style="warning" %}
キーパッドリーダーで入室コードを入力するには、コードを入力した後に次の **#** (#)キー。たとえば、コードが 123456 の場合は、次を入力します **123456#**.
{% endhint %}
### QRコード
{% hint style="danger" %}
訪問者に QR コードと解錠手順を送信するには、Guest Type に次を含める必要があります: **連絡先情報** 手順。
{% endhint %}
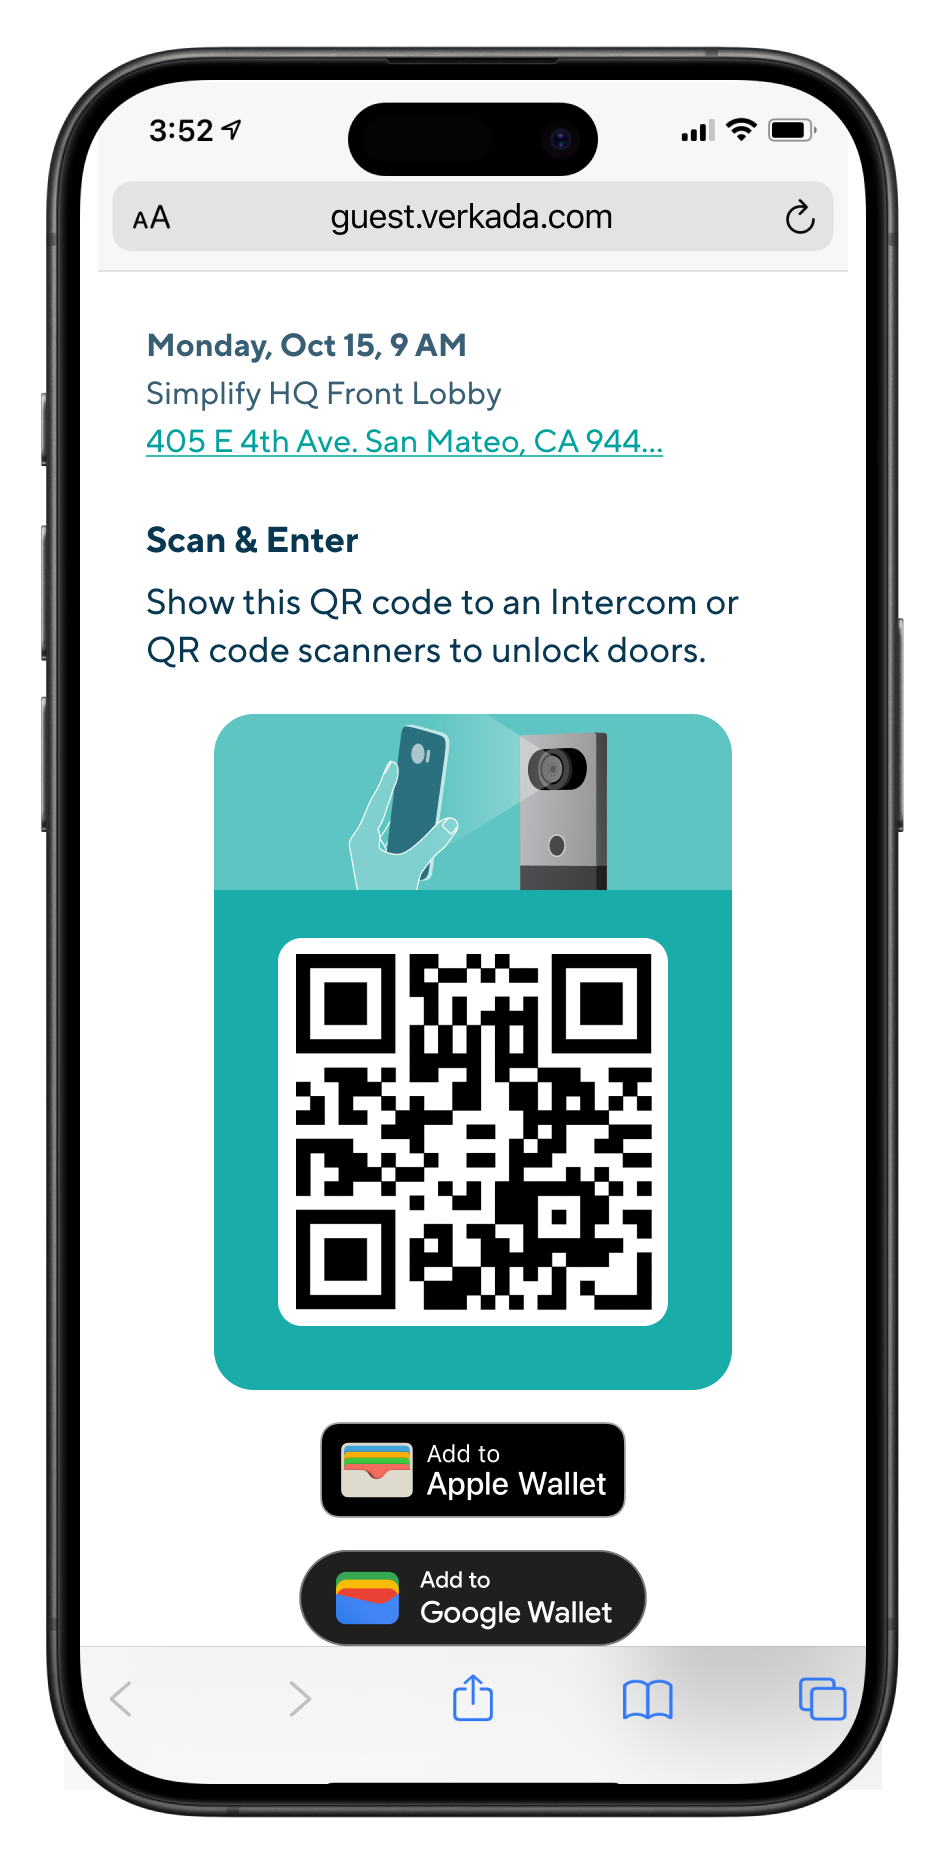
訪問者には、Verkada インターホンおよびサードパーティ製 QR コードリーダーでアクセスコントロールされたドアを解錠できる QR コードを送信できます。訪問者は、サインイン後に送信されるリンクから QR コードを確認できます。
推奨サードパーティ製 QR コードリーダー:
* Sycreader R35
* [ZKTeco QR500](https://www.zktecousa.com/product-page/qr-code-access-control-reader-qr500)
{% hint style="danger" %}
インターホンでの QR コード解錠は、次の 2 つのドアモード構成でのみサポートされています:
* **インターホンへ直接**
* **Verkada ドアにペアリング済み**
{% endhint %}
### 顔認証解錠
{% hint style="danger" %}
訪問者が Face Unlock を使用できるようにするには、Guest Type に次を含める必要があります: **バッジ写真** 手順。
{% endhint %}
訪問者は、Access Station Pro でアクセスコントロールされたドアを開けるために Face Unlock の使用をオプトインできます。 [Access Station Pro](https://help.verkada.com/access-control/configuration/access-station-pro-end-to-end-setup-guide).
この機能で使用される顔データは、認証情報が取り消されるか、訪問者がサインアウトすると削除されます。今後の訪問では訪問者の以前の設定が保持されますが、訪問者はサインイン時にいつでも Face Unlock の使用をオプトインまたはオプトアウトできます。
***
## ドアアクセスを招待された訪問者のみに制限する
通常の訪問者と招待された訪問者は、既定ではゲストタイプのアクセスコントロール設定に基づいてドアにアクセスできます。必要に応じて、アクセスを招待された訪問者のみに制限できます。
{% stepper %}
{% step %}
**Verkada Command で、All Products > Workplace >** **Guest。**
{% endstep %}
{% step %}
**左側のナビゲーションで、ゲスト設定をクリックします。**
{% endstep %}
{% step %}
**Sites > ご利用のサイトを選択します。**
{% endstep %}
{% step %}
**Guest Types の下で、Manage Guest Types をクリックします。**
{% endstep %}
{% step %}
**ゲストタイプを選択します。**
{% endstep %}
{% step %}
**右下で、ドアアクセスと点呼を選択します。**
{% endstep %}
{% step %}
**[招待されたゲストのみドアを解錠できる]にチェックを入れます。**
{% endstep %}
{% endstepper %}
***
## よくある質問
**Guest。**
{% endstep %}
{% step %}
**左側のナビゲーションで、ゲスト設定をクリックします。**
{% endstep %}
{% step %}
**Sites > ご利用のサイトを選択します。**
{% endstep %}
{% step %}
**Guest Types の下で、Manage Guest Types をクリックします。**
{% endstep %}
{% step %}
**ゲストタイプを選択します。**
{% endstep %}
{% step %}
**右下で、ドアアクセスと点呼を選択します。**
{% endstep %}
{% step %}
**Visit Access Type を選択し、** [**訪問アクセス種別**](/access-control/ja/yzto/add-a-user-to-the-verkada-access-system/visitor-access-visit-access-type.md) **または新しいものを作成します。**
{% endstep %}
{% step %}
**ゲストタイプに戻り、訪問アクセス種別を追加します。**
{% endstep %}
{% endstepper %}
{% hint style="danger" %}
ドアアクセス付きのゲストタイプを構成する際は、管理者の判断で行うことをお勧めします。次の設定を含めることを検討してください: **ホスト承認**, **承認済みリストのみ**、および **セキュリティ審査** 設定を有効にして、許可された訪問者のみがドアを開けられるようにします。
{% endhint %}
***
## サポートされている訪問者アクセス認証情報
Verkada Guest では、訪問者に次の認証情報を発行できます:
1. [キーカード](https://help.verkada.com/guest/~/revisions/EoCxP3hpfoyJZDsFs6y8/configuration/door-access-for-guests/assigning-a-keycard-in-guest)
2. 解錠リンク
3. 入室コード
4. QRコード
5. 顔認証解錠
### キーカード
訪問者には、Guest 内で一時的なキーカードをネイティブに割り当てることができます。
次の詳細はこちら: [訪問者へのキーカード割り当て](/guest/ja/she-ding/door-access-for-guests/assigning-a-keycard-in-guest.md).
### 解錠リンク
{% hint style="danger" %}
訪問者向けに解錠リンクを有効にするには、Guest Type に次を含める必要があります: **連絡先情報** 手順。
{% endhint %}
訪問者には、サインイン後にその訪問専用の Guest Portal リンクを送信できます。このリンクから、訪問者は遠隔でドアを解錠できます。
### 入室コード
{% hint style="danger" %}
訪問者に入室コードと解錠手順を送信するには、Guest Type に次を含める必要があります: **連絡先情報** 手順。
{% endhint %}
訪問者には、PINコードリーダーでアクセスコントロールされたドアを解錠するための入室コードを送信できます。訪問者向けの入室コードは 6 桁です。訪問者は、送信されたリンクから入室コードを確認できます:
{% hint style="warning" %}
キーパッドリーダーで入室コードを入力するには、コードを入力した後に次の **#** (#)キー。たとえば、コードが 123456 の場合は、次を入力します **123456#**.
{% endhint %}
### QRコード
{% hint style="danger" %}
訪問者に QR コードと解錠手順を送信するには、Guest Type に次を含める必要があります: **連絡先情報** 手順。
{% endhint %}
訪問者には、Verkada インターホンおよびサードパーティ製 QR コードリーダーでアクセスコントロールされたドアを解錠できる QR コードを送信できます。訪問者は、サインイン後に送信されるリンクから QR コードを確認できます。
推奨サードパーティ製 QR コードリーダー:
* Sycreader R35
* [ZKTeco QR500](https://www.zktecousa.com/product-page/qr-code-access-control-reader-qr500)
{% hint style="danger" %}
インターホンでの QR コード解錠は、次の 2 つのドアモード構成でのみサポートされています:
* **インターホンへ直接**
* **Verkada ドアにペアリング済み**
{% endhint %}
### 顔認証解錠
{% hint style="danger" %}
訪問者が Face Unlock を使用できるようにするには、Guest Type に次を含める必要があります: **バッジ写真** 手順。
{% endhint %}
訪問者は、Access Station Pro でアクセスコントロールされたドアを開けるために Face Unlock の使用をオプトインできます。 [Access Station Pro](https://help.verkada.com/access-control/configuration/access-station-pro-end-to-end-setup-guide).
この機能で使用される顔データは、認証情報が取り消されるか、訪問者がサインアウトすると削除されます。今後の訪問では訪問者の以前の設定が保持されますが、訪問者はサインイン時にいつでも Face Unlock の使用をオプトインまたはオプトアウトできます。
***
## ドアアクセスを招待された訪問者のみに制限する
通常の訪問者と招待された訪問者は、既定ではゲストタイプのアクセスコントロール設定に基づいてドアにアクセスできます。必要に応じて、アクセスを招待された訪問者のみに制限できます。
{% stepper %}
{% step %}
**Verkada Command で、All Products > Workplace >** **Guest。**
{% endstep %}
{% step %}
**左側のナビゲーションで、ゲスト設定をクリックします。**
{% endstep %}
{% step %}
**Sites > ご利用のサイトを選択します。**
{% endstep %}
{% step %}
**Guest Types の下で、Manage Guest Types をクリックします。**
{% endstep %}
{% step %}
**ゲストタイプを選択します。**
{% endstep %}
{% step %}
**右下で、ドアアクセスと点呼を選択します。**
{% endstep %}
{% step %}
**[招待されたゲストのみドアを解錠できる]にチェックを入れます。**
{% endstep %}
{% endstepper %}
***
## よくある質問
訪問者にドアアクセスを付与せずに、点呼レポートに含めることはできますか?
はい、訪問者はドアアクセスがなくても点呼レポートに含めることができます。ゲストタイプは、点呼が有効な訪問アクセス種別で構成されている必要があります。
グローバルゲストタイプに訪問アクセス種別を設定できますか?
いいえ、グローバルゲストタイプには訪問アクセス種別を設定できません。そのため、グローバルゲストタイプではドアアクセスを付与できず、訪問者を点呼レポートに含めることもできません。
訪問者は、次を必要とするドアを解錠できますか 2要素認証?
はい、訪問者は 2要素認証を必要とするドアスケジュールに従うドアを解錠できます。訪問者はキーカード/QRコードをスキャンし、その後入室コードを入力する必要があります。
---
# Agent Instructions
This documentation is published with GitBook. GitBook is the documentation platform designed so that both humans and AI agents can read, navigate, and reason over technical content effectively. Learn more at gitbook.com.
## Querying This Documentation
If you need additional information that is not directly available in this page, you can query the documentation by asking a question.
Perform an HTTP GET request on the following URL with the `ask` and `goal` query parameters:
```
GET https://help.verkada.com/guest/ja/she-ding/door-access-for-guests.md?ask=&goal=
```
`ask` is the immediate question: it should be specific, self-contained, and written in natural language.
`goal` is what the user is ultimately trying to achieve, the reason they need the answer. Sharing it helps GitBook give you a better, more relevant answer. A goal is most helpful when it describes the outcome the user wants rather than restating the question. For example, with `ask=how do I create an API token`, a goal like `automate deployments from our CI pipeline` lets GitBook tailor the answer to that use case.
The response will contain a direct answer to the question and relevant excerpts and sources from the documentation.
Use this mechanism when the answer is not explicitly present in the current page, you need clarification or additional context, or you want to retrieve related documentation sections.