> For the complete documentation index, see [llms.txt](https://help.verkada.com/llms.txt). Markdown versions of documentation pages are available by appending `.md` to page URLs; this page is available as [Markdown](https://help.verkada.com/verkada-cameras/ja/she-ding/security-and-privacy/enable-face-blur-on-verkada-cameras.md).
# Verkadaカメラで顔ぼかしを有効にする
ライブおよびアーカイブ済みビデオの顔をぼかします
Verkada Command は、ライブ映像内のすべての顔をぼかし、アーカイブ済み映像内の顔を選択的にぼかすことをサポートしています。これを使用して、カメラシステムで録画された個人のプライバシーを保護します。
***
{% tabs %}
{% tab title="ライブ顔ぼかし" %}
### ライブ顔ぼかしを有効にする
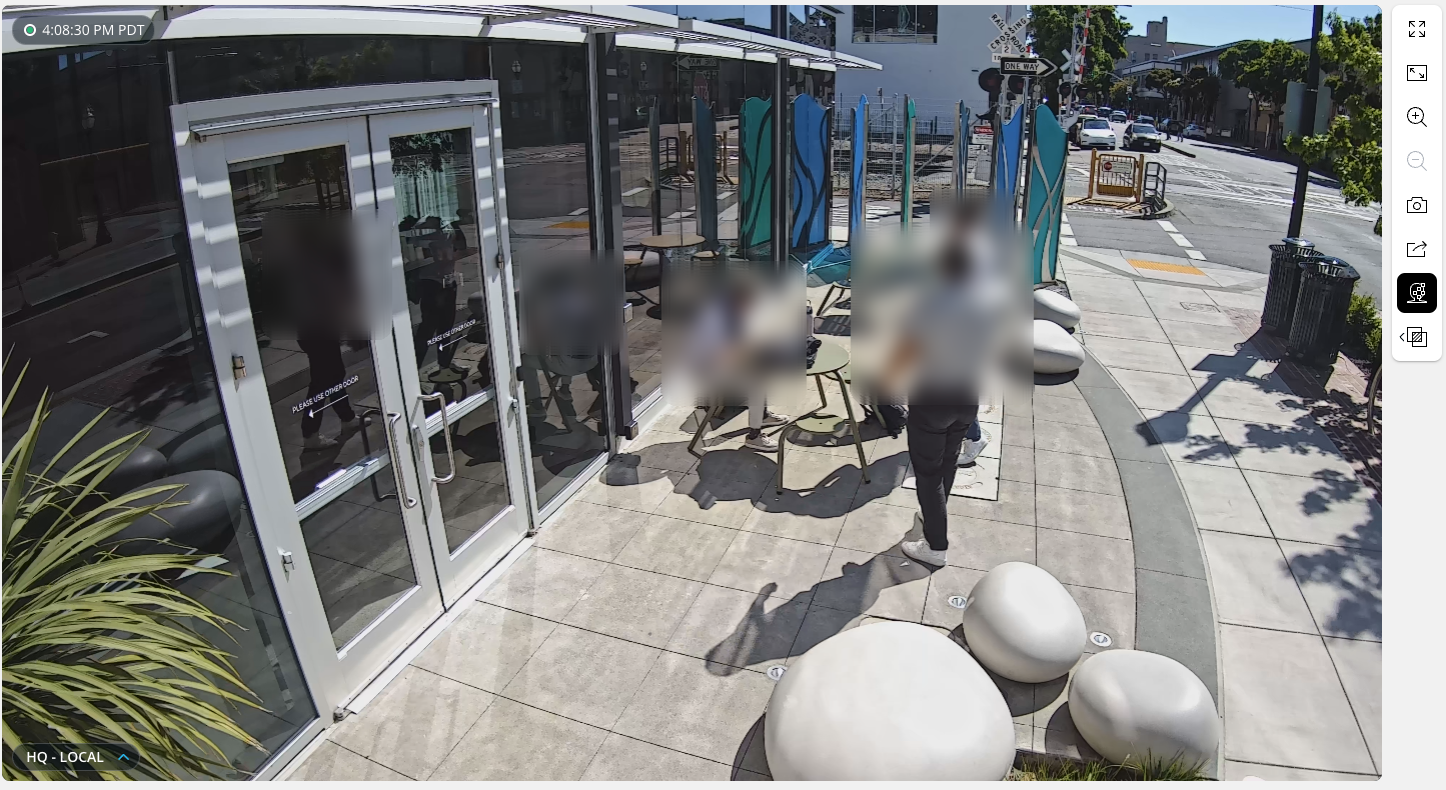
ライブ顔ぼかしは、グリッドと個別のカメラページ上のライブビデオフィード内の顔を検出してぼかします。この設定は録画済み映像には適用されないため、カメラ履歴には引き続き顔が表示されます。
単一カメラ、グリッド、またはグローバルのライブビデオフィードから、ライブ顔ぼかしにアクセスして有効にできます **カメラ設定** ページ。
{% hint style="warning" %}
カメラおよびグリッドレベルでのライブ顔ぼかしは、設定したユーザーに固有です。この選択によって、他のユーザーに顔ぼかしが有効になることはありません。
{% endhint %}
#### ライブビデオフィード - カメラページ
{% stepper %}
{% step %}
**Verkada Command で、\[All Products] > \[Cameras] に移動します。**
{% endstep %}
{% step %}
**カメラを選択します。**
{% endstep %}
{% step %}
**ライブビデオフィードの右側で、「ライブ顔ぼかし」をクリックします。**
{% endstep %}
{% endstepper %}
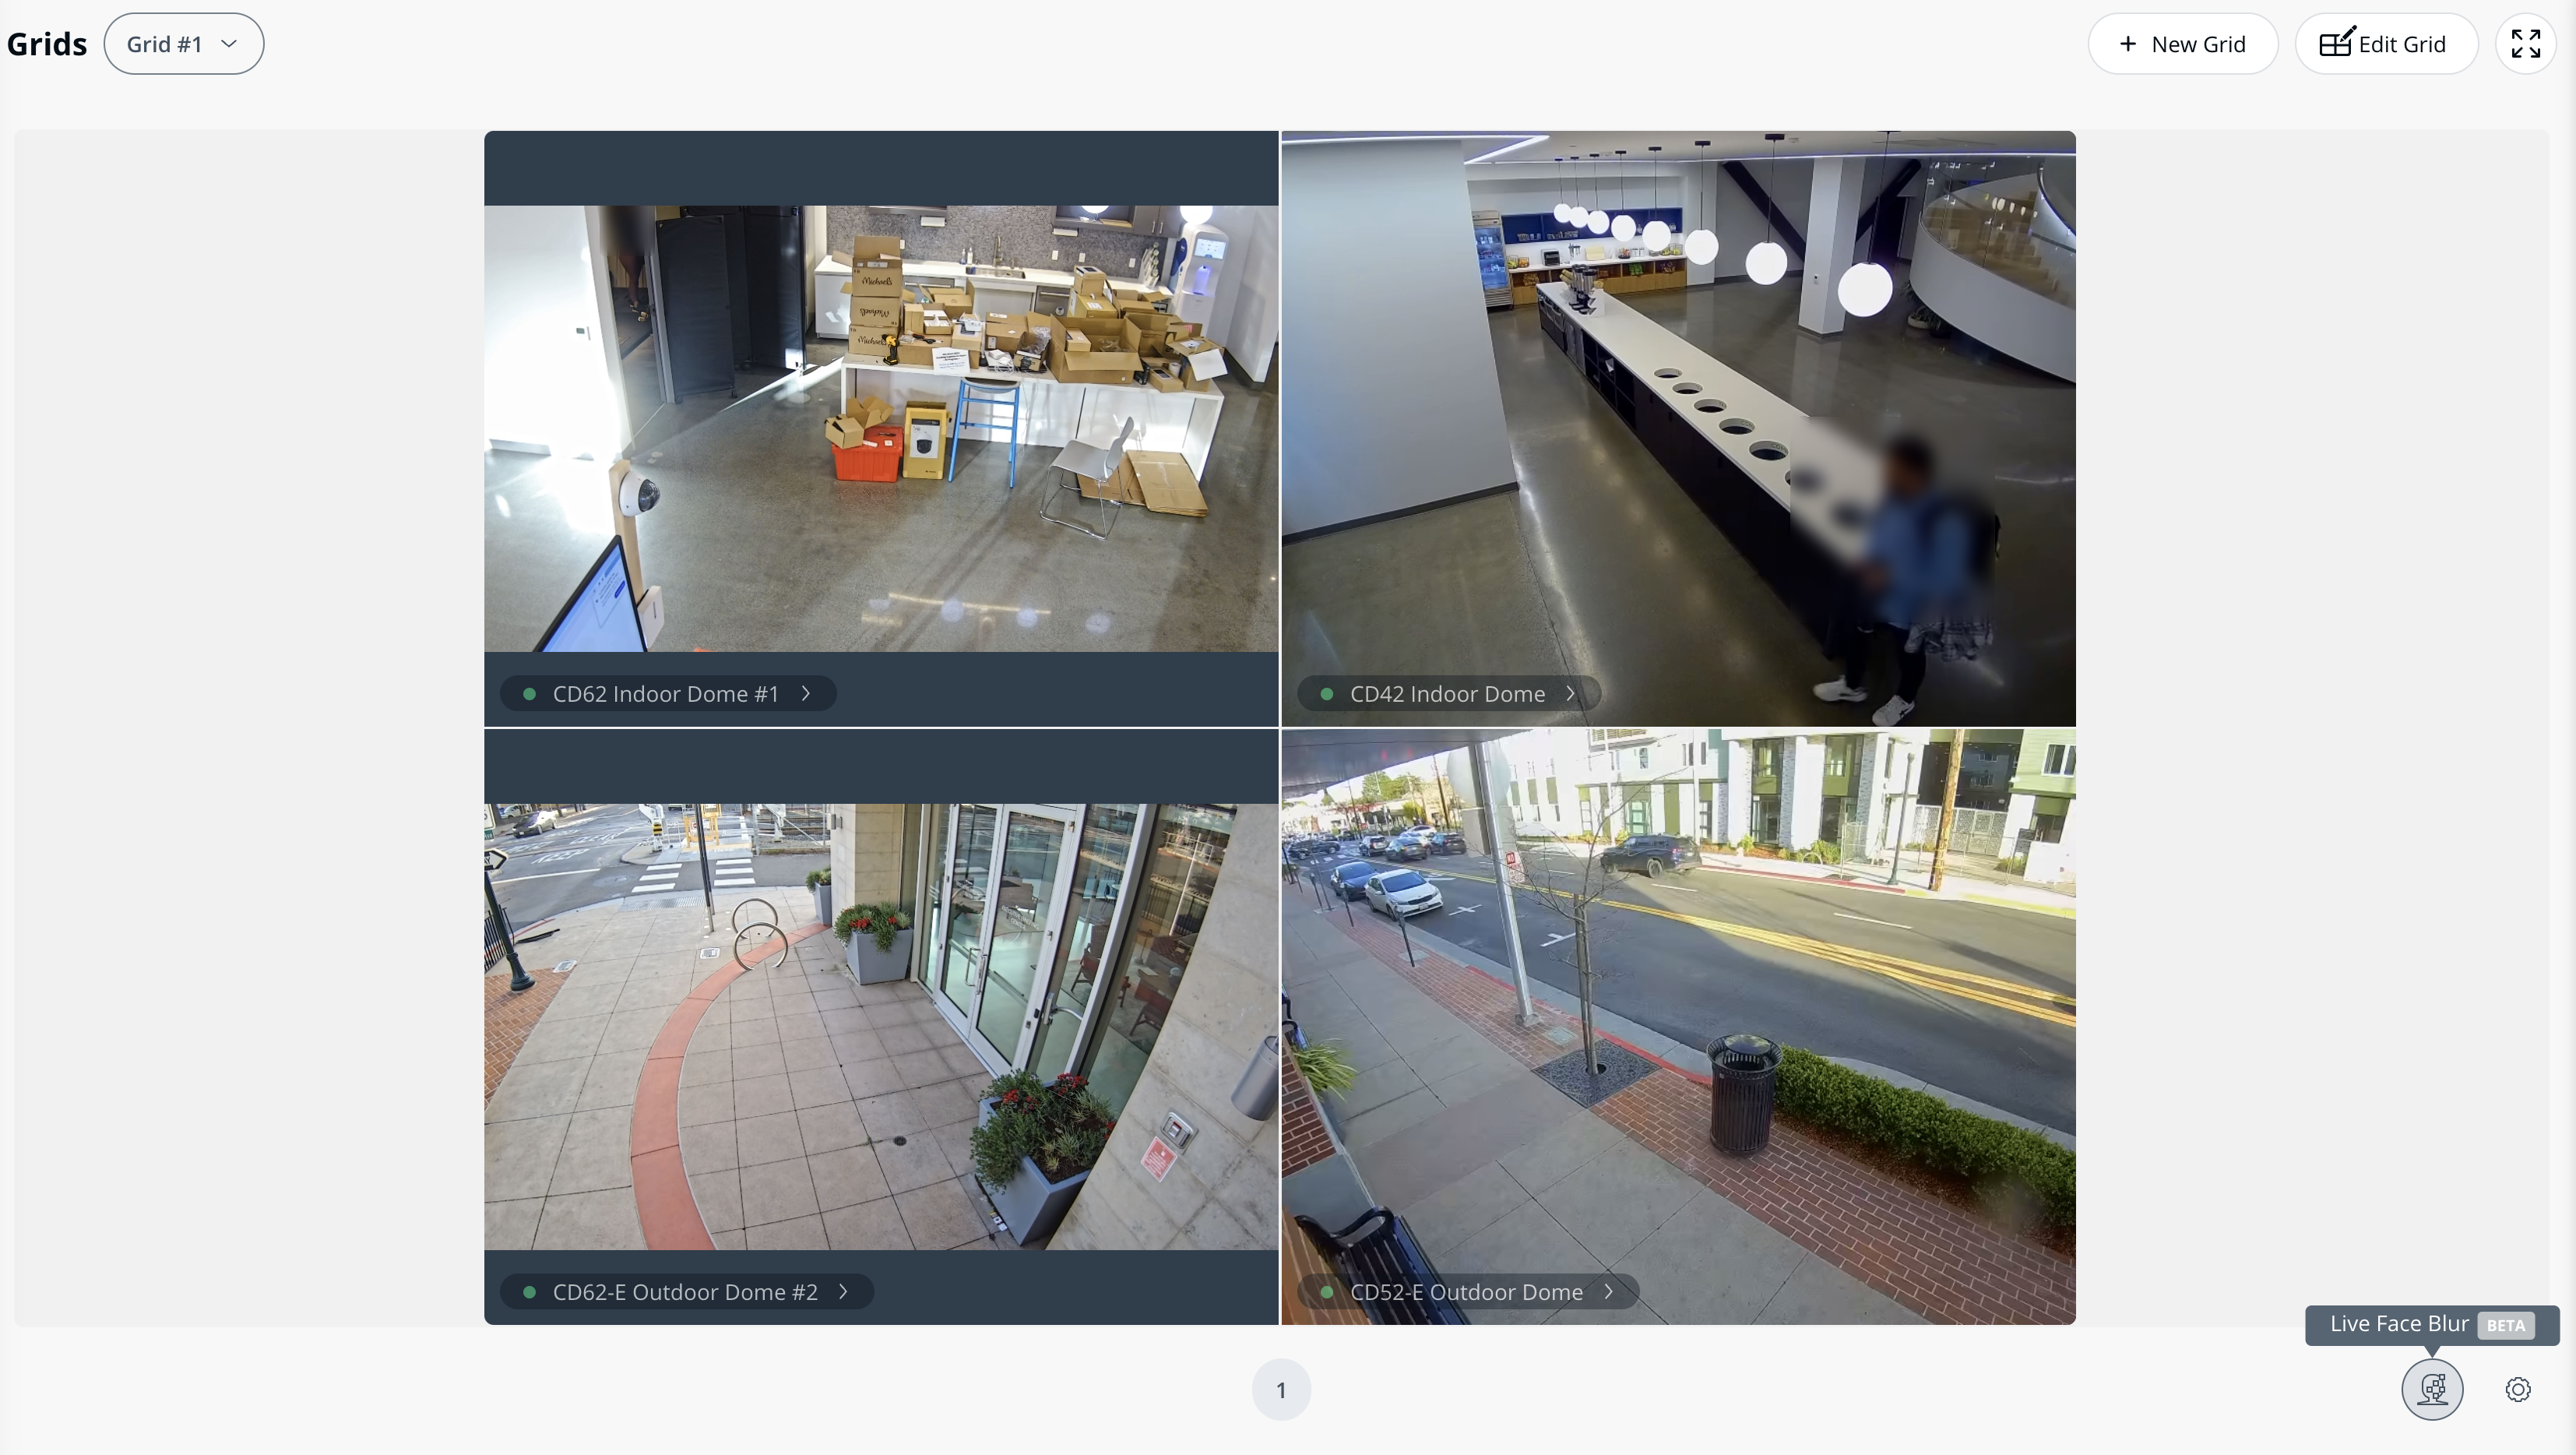
#### ライブビデオフィード - グリッド
{% stepper %}
{% step %}
**Verkada Command で、\[All Products] > \[Cameras] に移動します。**
{% endstep %}
{% step %}
**左側のナビゲーションから、「グリッド」を選択します。**
{% endstep %}
{% step %}
**グリッドの右下で、「ライブ顔ぼかし」をクリックします。**
{% endstep %}
{% endstepper %}
#### カメラ設定ページ
オーガナイゼーション' の管理者は、「デフォルトのライブ顔ぼかし設定」を使用して、オーガナイゼーション' 内のすべてのユーザーとカメラでライブ顔ぼかしを有効にできます。 **デフォルトのライブ顔ぼかし設定**.
個々のユーザーは、カメラごとまたはグリッドごとに、個別のカメラやグリッドでこのグローバル設定を上書きできます。上書きされた設定は、それを構成したユーザーにのみ表示され、他のユーザーにはその **デフォルトのライブ顔ぼかし設定** 体験が残ります。
{% stepper %}
{% step %}
**Verkada Command で、\[All Products] > \[Cameras] に移動します。**
{% endstep %}
{% step %}
**左側のナビゲーションバーで、「カメラ設定」をクリックします。**
{% endstep %}
{% step %}
**「デフォルトのライブ顔ぼかし設定」の横で、ドロップダウンから「オン」を選択します。**
{% endstep %}
{% endstepper %}
#### 考慮事項
* 以下の [CB53-E](https://docs.verkada.com/docs/video-security-cb53-e-datasheet.pdf)/[CB63-E](https://docs.verkada.com/docs/video-security-cb63-e-datasheet.pdf), [CB52-E/CB62-E](https://www.verkada.com/security-cameras/bullet#models), [CD22](https://www.verkada.com/au/security-cameras/dome/cd22/)/[CD22-E](https://www.verkada.com/au/security-cameras/dome/cd22-e/), [CD32](https://www.verkada.com/au/security-cameras/dome/cd32/)/[CD32-E](https://www.verkada.com/au/security-cameras/dome/cd32-e/), [CD42](https://www.verkada.com/security-cameras/dome/cd42/)/[CD42-E](https://www.verkada.com/security-cameras/dome/cd42-e/), [CD43](https://docs.verkada.com/docs/video-security-cd43-datasheet.pdf)/[CD43-E](https://docs.verkada.com/docs/video-security-cd43-e-datasheet.pdf), [CD52](https://www.verkada.com/security-cameras/dome/cd52/)/[CD52-E](https://www.verkada.com/security-cameras/bullet/cb52-e/), [CD53](https://docs.verkada.com/docs/video-security-cd53-datasheet.pdf)/[CD53-E](https://docs.verkada.com/docs/video-security-cd53-e-datasheet.pdf), [CD62](https://www.verkada.com/security-cameras/dome/cd62/)/[CD62-E](https://www.verkada.com/security-cameras/bullet/cb62-e/), [CD63](https://docs.verkada.com/docs/video-security-cd63-datasheet.pdf)/[CD63-E](https://docs.verkada.com/docs/video-security-cd63-e-datasheet.pdf), [CH52-E](https://www.verkada.com/security-cameras/multisensor/ch52-e/), [CH53-E](https://docs.verkada.com/docs/video-security-ch53-e-datasheet.pdf), [CH63-E](https://docs.verkada.com/docs/video-security-ch63-e-datasheet.pdf), [CM22](https://docs.verkada.com/docs/cm22-mini-dome-datasheet.pdf), [CM42](https://www.verkada.com/security-cameras/mini/cm42/), [CM42-S](https://docs.verkada.com/docs/video-security-cm42-s-datasheet.pdf), [CR63-E](https://docs.verkada.com/docs/video-security-cr63-e-datasheet.pdf)/[CR63-TE](https://docs.verkada.com/docs/video-security-cr63-te-datasheet.pdf), [CY53-E](https://docs.verkada.com/docs/video-security-cy53-e-datasheet.pdf)、および [CY63-E](https://docs.verkada.com/docs/video-security-cy63-e-datasheet.pdf) カメラモデルのみがこの機能に対応します。
* [CB52/53-E および TE](https://www.verkada.com/docs/?search=bullet\&contentType=datasheet)、および [CB62/63-E および TE](https://www.verkada.com/docs/?search=bullet\&contentType=datasheet) LPR(ナンバープレート認識)モードが無効になっている場合にライブ顔ぼかしをサポートします。
* この機能はデスクトップでのみ利用できます。
* この機能はライブリンクでは利用できません。
* ライブ顔ぼかしは保存済みの映像には影響しません。
* 顔ぼかしは、人物分析など他の機能とは独立して動作します。そのため、顔は履歴映像に記録され、カメラページの **動体検知**, **「履歴」**、および **「人物」** タブに表示されます。
{% endtab %}
{% tab title="アーカイブ用顔ぼかし" %}
## 顔ぼかしアーカイブを作成する
{% stepper %}
{% step %}
**Verkada Command で、\[All Products] > \[Cameras] に移動します。**
{% endstep %}
{% step %}
**左側のナビゲーションで、「アーカイブ」をクリックします。**
{% endstep %}
{% step %}
**アーカイブにカーソルを合わせ、クリックします** **> ダウンロードの準備。**
{% endstep %}
{% step %}
**右下の「アーカイブのコピー」で、「顔をぼかす」をオンに切り替えます。**
{% endstep %}
{% step %}
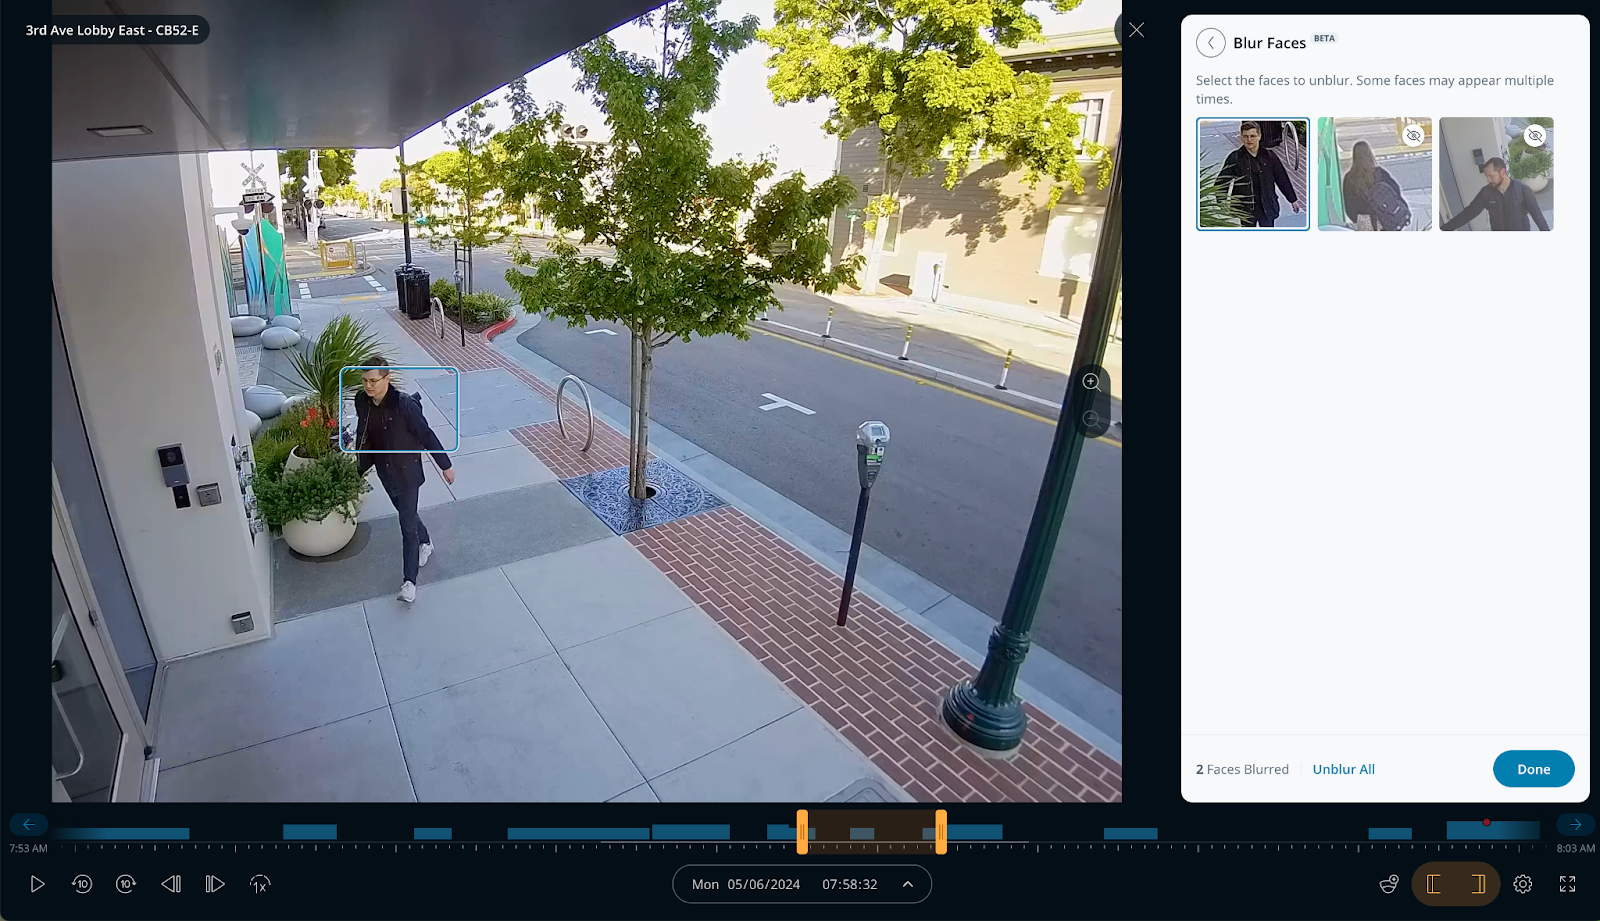
**(任意)第2世代以降のカメラをお持ちの場合は、選択的顔ぼかしを使用できます。**
1. トグルの右側にある **顔をぼかす** 「すべての顔」をクリックし **ます。**
2. 顔プロフィールの右上で、ぼかし解除アイコンをクリックします。
3. クリックします **完了。**
選択的顔ぼかしはアーカイブを作成し、選択を解除した顔を除くすべての顔をぼかします。イベントの映像を書き出す際に、傍観者のプライバシーを守るのに最適なオプションです。
**顔ぼかしが最も効果を発揮するのは、次のような場合です:**
* 各フレームに写る人数が少ない。
* 人の顔がはっきり見えていること。帽子やマスクで顔の一部が隠れることが多く、検出漏れにつながります。
{% hint style="info" %}
最適な精度のため、同じ人物が重複して表示される場合があります。選択を行い、 **[完了]**クリックし、その後 **保存** アーカイブを作成します。
{% endhint %}
{% endstep %}
{% step %}
**右下で、「コピーを作成」をクリックします。**
{% endstep %}
{% step %}
**コピーが完了したら、次のことができます:**
* クリックします :download: ダウンロードするには
* クリックします :folder-minus: に [インシデントに添付する](/verkada-cameras/ja/bideosutorminguto/incident-management.md#add-archives-to-an-incident)
* クリックします :ellipsis: > :share-from-square: に [共有する](/verkada-cameras/ja/bideosutorminguto/sharing-video.md#share-archives-via-browser)
* クリックします :ellipsis: > [統合にアップロードする](/command/ja/ganaizshon/integrations.md)
* クリックします :ellipsis: > :trash-can: コピーを削除するには
{% endstep %}
{% endstepper %}
***
#### 考慮事項
* [CB52/53-E および TE](https://www.verkada.com/docs/?search=bullet\&contentType=datasheet)、および [CB62/63-E および TE](https://www.verkada.com/docs/?search=bullet\&contentType=datasheet)、LPR(ナンバープレート認識)モードが無効になっている場合にのみ、選択的顔ぼかしをサポートします。
* この機能は、デスクトップでアーカイブを作成する場合にのみ利用できます。
{% endtab %}
{% endtabs %}
---
# Agent Instructions
This documentation is published with GitBook. GitBook is the documentation platform designed so that both humans and AI agents can read, navigate, and reason over technical content effectively. Learn more at gitbook.com.
## Querying This Documentation
If you need additional information that is not directly available in this page, you can query the documentation by asking a question.
Perform an HTTP GET request on the following URL with the `ask` and `goal` query parameters:
```
GET https://help.verkada.com/verkada-cameras/ja/she-ding/security-and-privacy/enable-face-blur-on-verkada-cameras.md?ask=&goal=
```
`ask` is the immediate question: it should be specific, self-contained, and written in natural language.
`goal` is what the user is ultimately trying to achieve, the reason they need the answer. Sharing it helps GitBook give you a better, more relevant answer. A goal is most helpful when it describes the outcome the user wants rather than restating the question. For example, with `ask=how do I create an API token`, a goal like `automate deployments from our CI pipeline` lets GitBook tailor the answer to that use case.
The response will contain a direct answer to the question and relevant excerpts and sources from the documentation.
Use this mechanism when the answer is not explicitly present in the current page, you need clarification or additional context, or you want to retrieve related documentation sections.