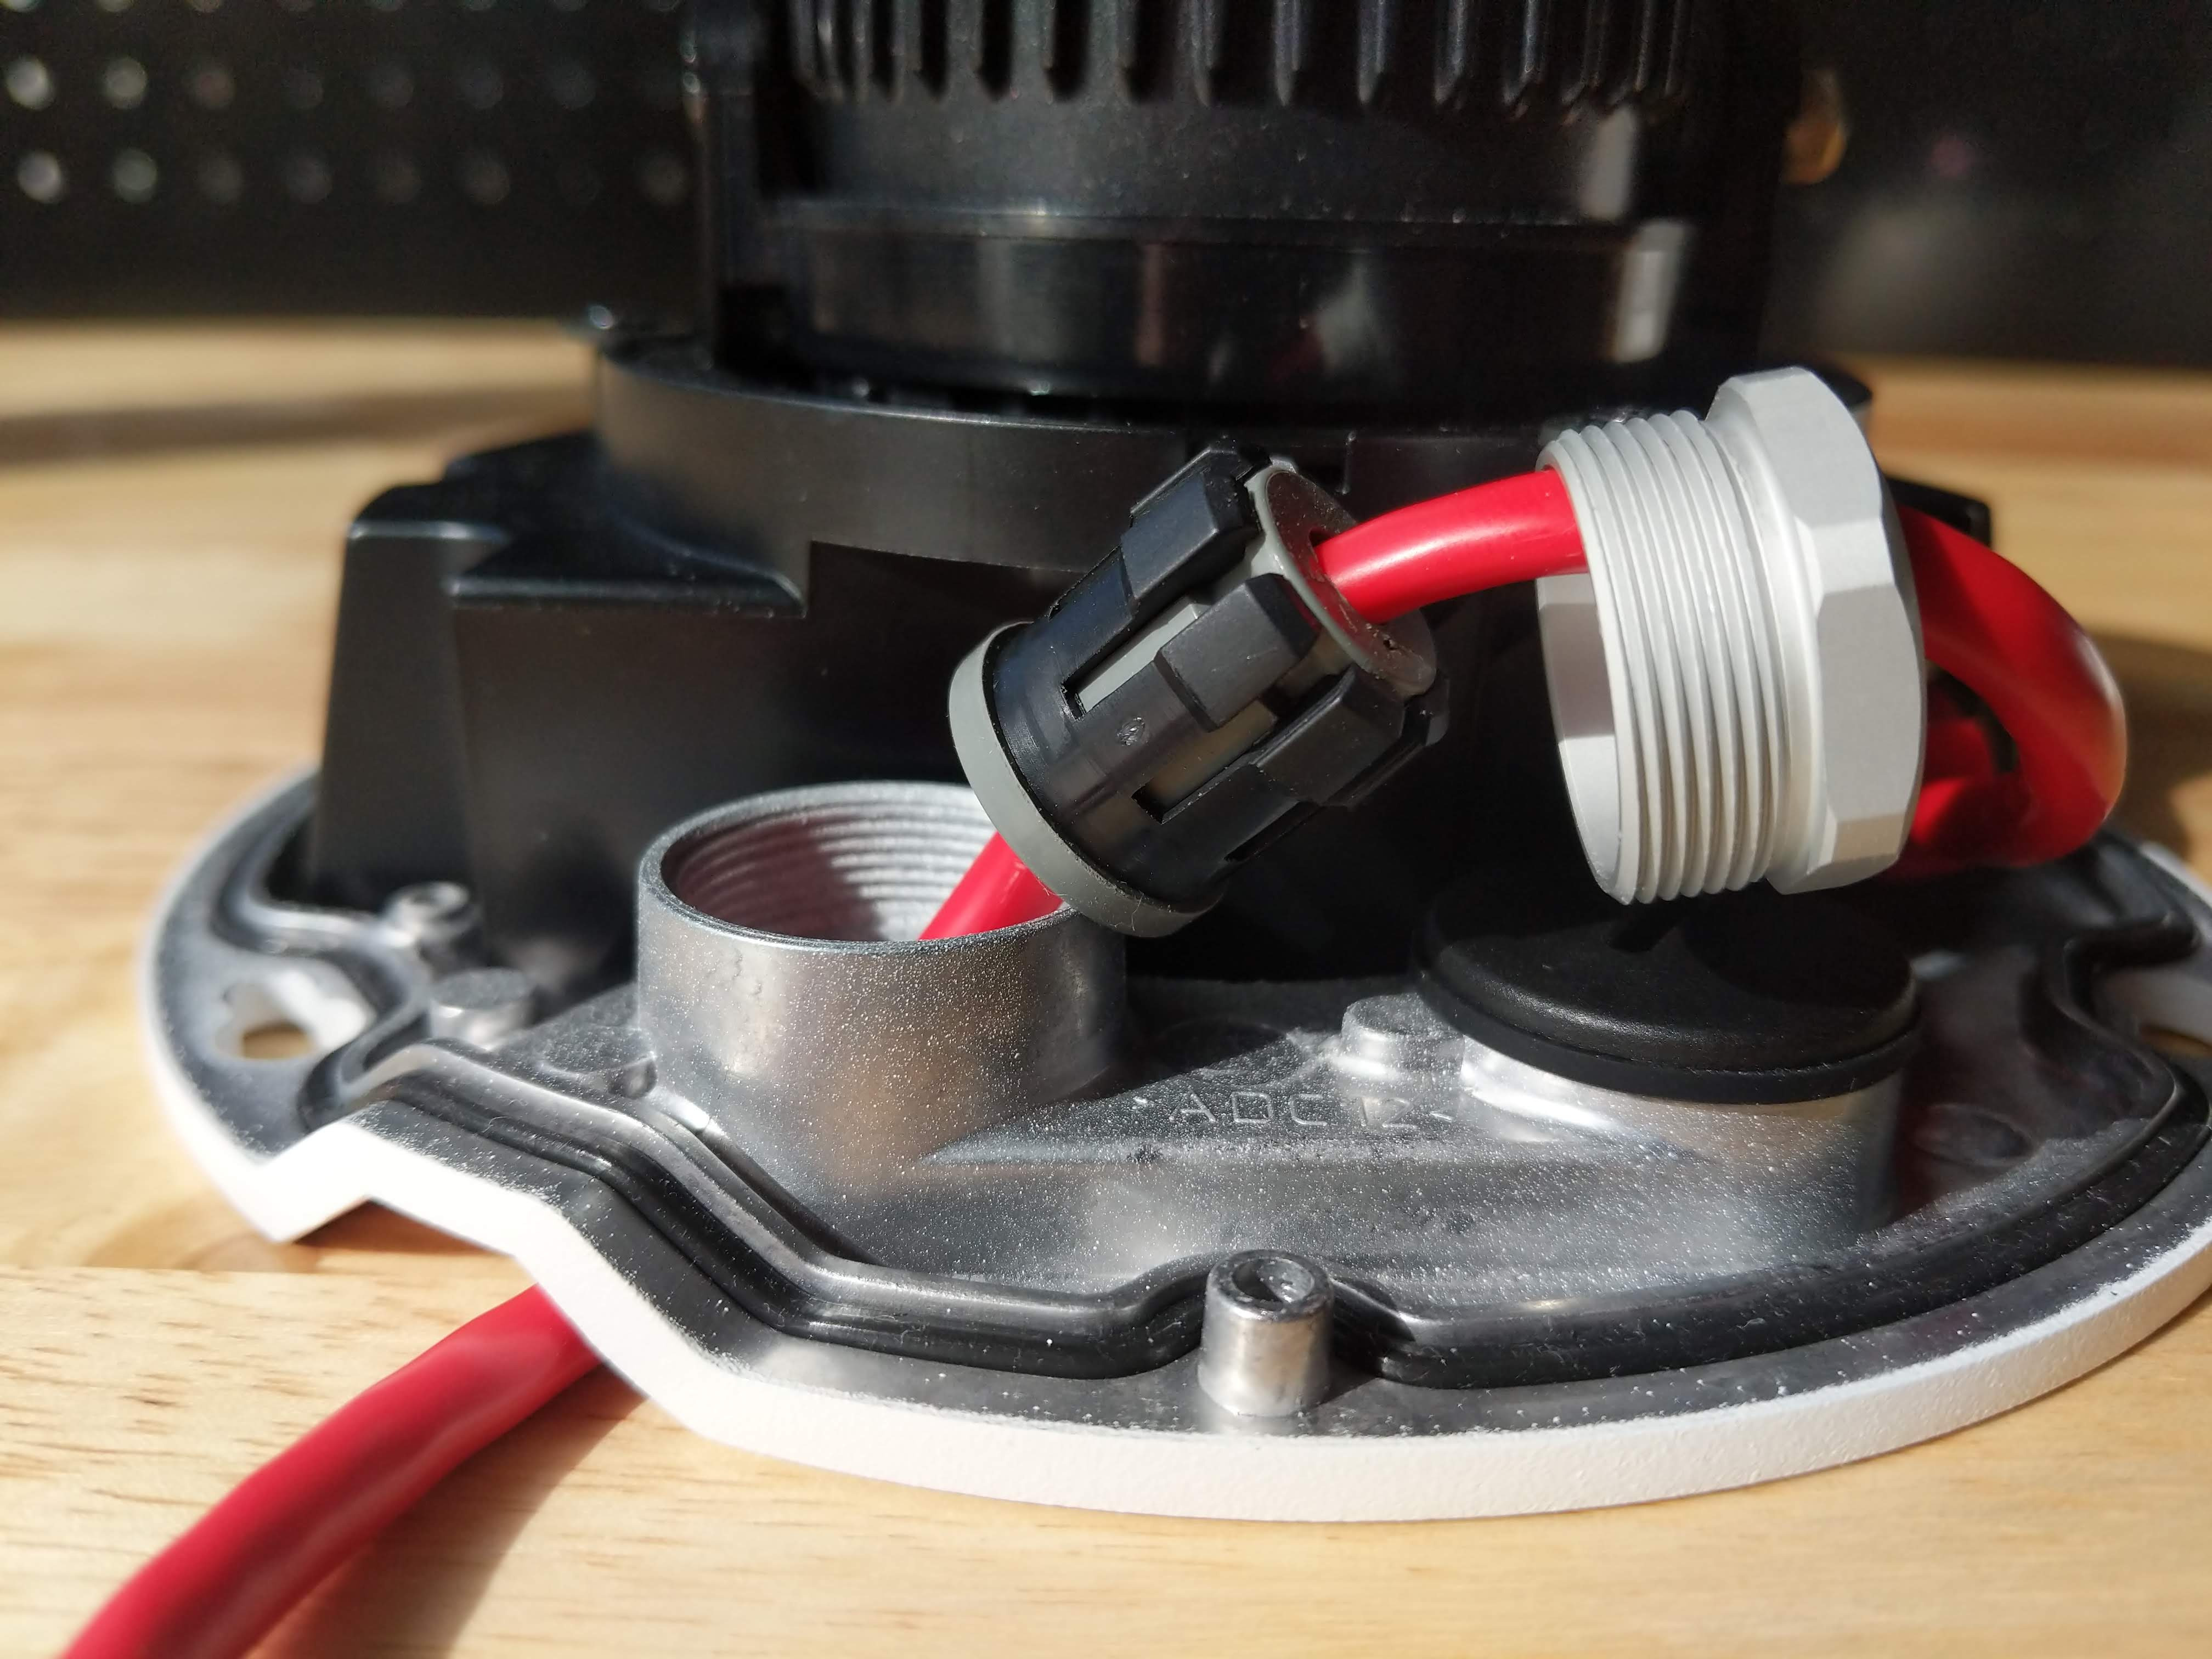
> For the complete documentation index, see [llms.txt](https://help.verkada.com/llms.txt). Markdown versions of documentation pages are available by appending `.md` to page URLs; this page is available as [Markdown](https://help.verkada.com/verkada-cameras/ja/mentenansutotoraburushtingu/waterproof-outdoor-cameras.md).
# 防水屋外カメラ
Verkadaの屋外カメラを防水化する方法を学びます
水害を防ぐには(防水処理とも呼ばれます)、Verkada の屋外カメラでは Ethernet ケーブルを密閉し、乾燥剤パックを正しく取り付ける必要があります。
***
## カメラ
{% hint style="info" %}
屋外カメラの防水処理は、取付作業中に行います。次を参照してください。 [設置ガイド](https://www.verkada.com/docs/?product=videoSecurity\&contentType=setupGuide\&search=outdoor) お使いのカメラモデルの完全な取付手順をご確認ください。
{% endhint %}
{% tabs %}
{% tab title="第3世代 CXシリーズ" %}
{% stepper %}
{% step %}
**T10トルクスセキュリティドライバーを使用して、ケーブルラッチのネジを緩めます。**
1. ケーブルラッチを開きます。
2. ケーブルグランドを取り外し、脇に置きます。
{% endstep %}
{% step %}
**Ethernetケーブルをケーブルグランドの開口部とラッチに通します。**
{% endstep %}
{% step %}
**Ethernetケーブルをカメラに接続します。**
1. ケーブルグランドをケーブルグランド穴に押し込みます。
2. ケーブルにたるみがある場合は、余分なEthernet\
ケーブルをケーブルグランドに押し込みます。
{% endstep %}
{% step %}
**ケーブルグランドが隙間や段差なくしっかり所定の位置にあることを確認します。**
{% endstep %}
{% step %}
**グロメットの切れ目がラッチの下に来ていることを確認してください。誤った取り付けにより水が浸入し、デバイスが損傷する可能性があります。**
{% endstep %}
{% step %}
**セキュリティネジを締める前に、ラッチが完全に下がって閉じていることを確認してください。**
{% endstep %}
{% step %}
**カメラを取り付けて位置を調整します。**
1. 青い穴をつまみネジに合わせ、カメラを時計回りに回します。
2. 固定するために、T10セキュリティドライバーを使用してつまみネジを締めます。
3. ラッチを閉じ、付属のT10セキュリティドライバーを使用してEthernetケーブルを固定・密閉します。
{% hint style="info" %}
カメラケースを固定して適切に収まることを確認し、その後取り外して乾燥剤パックを取り付けます。
{% endhint %}
{% endstep %}
{% step %}
**外側の乾燥剤袋を開け、乾燥剤パックを取り出し、包装をはがして接着面を露出させます。「Attach Desiccant Here」ラベルの位置で、乾燥剤をカメラ本体に取り付けます。カメラを覆わないようにしてください。**
{% endstep %}
{% step %}
**トップカバーのSecurity Torxネジの位置を、対応する穴に合わせて**\
**カメラベースに合わせ、そのまま固定します。固定するには、2本のT10 Torx Security**\
**ネジを締めます。**
{% endstep %}
{% endstepper %}
{% endtab %}
{% tab title="第1世代および第2世代 CXシリーズ" %}
{% hint style="warning" %}
BulletシリーズカメラとCF81-Eは密閉されており、乾燥剤パックは不要です。
{% endhint %}
{% stepper %}
{% step %}
**カメラベースプレートのケーブルアクセスポートを分解します。**
{% endstep %}
{% step %}
**Ethernetケーブルをベースプレートから上向きに通し、ポート部品に通します。**
1. ケーブルを貫通穴に挿入します。
{% hint style="warning" %}
Ethernetケーブルを貫通穴の上端から3~5インチ(7.62~12.7 cm)出しておきます。
{% endhint %}
2. ケーブルの周囲にゴム製シールを配置します。
3. プラスチックカラーをゴム製シールの上からしっかり押し込み、所定の位置にカチッとはまるまで取り付けます。
4. シールとカラーの組み立て部品を、固定されるまで貫通穴にしっかり差し込みます。
{% endstep %}
{% step %}
**ゴム製シールの上に金属ナットを載せ、貫通穴のねじ山にEngageします。ナットをレンチで締め、ベースプレートと面一になるまで固定します。ねじ山が見えてはいけません。**
| 正しい取り付け | 誤った取り付け |
| --------------------------------------------------------------------------------------------------------------------------------------------------------------------------------------------------------------------------------------------------------------- | --------------------------------------------------------------------------------------------------------------------------------------------------------------------------------------------------------------------------------------------------------------- |
|  |  |
| {% endstep %} | |
{% step %}
**Ethernetジャックを、カメラのベースに対して90度の角度でカメラポートに差し込みます。**
{% endstep %}
{% step %}
**カメラを取り付けて位置を調整します。**
{% hint style="info" %}
カメラケースを固定して適切に収まることを確認し、その後取り外して乾燥剤パックを取り付けます。
{% endhint %}
{% endstep %}
{% step %}
**外側の乾燥剤袋を開け、乾燥剤パックを取り出し、包装をはがして接着面を露出させます。「Attach Desiccant Here」ラベルの位置で、乾燥剤をカメラ本体に取り付けます。カメラを覆わないようにしてください。**
{% endstep %}
{% step %}
**カメラカバーを元に戻し、付属のT10トルクスセキュリティドライバーで固定します。**
{% endstep %}
{% endstepper %}
{% endtab %}
{% tab title="Dシリーズ" %}
{% stepper %}
{% step %}
**カメラベースプレートのケーブルアクセスポートを分解します。**
{% endstep %}
{% step %}
**Ethernetケーブルをベースプレートから上向きに通し、ポート部品に通します。**
1. ケーブルを貫通穴に挿入します。
{% hint style="warning" %}
Ethernetケーブルを貫通穴の上端から3~5インチ(7.62~12.7 cm)出しておきます。
{% endhint %}
2. ケーブルグランドのゴム部分をケーブルに通し、ケーブルに押し当てます。
3. ケーブルグランドのプラスチック部分と金属ナットをケーブルに通します。
4. ケーブルグランドのプラスチック部分をゴム部分の上から押し込みます。
{% endstep %}
{% step %}
**ケーブルグランドを貫通穴に入れ、その上にナットを載せます。**
{% endstep %}
{% step %}
**Ethernetジャックを、カメラのベースに対して90度の角度でカメラポートに差し込みます。**
{% endstep %}
{% step %}
**ナットをレンチで締め、ベースプレートと面一になるまで固定します。ねじ山が見えていてはいけません。**
| 正しい取り付け | 誤った取り付け |
| --------------------------------------------------------------------------------------------------------------------------------------------------------------------------------------------------------------------------------------------------------------- | --------------------------------------------------------------------------------------------------------------------------------------------------------------------------------------------------------------------------------------------------------------- |
|  |  |
| {% endstep %} | |
{% step %}
**カメラを取り付けて位置を調整します。**
{% hint style="info" %}
カメラケースを固定して適切に収まることを確認し、その後取り外して乾燥剤パックを取り付けます。
{% endhint %}
{% endstep %}
{% step %}
**外側の乾燥剤袋を開け、乾燥剤パックを取り出し、包装をはがして接着面を露出させます。「Attach Desiccant Here」ラベルの位置で、乾燥剤をカメラ本体に取り付けます。カメラを覆わないようにしてください。**
{% endstep %}
{% step %}
**カメラカバーを元に戻し、付属のT10トルクスセキュリティドライバーで固定します。**
{% endstep %}
{% endstepper %}
{% endtab %}
{% endtabs %}
## 取付機器
取り付け後に取付金具を防水するには、防水シリコーンコーキングで隙間をすべて埋めることをおすすめします。
{% hint style="danger" %}
角度マウント(ACC–MNT–7)またはペンダント キャップ マウント(ACC–MNT–8)を取り付ける前に、カメラから黒い取付プレートを取り外してください。取り付けたままだと浸水してデバイスが損傷する可能性があります。
{% endhint %}
---
# Agent Instructions
This documentation is published with GitBook. GitBook is the documentation platform designed so that both humans and AI agents can read, navigate, and reason over technical content effectively. Learn more at gitbook.com.
## Querying This Documentation
If you need additional information that is not directly available in this page, you can query the documentation by asking a question.
Perform an HTTP GET request on the following URL with the `ask` and `goal` query parameters:
```
GET https://help.verkada.com/verkada-cameras/ja/mentenansutotoraburushtingu/waterproof-outdoor-cameras.md?ask=&goal=
```
`ask` is the immediate question: it should be specific, self-contained, and written in natural language.
`goal` is what the user is ultimately trying to achieve, the reason they need the answer. Sharing it helps GitBook give you a better, more relevant answer. A goal is most helpful when it describes the outcome the user wants rather than restating the question. For example, with `ask=how do I create an API token`, a goal like `automate deployments from our CI pipeline` lets GitBook tailor the answer to that use case.
The response will contain a direct answer to the question and relevant excerpts and sources from the documentation.
Use this mechanism when the answer is not explicitly present in the current page, you need clarification or additional context, or you want to retrieve related documentation sections.