> For the complete documentation index, see [llms.txt](https://help.verkada.com/llms.txt). Markdown versions of documentation pages are available by appending `.md` to page URLs; this page is available as [Markdown](https://help.verkada.com/verkada-cameras/ja/insutru/camera-deployment/disconnect-and-reconnect-the-cm41-s-video-cable.md).
# CM41-Sビデオケーブルを切断して再接続する
VerkadaのCM41-Sビデオケーブルの切断と再接続方法を学びます
取り付けることができます [CM41-S](https://docs.verkada.com/docs/Verkada_CM41-S_Split_Mini_Dome_Install_Guide.pdf) ATMやその他のスペースが限られた場所に設置できます。カメラ本体とレンズは分離され、ビデオケーブルで接続されています。
***
## 仕組み
以下の手順では、このビデオケーブルを取り外し、カメラの取り付け後に再接続する方法を説明します。
### 手順1:適切に接地する
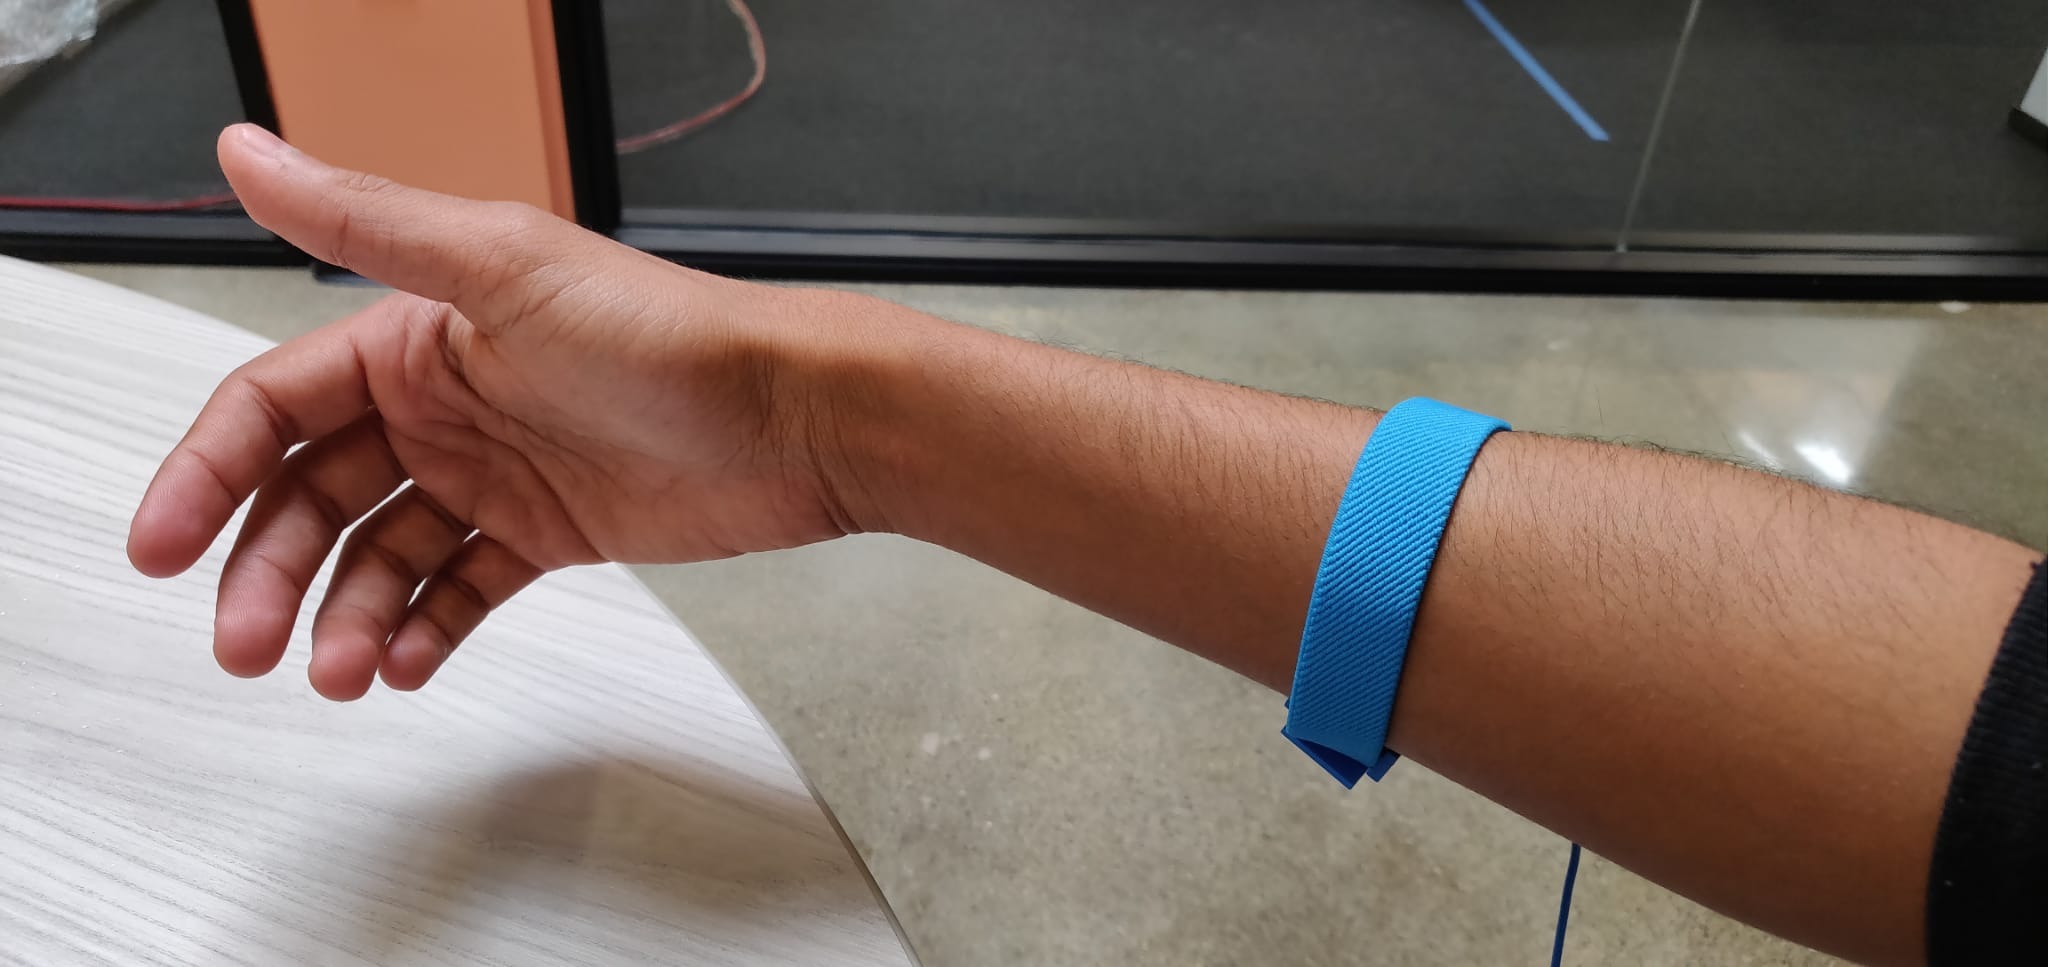
敏感な電子部品の近くで作業するため、適切に接地されていることを確認してください。
{% hint style="warning" %}
乾燥した環境では静電気の蓄積が起こりやすくなります。以下に示すように、帯電していないことを確認するために静電防止リストストラップを使用してください。
{% endhint %}
### 手順2:CM41-Sビデオケーブルを取り外す
{% stepper %}
{% step %}
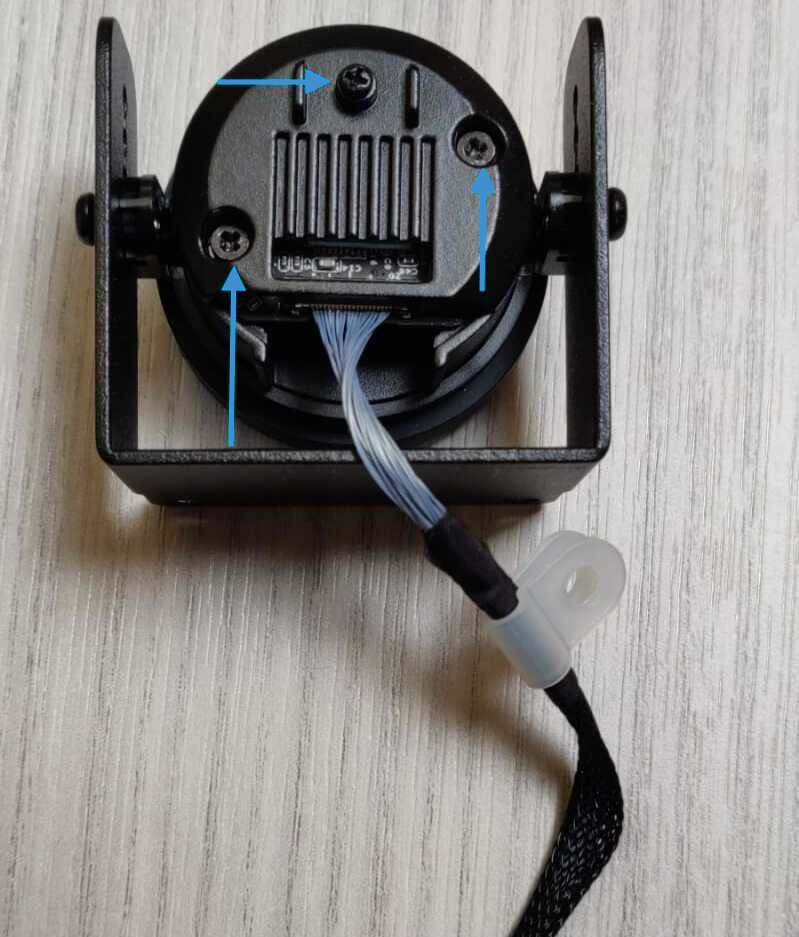
**カメラレンズからビデオケーブルを取り外すには、画像に示されているネジを外します。**
{% endstep %}
{% step %}
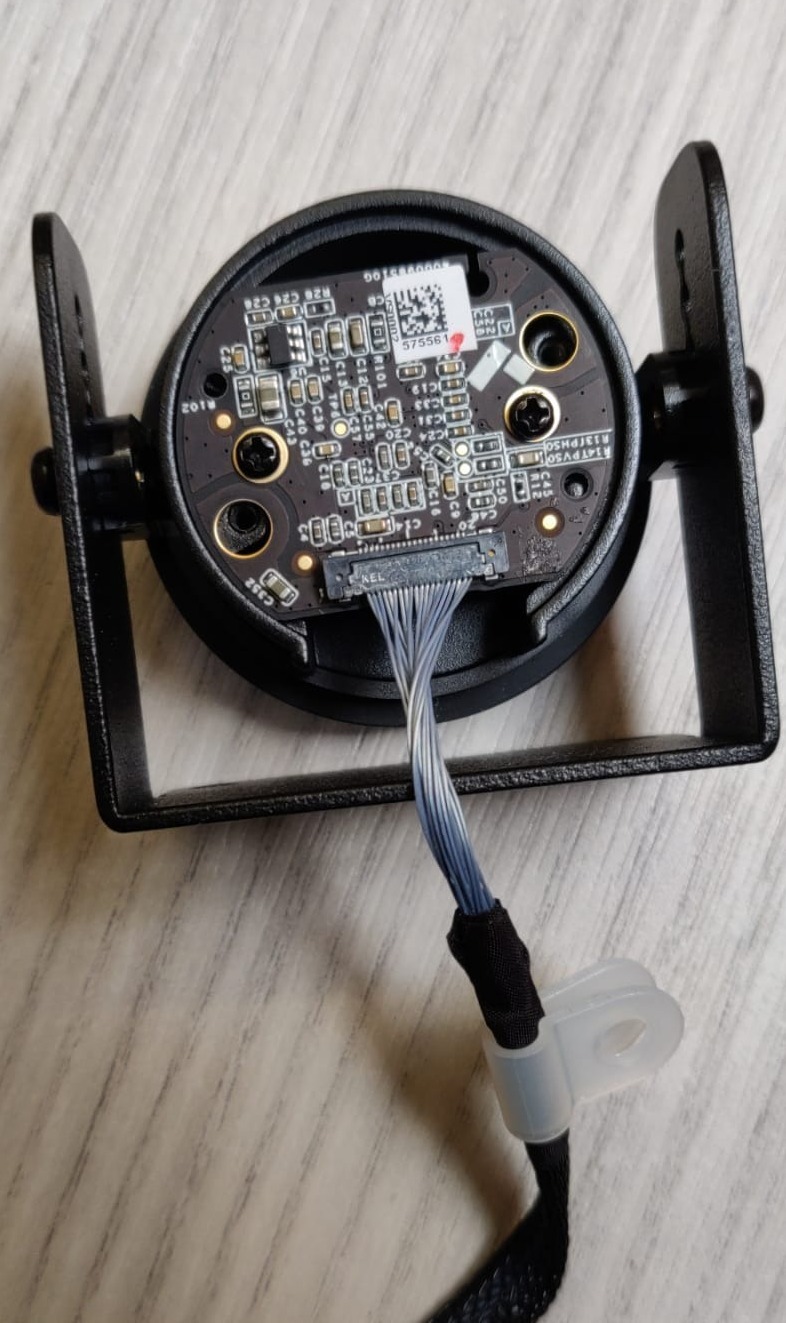
**ネジを外した後は、次のように見えるはずです。**
{% endstep %}
{% step %}
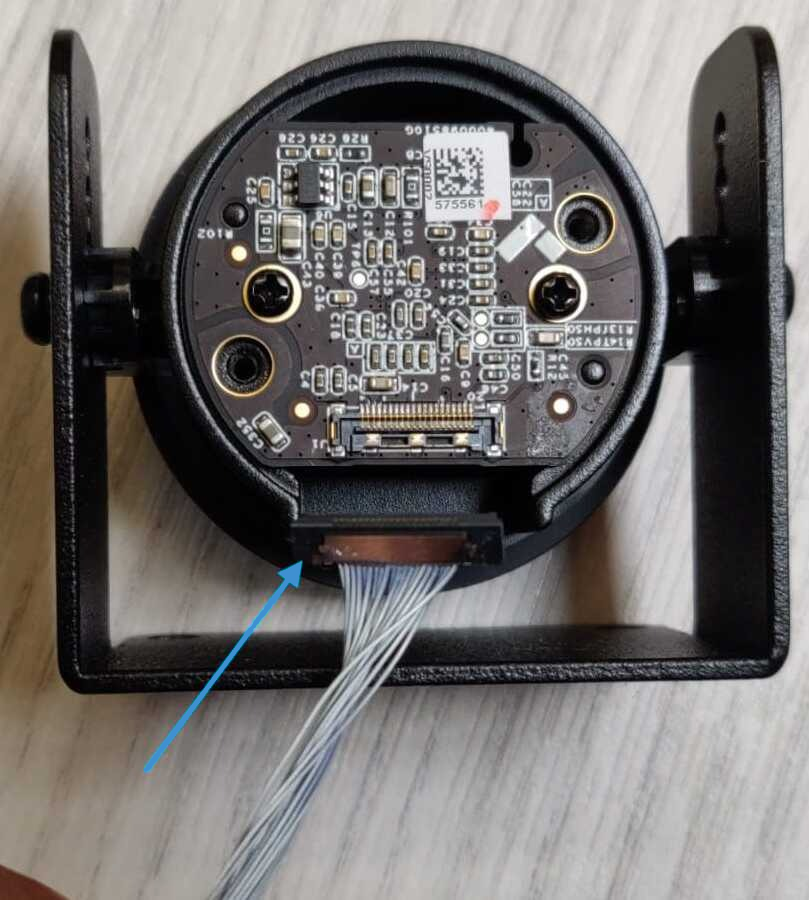
**コネクタの側面を持ち上げて、ビデオケーブルコネクタを取り外します。**
{% endstep %}
{% step %}
**レンズがマウントから落下しないように注意してください。この時点でビデオケーブルは取り外され、レンズを希望の場所に取り付けることができます。**
{% endstep %}
{% endstepper %}
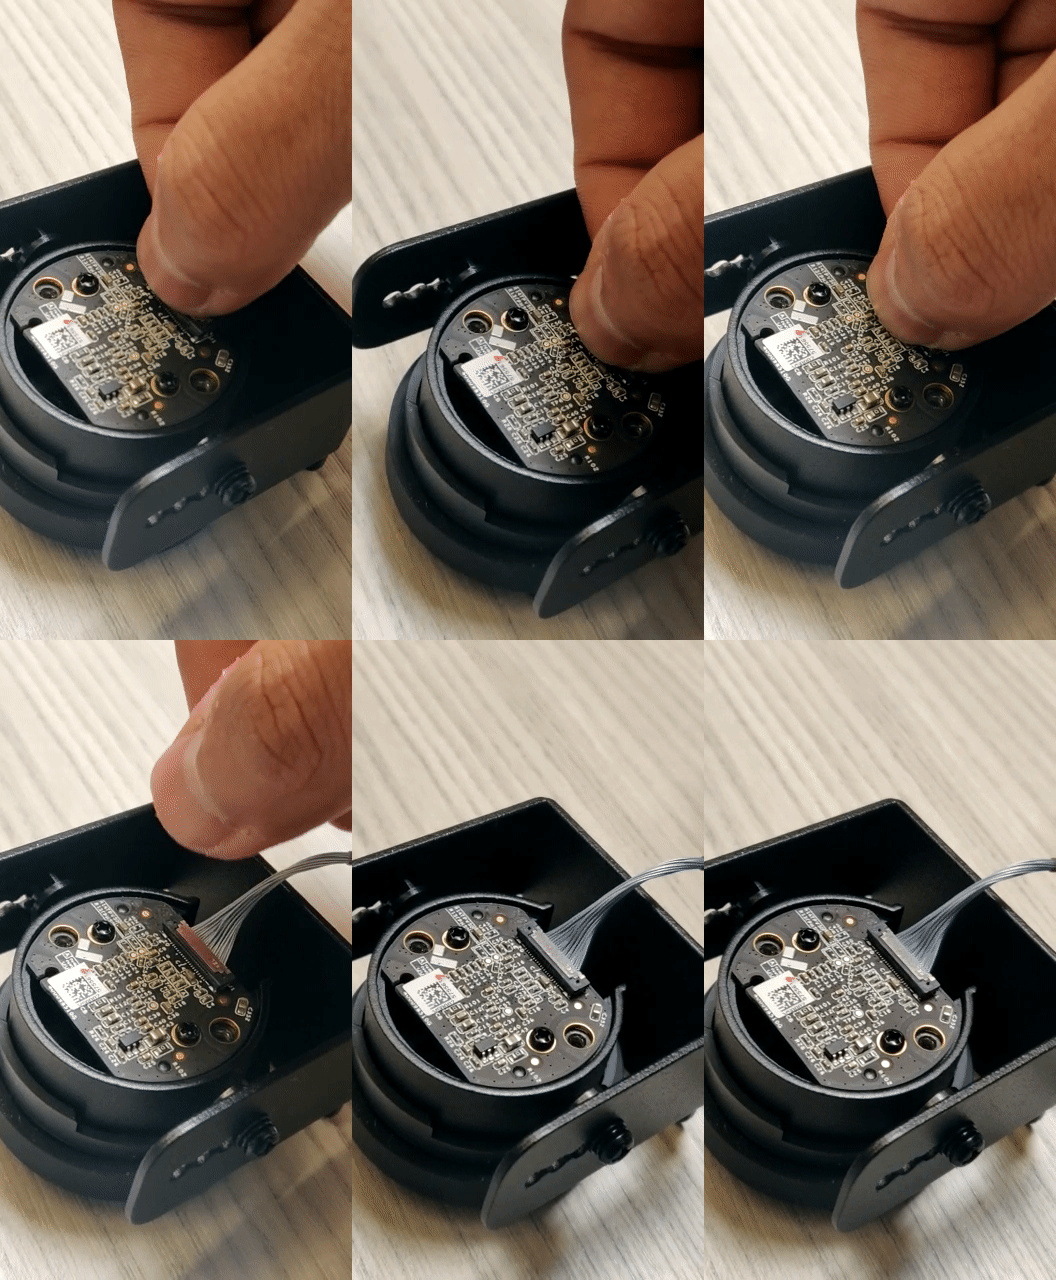
### 手順3:CM41-Sビデオケーブルを再接続する
{% stepper %}
{% step %}
**カメラを取り付けたら、ビデオケーブルを再接続する必要があります。ケーブルコネクタは、以下に示すようにまっすぐ差し込みます。**
{% endstep %}
{% step %}
**レンズの背面カバーを取り付け、3本のネジを締めれば、カメラの取り付けは完了です。**
{% endstep %}
{% endstepper %}
---
# Agent Instructions
This documentation is published with GitBook. GitBook is the documentation platform designed so that both humans and AI agents can read, navigate, and reason over technical content effectively. Learn more at gitbook.com.
## Querying This Documentation
If you need additional information that is not directly available in this page, you can query the documentation by asking a question.
Perform an HTTP GET request on the following URL with the `ask` and `goal` query parameters:
```
GET https://help.verkada.com/verkada-cameras/ja/insutru/camera-deployment/disconnect-and-reconnect-the-cm41-s-video-cable.md?ask=&goal=
```
`ask` is the immediate question: it should be specific, self-contained, and written in natural language.
`goal` is what the user is ultimately trying to achieve, the reason they need the answer. Sharing it helps GitBook give you a better, more relevant answer. A goal is most helpful when it describes the outcome the user wants rather than restating the question. For example, with `ask=how do I create an API token`, a goal like `automate deployments from our CI pipeline` lets GitBook tailor the answer to that use case.
The response will contain a direct answer to the question and relevant excerpts and sources from the documentation.
Use this mechanism when the answer is not explicitly present in the current page, you need clarification or additional context, or you want to retrieve related documentation sections.