> For the complete documentation index, see [llms.txt](https://help.verkada.com/llms.txt). Markdown versions of documentation pages are available by appending `.md` to page URLs; this page is available as [Markdown](https://help.verkada.com/verkada-cameras/es/transmision-y-comparticion-de-video/view-historical-footage/use-the-timelapse-feature.md).
# Time-lapse de video
Aprende a usar la función de time-lapse integrada de Verkada Command
[Verkada Command](/command/es/primeros-pasos/get-started-with-verkada-command.md) Agrupa miniaturas durante un período de 24 horas, lo que te permite ver todo el tiempo como un timelapse que puedes descargar como archivo MP4 para compartir.
{% hint style="warning" %}
Los timelapses solo están disponibles para los últimos 30 días de grabación.
{% endhint %}
***
## Activar timelapse
{% hint style="danger" %}
Debes habilitar la función de timelapse antes de poder usarla; no se pueden generar retroactivamente a partir del momento de activación.
{% endhint %}
{% stepper %}
{% step %}
**En Verkada Command, ve a Todos los productos > Cámaras.**
{% endstep %}
{% step %}
**Seleccione una cámara.**
{% endstep %}
{% step %}
**A la derecha de la transmisión de cámara, haz clic en el icono de Configuración.**
{% endstep %}
{% step %}
**A la izquierda, selecciona Dispositivo.**
{% endstep %}
{% step %}
**Activa Timelapse.**
{% endstep %}
{% endstepper %}
***
## Usar timelapse
{% hint style="warning" %}
La función de timelapse solo está disponible en incrementos de 24 horas y no está disponible si hay menos de 24 horas de grabación.
{% endhint %}
{% stepper %}
{% step %}
**En Verkada Command, ve a Todos los productos > Cámaras.**
{% endstep %}
{% step %}
**Seleccione una cámara.**
{% endstep %}
{% step %}
**Debajo de la transmisión de cámara, haz clic en el icono de Historial.**
{% endstep %}
{% step %}
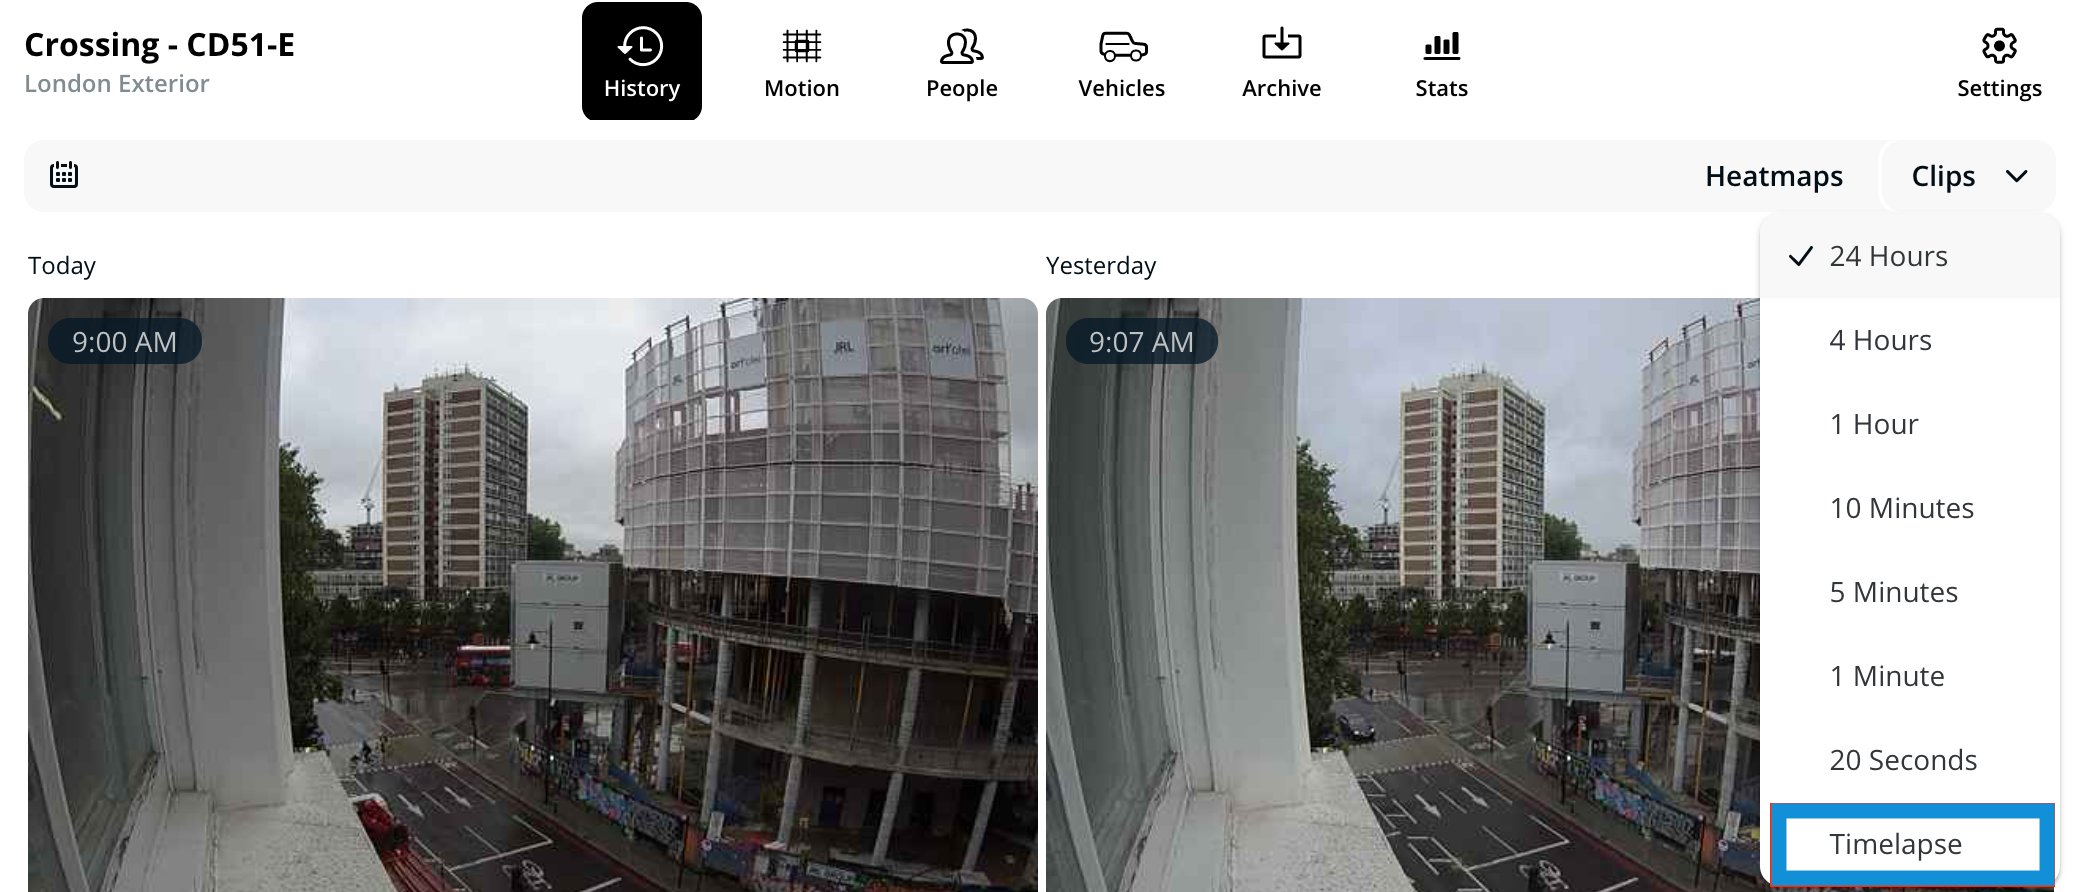
**A la derecha, haz clic en el menú desplegable Clips y selecciona Timelapse.**
1. Mueve el cursor sobre la barra de movimiento para desplazarte por el timelapse.
2. Haz clic en la miniatura para reproducir el timelapse.
{% endstep %}
{% step %}
**(Opcional) Al reproducir un timelapse, haz clic en el icono de Descarga para guardarlo como archivo MP4.**
{% endstep %}
{% endstepper %}

---
# Agent Instructions
This documentation is published with GitBook. GitBook is the documentation platform designed so that both humans and AI agents can read, navigate, and reason over technical content effectively. Learn more at gitbook.com.
## Querying This Documentation
If you need additional information that is not directly available in this page, you can query the documentation by asking a question.
Perform an HTTP GET request on the following URL with the `ask` and `goal` query parameters:
```
GET https://help.verkada.com/verkada-cameras/es/transmision-y-comparticion-de-video/view-historical-footage/use-the-timelapse-feature.md?ask=&goal=
```
`ask` is the immediate question: it should be specific, self-contained, and written in natural language.
`goal` is what the user is ultimately trying to achieve, the reason they need the answer. Sharing it helps GitBook give you a better, more relevant answer. A goal is most helpful when it describes the outcome the user wants rather than restating the question. For example, with `ask=how do I create an API token`, a goal like `automate deployments from our CI pipeline` lets GitBook tailor the answer to that use case.
The response will contain a direct answer to the question and relevant excerpts and sources from the documentation.
Use this mechanism when the answer is not explicitly present in the current page, you need clarification or additional context, or you want to retrieve related documentation sections.