> For the complete documentation index, see [llms.txt](https://help.verkada.com/llms.txt). Markdown versions of documentation pages are available by appending `.md` to page URLs; this page is available as [Markdown](https://help.verkada.com/verkada-cameras/de/konfiguration/security-and-privacy/privacy-regions.md).
# Privatzonen
Einen Teil des Sichtfelds der Kamera in Live- und Archivaufnahmen ausblenden
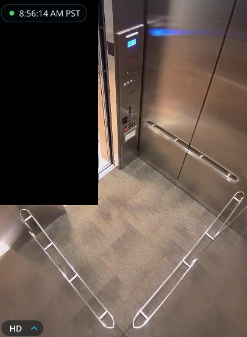
Privatzonen ermöglichen es Ihnen, Teile des Kamerabilds zu blockieren. Bereiche, die durch eine Privatzone blockiert werden, werden im Live-Stream und im aufgezeichneten Material der Kamera ausgeblendet.
{% hint style="danger" %}
Die [D80](https://docs.verkada.com/docs/video-security-d80-datasheet.pdf) und [PTZ-Kameras](https://www.verkada.com/security-cameras/ptz/) **unterstützen keine** unterstützen Privatzonen. Alle anderen Kameramodelle unterstützen granulare Privatzonen (60x60), mit Ausnahme der [D30](https://docs.verkada.com/docs/video-security-d30-datasheet.pdf), [D40](https://docs.verkada.com/docs/video-security-d40-datasheet.pdf), [D50](https://docs.verkada.com/docs/video-security-d50-datasheet.pdf), und [CM42-S](https://docs.verkada.com/docs/video-security-cm42-s-datasheet.pdf) die grundlegende Privatzonen (10x10) unterstützen.
{% endhint %}
***
## Konfiguration
{% hint style="danger" %}
Sie benötigen [Site-Admin](/command/de/benutzer-und-berechtigungen/roles-and-permissions-for-command.md) Berechtigungen zum Konfigurieren von Privatzonen.
{% endhint %}
{% stepper %}
{% step %}
**Gehen Sie in Verkada Command zu Alle Produkte > Kameras.**
{% endstep %}
{% step %}
**Wählen Sie die Kamera aus, die Sie konfigurieren möchten.**
{% endstep %}
{% step %}
**Klicken Sie unten rechts auf „Einstellungen“.**
{% endstep %}
{% step %}
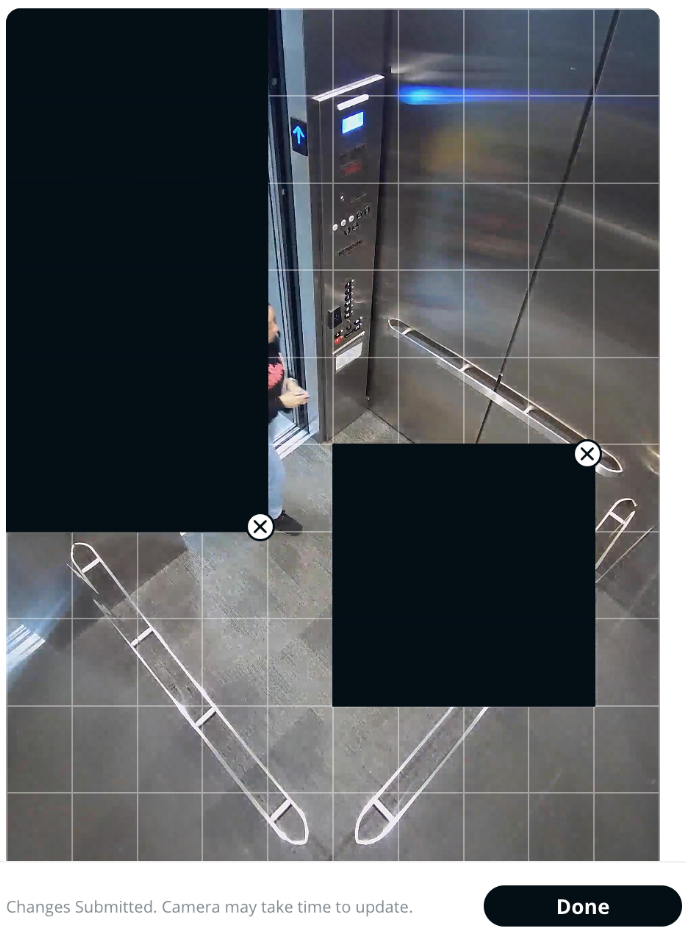
**Unter Datenschutz > Privatzonen markieren wählen Sie Privatzonen markieren.**
a. Klicken und ziehen Sie den Bereich, den Sie als Ihre Privatzone markieren möchten.\
b. Klicken Sie **Fertig**.
{% endstep %}
{% endstepper %}
{% hint style="warning" %}
Privatzonen wirken nicht rückwirkend. Die Kamera benötigt möglicherweise 1 bis 2 Minuten, um ihre Konfiguration zu aktualisieren.
{% endhint %}
***
## Eine Privatzone löschen
{% stepper %}
{% step %}
**Gehen Sie in Verkada Command zu Alle Produkte > Kameras.**
{% endstep %}
{% step %}
**Wählen Sie die Kamera aus, die Sie konfigurieren möchten.**
{% endstep %}
{% step %}
**Klicken Sie unten rechts auf „Einstellungen“.**
{% endstep %}
{% step %}
**Unter Datenschutz > Privatzonen markieren wählen Sie Privatzonen markieren.**
a. Für jede konfigurierte Privatzone klicken Sie auf das **X** zum Löschen.\
b. Klicken Sie **Fertig**.
{% endstep %}
{% endstepper %}
---
# Agent Instructions
This documentation is published with GitBook. GitBook is the documentation platform designed so that both humans and AI agents can read, navigate, and reason over technical content effectively. Learn more at gitbook.com.
## Querying This Documentation
If you need additional information that is not directly available in this page, you can query the documentation by asking a question.
Perform an HTTP GET request on the following URL with the `ask` and `goal` query parameters:
```
GET https://help.verkada.com/verkada-cameras/de/konfiguration/security-and-privacy/privacy-regions.md?ask=&goal=
```
`ask` is the immediate question: it should be specific, self-contained, and written in natural language.
`goal` is what the user is ultimately trying to achieve, the reason they need the answer. Sharing it helps GitBook give you a better, more relevant answer. A goal is most helpful when it describes the outcome the user wants rather than restating the question. For example, with `ask=how do I create an API token`, a goal like `automate deployments from our CI pipeline` lets GitBook tailor the answer to that use case.
The response will contain a direct answer to the question and relevant excerpts and sources from the documentation.
Use this mechanism when the answer is not explicitly present in the current page, you need clarification or additional context, or you want to retrieve related documentation sections.