> For the complete documentation index, see [llms.txt](https://help.verkada.com/llms.txt). Markdown versions of documentation pages are available by appending `.md` to page URLs; this page is available as [Markdown](https://help.verkada.com/verkada-cameras/configuration/security-and-privacy/enable-face-blur-on-verkada-cameras.md).
# Enable Face Blur on Verkada Cameras
Blur faces for live and archived video
Verkada Command supports blurring all faces in live footage and selectively blurring faces in archived footage. Use this to protect the privacy of individuals recorded by your camera system.
***
{% tabs %}
{% tab title="Live Face Blur" %}
### Enable Live Face Blur
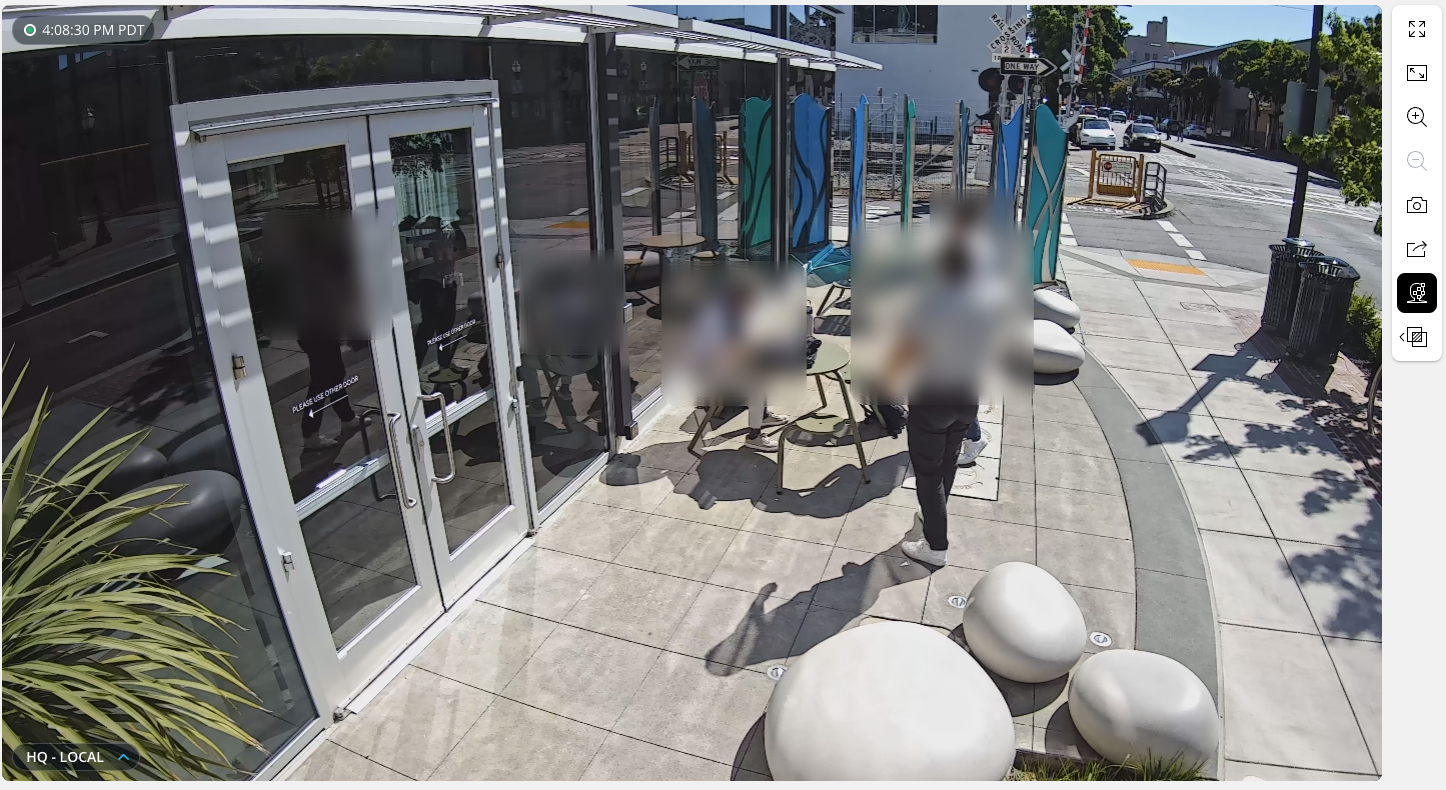
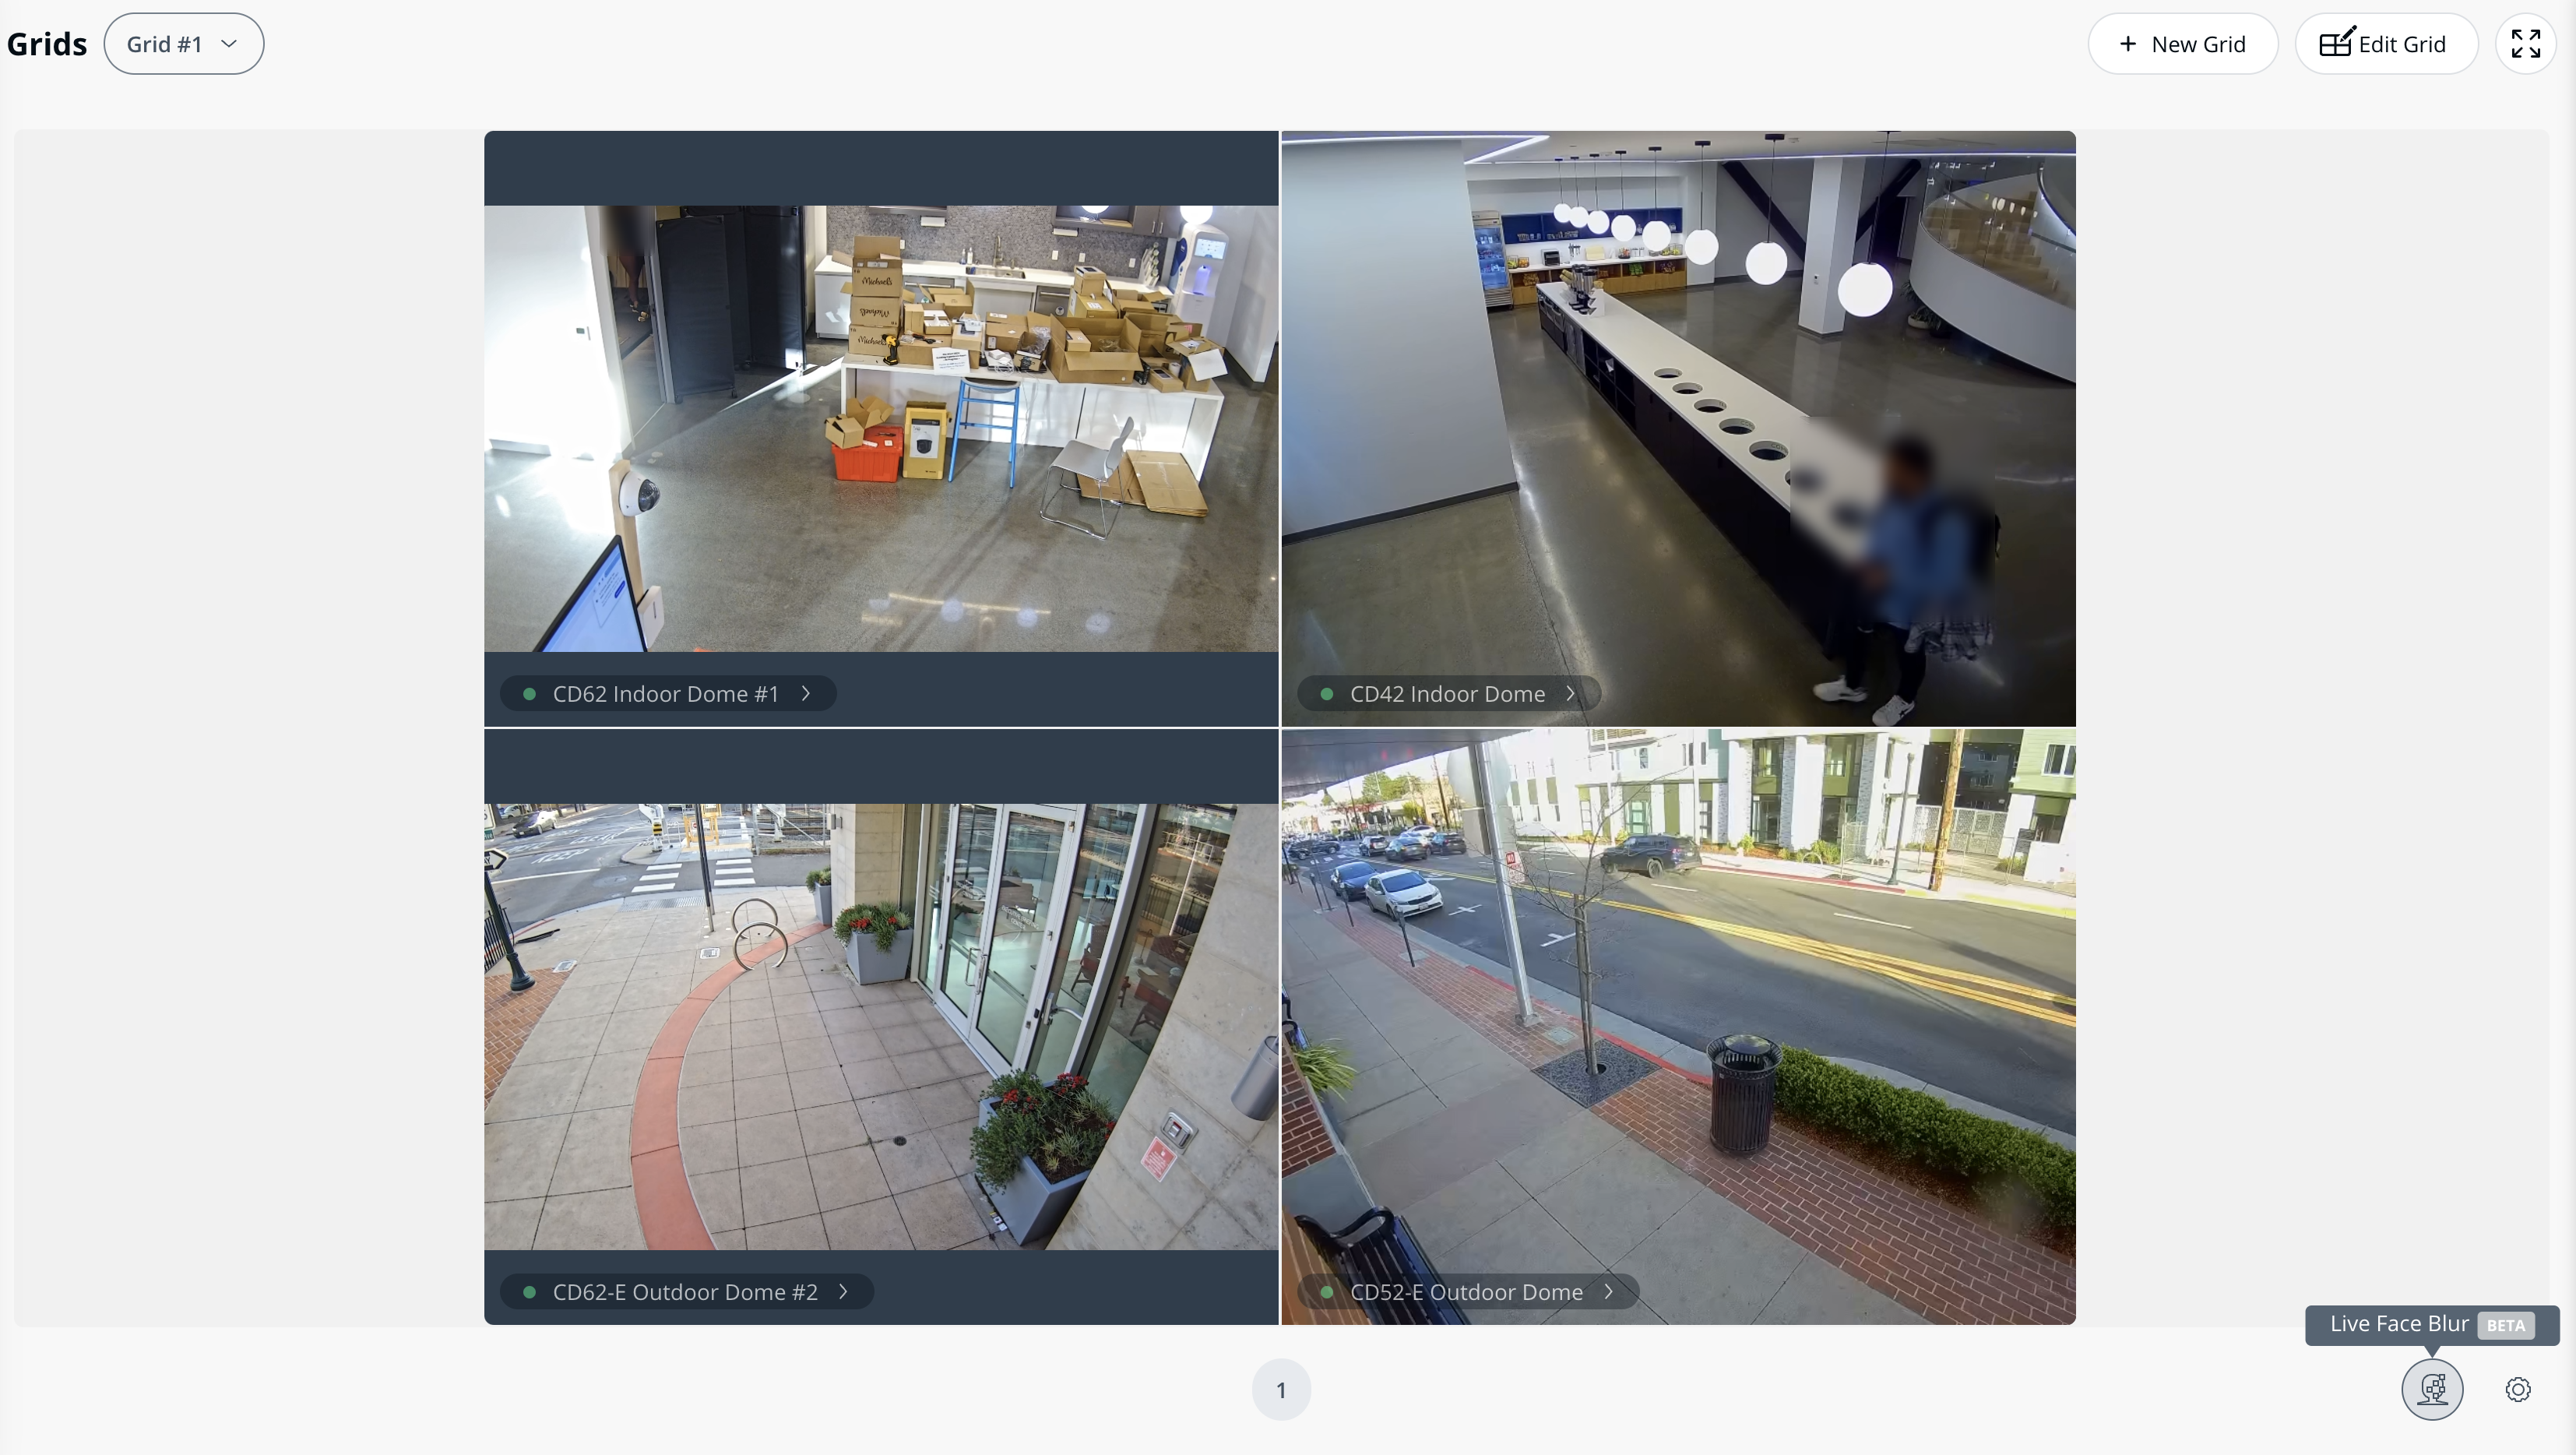
Live face blur detects and blurs faces in the live video feed on grids and the individual camera page. This setting does not apply to recorded footage, so camera history will still show faces.
You can access and enable Live Face Blur via the live video feed for a single camera, grid, or through the global **Cameras Settings** page.
{% hint style="warning" %}
Live Face Blur at the camera and grid level is specific to the user who configures it. This choice does not enable Face Blur for any other users.
{% endhint %}
#### Live video feed - Camera page
{% stepper %}
{% step %}
**In Verkada Command, go to All Products > Cameras.**
{% endstep %}
{% step %}
**Select a camera.**
{% endstep %}
{% step %}
**To the right of the live video feed, click Live Face Blur.**
{% endstep %}
{% endstepper %}
#### Live video feed - Grids
{% stepper %}
{% step %}
**In Verkada Command, go to All Products > Cameras.**
{% endstep %}
{% step %}
**From the left navigation, select Grids.**
{% endstep %}
{% step %}
**In the bottom right of your grid, click Live Face Blur.**
{% endstep %}
{% endstepper %}
#### Camera Settings page
Organization Admins can enable Live Face Blur for all users and cameras within the organization with the **Default Live Face Blur Setting**.
Individual users can override this global setting for individual cameras or grids on a per-camera or per-grid basis. Any overridden settings will only be visible to the user who configured them, leaving other users with the **Default Live Face Blur Setting** experience.
{% stepper %}
{% step %}
**In Verkada Command, go to All Products > Cameras.**
{% endstep %}
{% step %}
**From the left navigation bar, click Cameras Settings.**
{% endstep %}
{% step %}
**Next to Default Live Face Blur Setting, select On from the dropdown. **
{% endstep %}
{% endstepper %}
#### Considerations
* Only the [CB53-E](https://docs.verkada.com/docs/video-security-cb53-e-datasheet.pdf)/[CB63-E](https://docs.verkada.com/docs/video-security-cb63-e-datasheet.pdf), [CB52-E/CB62-E](https://www.verkada.com/security-cameras/bullet#models), [CD22](https://www.verkada.com/au/security-cameras/dome/cd22/)/[CD22-E](https://www.verkada.com/au/security-cameras/dome/cd22-e/), [CD32](https://www.verkada.com/au/security-cameras/dome/cd32/)/[CD32-E](https://www.verkada.com/au/security-cameras/dome/cd32-e/), [CD42](https://www.verkada.com/security-cameras/dome/cd42/)/[CD42-E](https://www.verkada.com/security-cameras/dome/cd42-e/), [CD43](https://docs.verkada.com/docs/video-security-cd43-datasheet.pdf)/[CD43-E](https://docs.verkada.com/docs/video-security-cd43-e-datasheet.pdf), [CD52](https://www.verkada.com/security-cameras/dome/cd52/)/[CD52-E](https://www.verkada.com/security-cameras/bullet/cb52-e/), [CD53](https://docs.verkada.com/docs/video-security-cd53-datasheet.pdf)/[CD53-E](https://docs.verkada.com/docs/video-security-cd53-e-datasheet.pdf), [CD62](https://www.verkada.com/security-cameras/dome/cd62/)/[CD62-E](https://www.verkada.com/security-cameras/bullet/cb62-e/), [CD63](https://docs.verkada.com/docs/video-security-cd63-datasheet.pdf)/[CD63-E](https://docs.verkada.com/docs/video-security-cd63-e-datasheet.pdf), [CH52-E](https://www.verkada.com/security-cameras/multisensor/ch52-e/), [CH53-E](https://docs.verkada.com/docs/video-security-ch53-e-datasheet.pdf), [CH63-E](https://docs.verkada.com/docs/video-security-ch63-e-datasheet.pdf), [CM22](https://docs.verkada.com/docs/cm22-mini-dome-datasheet.pdf), [CM42](https://www.verkada.com/security-cameras/mini/cm42/), [CM42-S](https://docs.verkada.com/docs/video-security-cm42-s-datasheet.pdf), [CR63-E](https://docs.verkada.com/docs/video-security-cr63-e-datasheet.pdf)/[CR63-TE](https://docs.verkada.com/docs/video-security-cr63-te-datasheet.pdf), [CY53-E](https://docs.verkada.com/docs/video-security-cy53-e-datasheet.pdf), and [CY63-E](https://docs.verkada.com/docs/video-security-cy63-e-datasheet.pdf) camera models support this feature.
* [CB52/53-E and TE](https://www.verkada.com/docs/?search=bullet\&contentType=datasheet), and [CB62/63-E and TE](https://www.verkada.com/docs/?search=bullet\&contentType=datasheet) support live face blur when LPR (license plate recognition) mode is disabled.
* This feature is only available on desktop.
* This feature is not available for live links.
* Live Face Blur does not affect saved footage.
* Face Blur works independently of any other features, such as people analytics. Thus, faces can still be captured in historical footage and visible in the **Motion**, **History**, and **People** tabs of the camera's page.
{% endtab %}
{% tab title="Face Blur for Archives" %}
## Create a Face Blur archive
{% stepper %}
{% step %}
**In Verkada Command, go to All Products > Cameras.**
{% endstep %}
{% step %}
**On the left navigation, click Archives.**
{% endstep %}
{% step %}
**Hover over an archive and click** **> Prepare for Download.**
{% endstep %}
{% step %}
**In the bottom right, under Archive Copies, toggle on Blur Faces.**
{% endstep %}
{% step %}
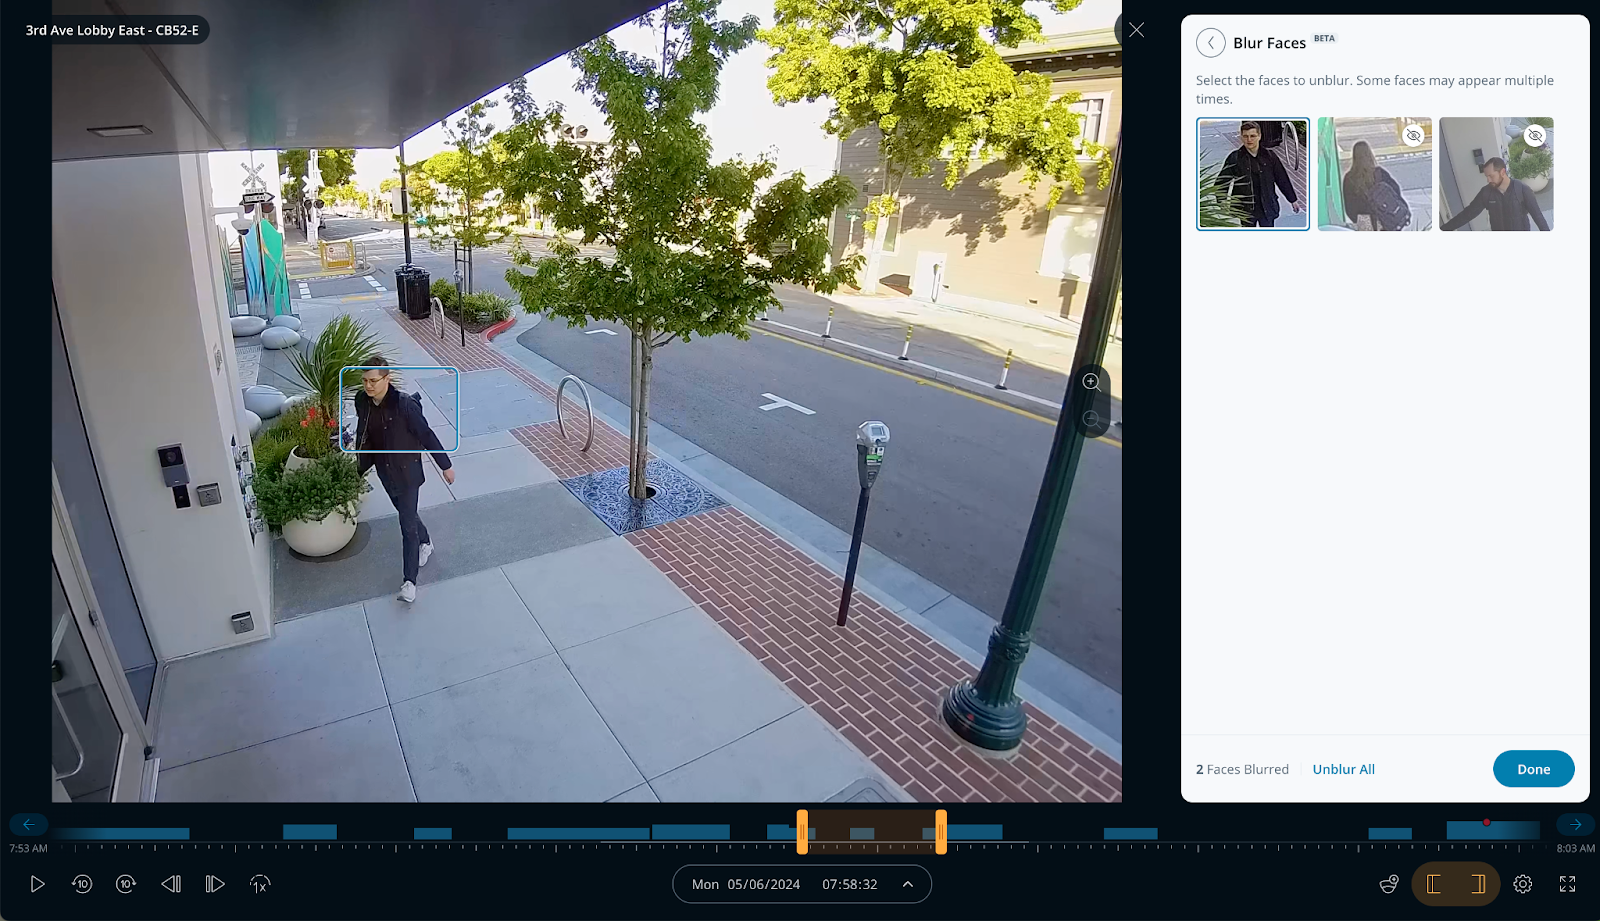
**(Optional) If you have a second-generation or newer camera, you can use selective face blur.**
1. To the right of the **Blur Faces** toggle, click **All Faces.**
2. In the top right of a face profile, click the unblur icon.
3. Click **Done.**
Selective Face Blur creates an archive, blurring all faces except those you deselect. This is a great option for preserving bystanders' privacy when exporting video of an event.
**Face blur works best when:**
* There are only a few people in each frame.
* People's faces are clearly visible; hats and masks often partially obscure them, leading to missed detections.
{% hint style="info" %}
For optimal accuracy, you may see repeated individuals. Make your selections, click **Done**, and then **Save** to create the archive.
{% endhint %}
{% endstep %}
{% step %}
**In the bottom right, click Create Copy.**
{% endstep %}
{% step %}
**Once the copy has been completed, you can:**
* Click :download: to download
* Click :folder-minus: to [attach to an Incident](/verkada-cameras/video-streaming-and-sharing/incident-management.md#add-archives-to-an-incident)
* Click :ellipsis: > :share-from-square: to [share](/verkada-cameras/video-streaming-and-sharing/sharing-video.md#share-archives-via-browser)
* Click :ellipsis: > [Upload to an Integration](/command/organization-settings/integrations.md)
* Click :ellipsis: > :trash-can: to remove the copy
{% endstep %}
{% endstepper %}
***
#### Considerations
* [CB52/53-E and TE](https://www.verkada.com/docs/?search=bullet\&contentType=datasheet), and [CB62/63-E and TE](https://www.verkada.com/docs/?search=bullet\&contentType=datasheet), only support selective face blur when LPR (license plate recognition) mode is disabled.
* This feature is only available when creating archives on a desktop.
{% endtab %}
{% endtabs %}
---
# Agent Instructions
This documentation is published with GitBook. GitBook is the documentation platform designed so that both humans and AI agents can read, navigate, and reason over technical content effectively. Learn more at gitbook.com.
## Querying This Documentation
If you need additional information that is not directly available in this page, you can query the documentation by asking a question.
Perform an HTTP GET request on the following URL with the `ask` and `goal` query parameters:
```
GET https://help.verkada.com/verkada-cameras/configuration/security-and-privacy/enable-face-blur-on-verkada-cameras.md?ask=&goal=
```
`ask` is the immediate question: it should be specific, self-contained, and written in natural language.
`goal` is what the user is ultimately trying to achieve, the reason they need the answer. Sharing it helps GitBook give you a better, more relevant answer. A goal is most helpful when it describes the outcome the user wants rather than restating the question. For example, with `ask=how do I create an API token`, a goal like `automate deployments from our CI pipeline` lets GitBook tailor the answer to that use case.
The response will contain a direct answer to the question and relevant excerpts and sources from the documentation.
Use this mechanism when the answer is not explicitly present in the current page, you need clarification or additional context, or you want to retrieve related documentation sections.