> For the complete documentation index, see [llms.txt](https://help.verkada.com/llms.txt). Markdown versions of documentation pages are available by appending `.md` to page URLs; this page is available as [Markdown](https://help.verkada.com/guest/ja/she-ding/guest-sites/add-cameras-and-doors-in-verkada-guest.md).
# Verkada Guest にカメラとドアを追加
Verkada Guest でユーザーがドアを解錠し、ゲストを追跡できる方法を学ぶ
[Verkada Guest](https://docs.verkada.com/docs/verkada-guest-overview.pdf) これにより、あなたの組織は最適な来訪者体験を提供し、施設内に誰がいるのかをよりよく把握できます。さらに、既存の Guest 設定にカメラとドアを追加できます。
カメラを使うと、Guest ダッシュボードのユーザーはイベントを表示できます。ドアを使うと、管理者とマネージャーはドアのスケジュールを表示および編集でき、サイト閲覧者はドアを使ってドアイベントを表示できます。詳細は、Command ユーザーの役割についてをご覧ください。 [Command ユーザーの役割](/command/ja/yzto/roles-and-permissions-for-command.md).
***
### カメラまたはドアを追加するサイトを選択
{% stepper %}
{% step %}
**Verkada Commandでは、All Products > Workplace >**  **Guest。**
{% endstep %}
{% step %}
**左側のナビゲーションで、Guest Settings をクリックします。**
{% endstep %}
{% step %}
**オーガナイゼーション' の下で、サイトを選択します。**
{% endstep %}
{% step %}
**タイルの一覧から、カメラ(またはドア)を追加したいサイトを選択します。**
{% endstep %}
{% endstepper %}
## カメラを追加
カメラは、次の条件を満たす場合に Guest サイトとペアリングできます:
{% stepper %}
{% step %}
**Guest サイトと同じサイト内にある場合、または**
{% endstep %}
{% step %}
**Guest サイトのサブサイト内にある場合**
{% endstep %}
{% endstepper %}
{% hint style="warning" %}
ユーザーは少なくとも **ライブ専用ビューアー** の権限を、サイトに対して持っている必要があります。そうすることで、そのサイトのカメラを Guest に追加できます。
{% endhint %}
{% stepper %}
{% step %}
**Verkada Commandでは、All Products > Workplace >** **Guest。**
{% endstep %}
{% step %}
**左側のナビゲーションで、Guest Settings をクリックします。**
{% endstep %}
{% step %}
**サイトで、[カメラ]を選択します。**
{% endstep %}
{% step %}
**選択したカメラ数の横にある[カメラを管理]をクリックします。**
{% endstep %}
{% step %}
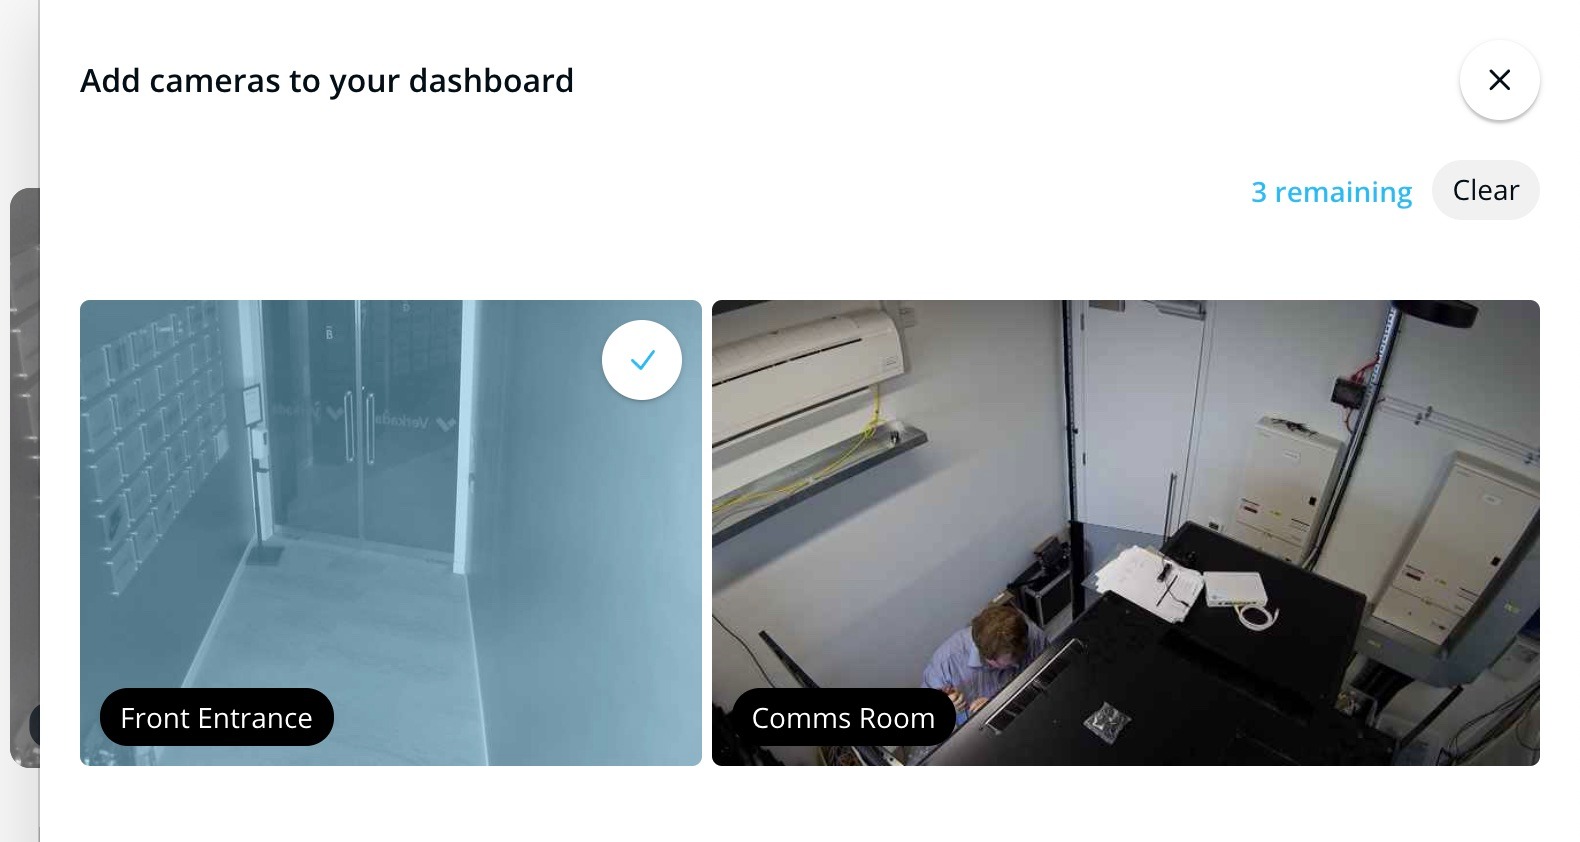
**ダッシュボードにカメラを追加するページでは、追加できるカメラ数が案内されます。**
{% endstep %}
{% step %}
**Guest サイトでは最大 4 台のカメラを選択できます。**
{% endstep %}
{% step %}
**任意。すべてのカメラを削除して最初からやり直すには、右上の[クリア]をクリックします。**
{% endstep %}
{% endstepper %}
## ドアを追加
{% hint style="warning" %}
ユーザーは **アクセスサイト管理者** サイトから Guest にドアを追加するには、そのサイトに対する権限が必要です。
{% endhint %}
ドアは、同じサイト内にある限り、Guest サイトに接続できます。
{% stepper %}
{% step %}
**Verkada Commandでは、All Products > Workplace >** **Guest。**
{% endstep %}
{% step %}
**左側のナビゲーションで、Guest Settings をクリックします。**
{% endstep %}
{% step %}
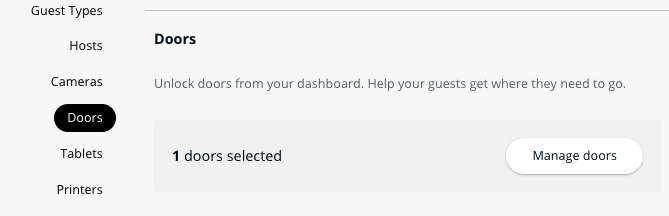
**サイトで、[ドア]までスクロールします。**
{% endstep %}
{% step %}
**選択したドア数の横にある[ドアを管理]をクリックします。**
{% endstep %}
{% step %}
**[Guest 管理用ドアを有効にする]ページでは、追加できるドア数が案内されます。**
{% endstep %}
{% step %}
**Guest サイトでは最大 4 台のドアを選択できます。**
{% endstep %}
{% endstepper %}
### ドアアクセスの設定
Guest ユーザーは [ドアアクセスを割り当てられている必要があります](/access-control/ja/yzto/add-a-user-to-the-verkada-access-system/assign-a-user-access-to-a-door.md)。Guest ホームページからドアを開くには **リモート解除** を有効にする必要があります:
{% stepper %}
{% step %}
**アクセスユーザーの場合**
{% endstep %}
{% step %}
**ドアの場合**
{% endstep %}
{% step %}
**アクセスサイトの場合**
{% endstep %}
{% endstepper %}
***
## FAQ
**Guest。**
{% endstep %}
{% step %}
**左側のナビゲーションで、Guest Settings をクリックします。**
{% endstep %}
{% step %}
**オーガナイゼーション' の下で、サイトを選択します。**
{% endstep %}
{% step %}
**タイルの一覧から、カメラ(またはドア)を追加したいサイトを選択します。**
{% endstep %}
{% endstepper %}
## カメラを追加
カメラは、次の条件を満たす場合に Guest サイトとペアリングできます:
{% stepper %}
{% step %}
**Guest サイトと同じサイト内にある場合、または**
{% endstep %}
{% step %}
**Guest サイトのサブサイト内にある場合**
{% endstep %}
{% endstepper %}
{% hint style="warning" %}
ユーザーは少なくとも **ライブ専用ビューアー** の権限を、サイトに対して持っている必要があります。そうすることで、そのサイトのカメラを Guest に追加できます。
{% endhint %}
{% stepper %}
{% step %}
**Verkada Commandでは、All Products > Workplace >** **Guest。**
{% endstep %}
{% step %}
**左側のナビゲーションで、Guest Settings をクリックします。**
{% endstep %}
{% step %}
**サイトで、[カメラ]を選択します。**
{% endstep %}
{% step %}
**選択したカメラ数の横にある[カメラを管理]をクリックします。**
{% endstep %}
{% step %}
**ダッシュボードにカメラを追加するページでは、追加できるカメラ数が案内されます。**
{% endstep %}
{% step %}
**Guest サイトでは最大 4 台のカメラを選択できます。**
{% endstep %}
{% step %}
**任意。すべてのカメラを削除して最初からやり直すには、右上の[クリア]をクリックします。**
{% endstep %}
{% endstepper %}
## ドアを追加
{% hint style="warning" %}
ユーザーは **アクセスサイト管理者** サイトから Guest にドアを追加するには、そのサイトに対する権限が必要です。
{% endhint %}
ドアは、同じサイト内にある限り、Guest サイトに接続できます。
{% stepper %}
{% step %}
**Verkada Commandでは、All Products > Workplace >** **Guest。**
{% endstep %}
{% step %}
**左側のナビゲーションで、Guest Settings をクリックします。**
{% endstep %}
{% step %}
**サイトで、[ドア]までスクロールします。**
{% endstep %}
{% step %}
**選択したドア数の横にある[ドアを管理]をクリックします。**
{% endstep %}
{% step %}
**[Guest 管理用ドアを有効にする]ページでは、追加できるドア数が案内されます。**
{% endstep %}
{% step %}
**Guest サイトでは最大 4 台のドアを選択できます。**
{% endstep %}
{% endstepper %}
### ドアアクセスの設定
Guest ユーザーは [ドアアクセスを割り当てられている必要があります](/access-control/ja/yzto/add-a-user-to-the-verkada-access-system/assign-a-user-access-to-a-door.md)。Guest ホームページからドアを開くには **リモート解除** を有効にする必要があります:
{% stepper %}
{% step %}
**アクセスユーザーの場合**
{% endstep %}
{% step %}
**ドアの場合**
{% endstep %}
{% step %}
**アクセスサイトの場合**
{% endstep %}
{% endstepper %}
***
## FAQ
受付担当者をフロントデスクのカメラのみに制限するにはどうすればよいですか?
1. カメラは、Guest サイトと同じサイト内にあるか、Guest サイトの下にネストされたサブサイトにある場合、Guest に接続できます。カメラが多いサイトで Guest を活用したい組織では、受付担当者のアクセスを次の方法で制限できます:
2. 関連するカメラをサブサイトに配置します。受付担当者には、適切なサブサイトに対するカメラ権限のみを付与します。
来訪者にドアアクセスを付与できますか?
招待された来訪者は、登録リンクからドアアクセスを取得できます。招待されたゲストにドアアクセスを設定するには、 [Guest Type を編集し](/guest/ja/she-ding/configure-guest-types.md) 、 **Guest Door Access**.
---
# Agent Instructions
This documentation is published with GitBook. GitBook is the documentation platform designed so that both humans and AI agents can read, navigate, and reason over technical content effectively. Learn more at gitbook.com.
## Querying This Documentation
If you need additional information that is not directly available in this page, you can query the documentation by asking a question.
Perform an HTTP GET request on the following URL with the `ask` and `goal` query parameters:
```
GET https://help.verkada.com/guest/ja/she-ding/guest-sites/add-cameras-and-doors-in-verkada-guest.md?ask=&goal=
```
`ask` is the immediate question: it should be specific, self-contained, and written in natural language.
`goal` is what the user is ultimately trying to achieve, the reason they need the answer. Sharing it helps GitBook give you a better, more relevant answer. A goal is most helpful when it describes the outcome the user wants rather than restating the question. For example, with `ask=how do I create an API token`, a goal like `automate deployments from our CI pipeline` lets GitBook tailor the answer to that use case.
The response will contain a direct answer to the question and relevant excerpts and sources from the documentation.
Use this mechanism when the answer is not explicitly present in the current page, you need clarification or additional context, or you want to retrieve related documentation sections.