> For the complete documentation index, see [llms.txt](https://help.verkada.com/llms.txt). Markdown versions of documentation pages are available by appending `.md` to page URLs; this page is available as [Markdown](https://help.verkada.com/guest/ja/she-ding/door-access-for-guests/manage-visitor-access-control-privileges.md).
# Guest から訪問者のドアアクセスを管理
敷地内で訪問者がアクセスできるドアを制御
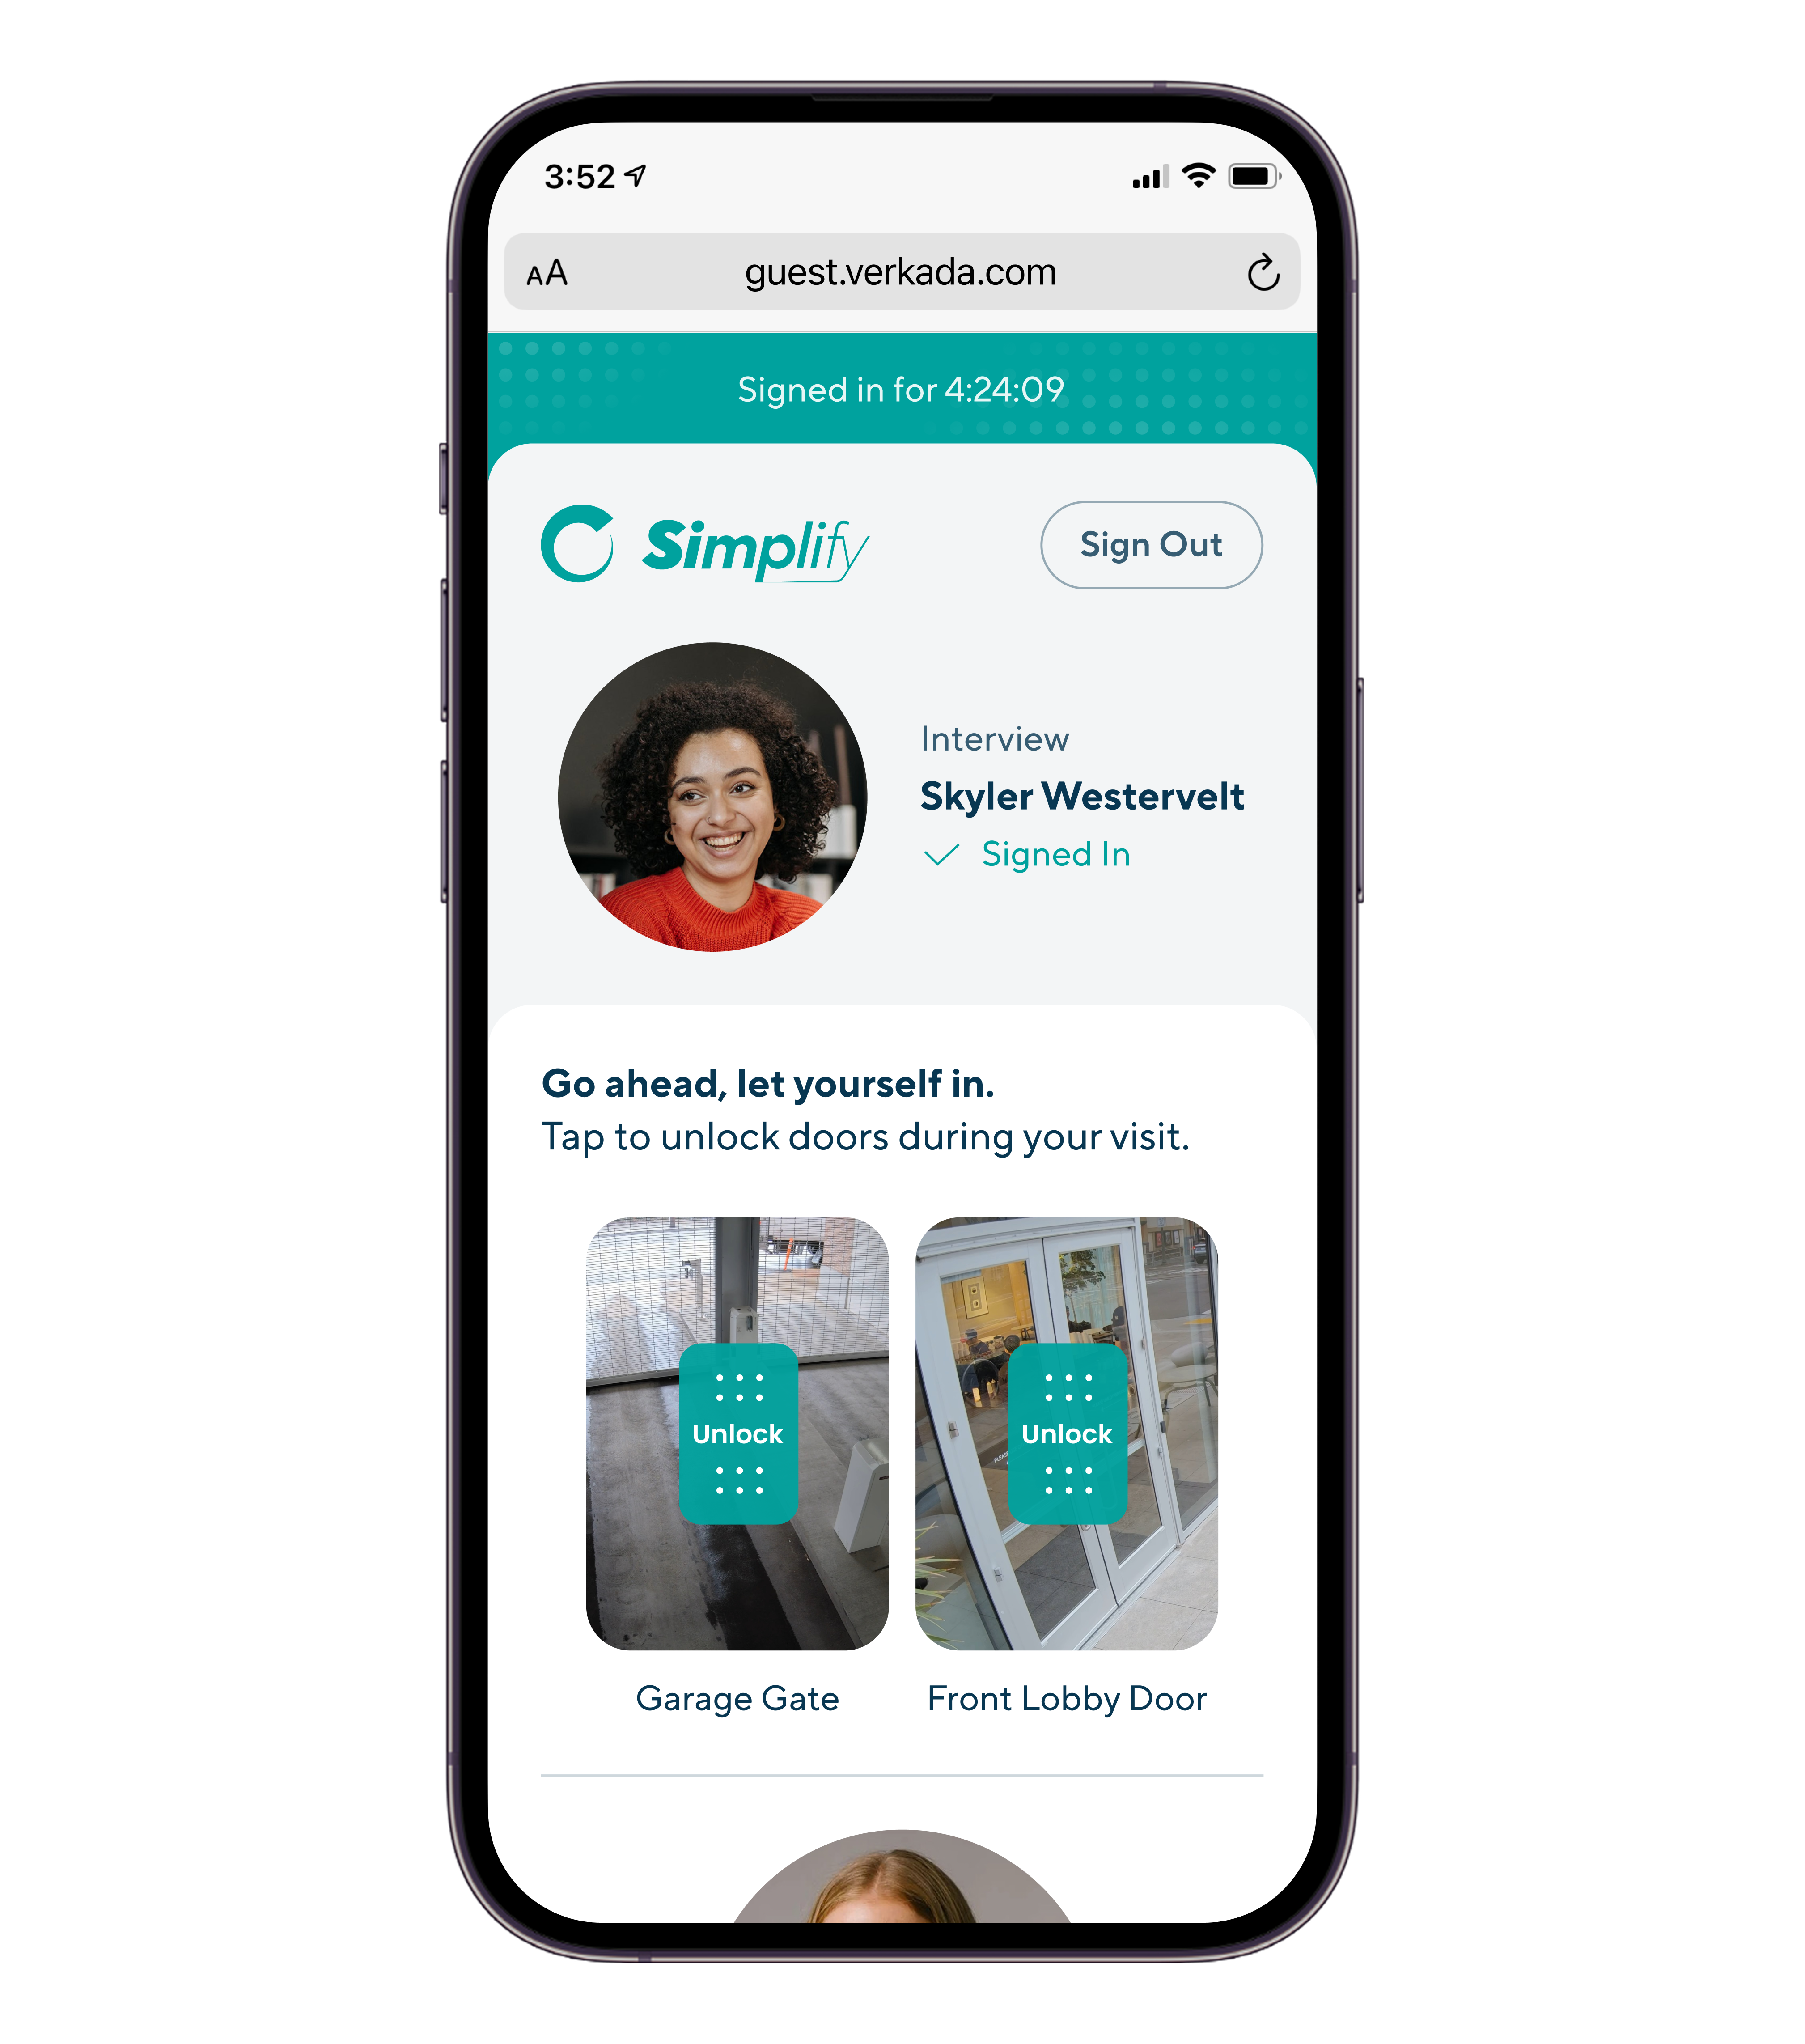
Verkada アクセスコントロールと Guest の連携により、組織は訪問者に限定的なドアアクセスを付与できます。組織は、Guest から直接、選択した訪問者にアクセス資格情報を発行できます。
***
## 訪問者へのドアアクセスの付与方法
[訪問アクセスの種類](https://help.verkada.com/access-control/users-and-credentials/add-a-user-to-the-verkada-access-system/visitor-access-visit-access-type) どのドアに訪問者がアクセスできるか、およびそのドアを解除するために訪問者が使用できる資格情報を定義します。Verkada Guest では、訪問者に以下の資格情報を発行できます。
1. [キーカード](https://help.verkada.com/guest/~/revisions/EoCxP3hpfoyJZDsFs6y8/configuration/door-access-for-guests/assigning-a-keycard-in-guest)
2. 解除リンク
3. 入室コード
4. QRコード
5. 顔認証解除
キーカードは、Workplace ユーザーが訪問ごとに訪問者へ割り当てる必要があります。詳細はこちら: [訪問者へのキーカード割り当て](https://help.verkada.com/guest/~/revisions/xrJT73IOTfAWzozwLpVL/configuration/door-access-for-guests/assigning-a-keycard-in-guest)。サインインすると、訪問者には、Unlock Links、入室コード、QRコードにアクセスできる URL が自動的に送信されます。
{% hint style="warning" %}
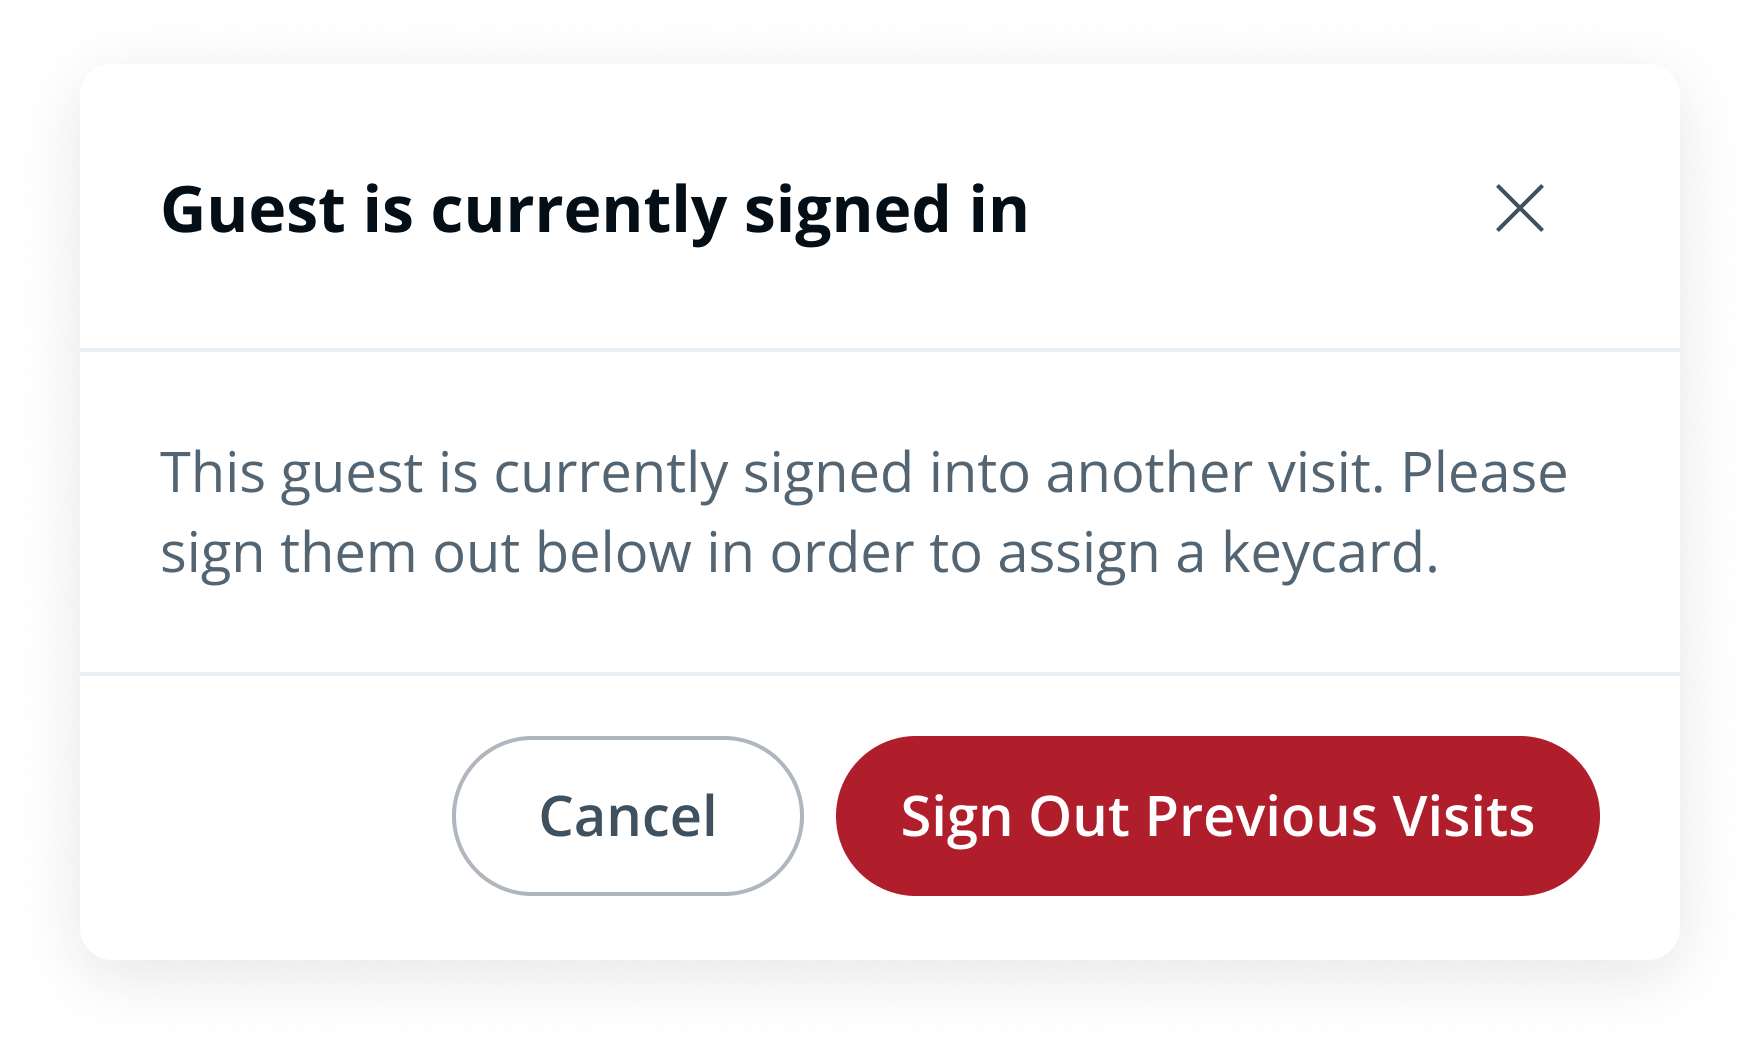
再来訪の訪問者には、前回の訪問による有効なドアアクセスがない場合にのみ、新しいアクセス資格情報が発行されます。Guest では、新しい資格情報を有効化する前に、スタッフにアクセスの取り消しまたは前回の訪問のサインアウトを促します。
 {% endhint %}
***
## 訪問者のアクセス権を確認
Guest ユーザーは、Guest から直接、訪問者のドアアクセス権に関する情報を確認できます。
{% stepper %}
{% step %}
**Verkada Command で、All Products > Workplace >**
{% endhint %}
***
## 訪問者のアクセス権を確認
Guest ユーザーは、Guest から直接、訪問者のドアアクセス権に関する情報を確認できます。
{% stepper %}
{% step %}
**Verkada Command で、All Products > Workplace >**  **Guest。**
{% endstep %}
{% step %}
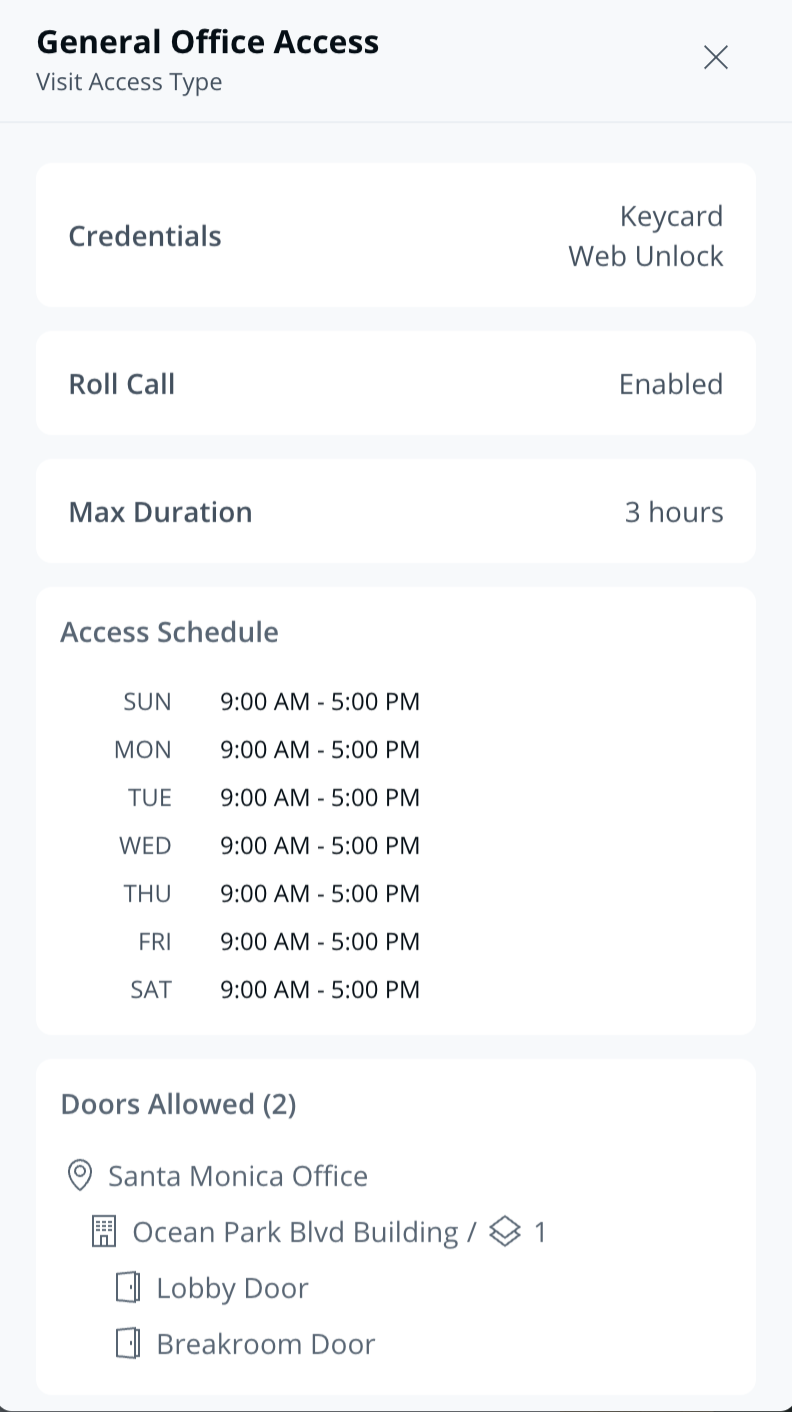
**訪問者を選択します。詳細パネルでは、次の内容を確認できます。**
* 訪問者にどの資格情報が発行されているか(例:キーカード、Face Unlock、入室コード)
* 訪問者がアクセスできるドア
* 訪問者のドアアクセス期間
* 訪問者が点呼レポートに含まれるかどうか
{% endstep %}
{% endstepper %}
***
## 訪問者のドアアクセスを無効化
### ドアアクセスの自動制御
訪問者は、次の場合にドアへのアクセスを自動的に失います:
1. ドアがアクセス制御された [ドアスケジュール](/access-control/ja/akusesu/door-schedules-and-exceptions.md).
2. 訪問者が、次の項目で定義されたアクセススケジュール外のドアを解除しようとしたとき: [訪問アクセスの種類](/access-control/ja/yzto/add-a-user-to-the-verkada-access-system/visitor-access-visit-access-type.md).
3. 訪問者のサインイン時間が、訪問アクセスの種類で定義された最大アクセス期間を超えたとき。
4. Guest Event が終了したとき(招待された訪問者のみ対象)。
5. 訪問者は Guest サイトの *自動サインアウト* 時刻でサインアウトされます。
キーカードは訪問者から切り離され、他の訪問者に再割り当てできるようになります:
1. 訪問者がサインアウトされた場合。
2. 訪問者のアクセスが取り消された場合。
3. 訪問者のサインイン時間が、訪問アクセスの種類で定義された最大アクセス期間を超えたとき。
4. Guest Event が終了したとき(招待された訪問者のみ対象)。
### 訪問者のドアアクセスを明示的に取り消す
Guest ユーザーは、Guest から直接、訪問者のドアアクセスを取り消すことができます。
{% stepper %}
{% step %}
**Verkada Command で、All Products > Workplace >** **Guest。**
{% endstep %}
{% step %}
**Guest Home では、Guest ユーザーにはドアアクセスを取り消すための 2 つの方法があります:**
a. サインイン中のユーザーを選択して、次をクリックします。 **アクセスを取り消す**。このオプションを選択すると、訪問者は引き続きサインイン中として扱われます。\nb. サインイン中のユーザーを選択して、次をクリックします。 **サインアウト。**
{% endstep %}
{% endstepper %}
***
**Guest。**
{% endstep %}
{% step %}
**訪問者を選択します。詳細パネルでは、次の内容を確認できます。**
* 訪問者にどの資格情報が発行されているか(例:キーカード、Face Unlock、入室コード)
* 訪問者がアクセスできるドア
* 訪問者のドアアクセス期間
* 訪問者が点呼レポートに含まれるかどうか
{% endstep %}
{% endstepper %}
***
## 訪問者のドアアクセスを無効化
### ドアアクセスの自動制御
訪問者は、次の場合にドアへのアクセスを自動的に失います:
1. ドアがアクセス制御された [ドアスケジュール](/access-control/ja/akusesu/door-schedules-and-exceptions.md).
2. 訪問者が、次の項目で定義されたアクセススケジュール外のドアを解除しようとしたとき: [訪問アクセスの種類](/access-control/ja/yzto/add-a-user-to-the-verkada-access-system/visitor-access-visit-access-type.md).
3. 訪問者のサインイン時間が、訪問アクセスの種類で定義された最大アクセス期間を超えたとき。
4. Guest Event が終了したとき(招待された訪問者のみ対象)。
5. 訪問者は Guest サイトの *自動サインアウト* 時刻でサインアウトされます。
キーカードは訪問者から切り離され、他の訪問者に再割り当てできるようになります:
1. 訪問者がサインアウトされた場合。
2. 訪問者のアクセスが取り消された場合。
3. 訪問者のサインイン時間が、訪問アクセスの種類で定義された最大アクセス期間を超えたとき。
4. Guest Event が終了したとき(招待された訪問者のみ対象)。
### 訪問者のドアアクセスを明示的に取り消す
Guest ユーザーは、Guest から直接、訪問者のドアアクセスを取り消すことができます。
{% stepper %}
{% step %}
**Verkada Command で、All Products > Workplace >** **Guest。**
{% endstep %}
{% step %}
**Guest Home では、Guest ユーザーにはドアアクセスを取り消すための 2 つの方法があります:**
a. サインイン中のユーザーを選択して、次をクリックします。 **アクセスを取り消す**。このオプションを選択すると、訪問者は引き続きサインイン中として扱われます。\nb. サインイン中のユーザーを選択して、次をクリックします。 **サインアウト。**
{% endstep %}
{% endstepper %}
***
訪問者のドアアクセスは自動的に失われますか?
はい、訪問者はドアアクセスを自動的に失うことがあります [5 つの方法](/guest/ja/she-ding/door-access-for-guests/manage-visitor-access-control-privileges.md#automatic-controls-for-door-access).
訪問者をサインアウトせずにドアアクセスを取り消すことはできますか?
はい、Guest ユーザーは、Guest Home ページの訪問詳細パネルから、訪問者をサインアウトせずにドアアクセスを取り消すことができます。
訪問者のキーカードは再割り当てできますか?
はい。訪問者がサインアウトされるか、アクセスが取り消されると、そのキーカードは別の訪問者に再割り当てできます。キーカードを同時に有効にできる訪問者は 1 人のみです。
---
# Agent Instructions
This documentation is published with GitBook. GitBook is the documentation platform designed so that both humans and AI agents can read, navigate, and reason over technical content effectively. Learn more at gitbook.com.
## Querying This Documentation
If you need additional information that is not directly available in this page, you can query the documentation by asking a question.
Perform an HTTP GET request on the following URL with the `ask` and `goal` query parameters:
```
GET https://help.verkada.com/guest/ja/she-ding/door-access-for-guests/manage-visitor-access-control-privileges.md?ask=&goal=
```
`ask` is the immediate question: it should be specific, self-contained, and written in natural language.
`goal` is what the user is ultimately trying to achieve, the reason they need the answer. Sharing it helps GitBook give you a better, more relevant answer. A goal is most helpful when it describes the outcome the user wants rather than restating the question. For example, with `ask=how do I create an API token`, a goal like `automate deployments from our CI pipeline` lets GitBook tailor the answer to that use case.
The response will contain a direct answer to the question and relevant excerpts and sources from the documentation.
Use this mechanism when the answer is not explicitly present in the current page, you need clarification or additional context, or you want to retrieve related documentation sections.