> For the complete documentation index, see [llms.txt](https://help.verkada.com/llms.txt). Markdown versions of documentation pages are available by appending `.md` to page URLs; this page is available as [Markdown](https://help.verkada.com/guest/ja/she-ding/configure-guest-types/design-a-visitor-badge-in-guest.md).
# Guest で訪問者バッジをデザイン
訪問者バッジに表示する情報と視覚的な手がかりをカスタマイズ
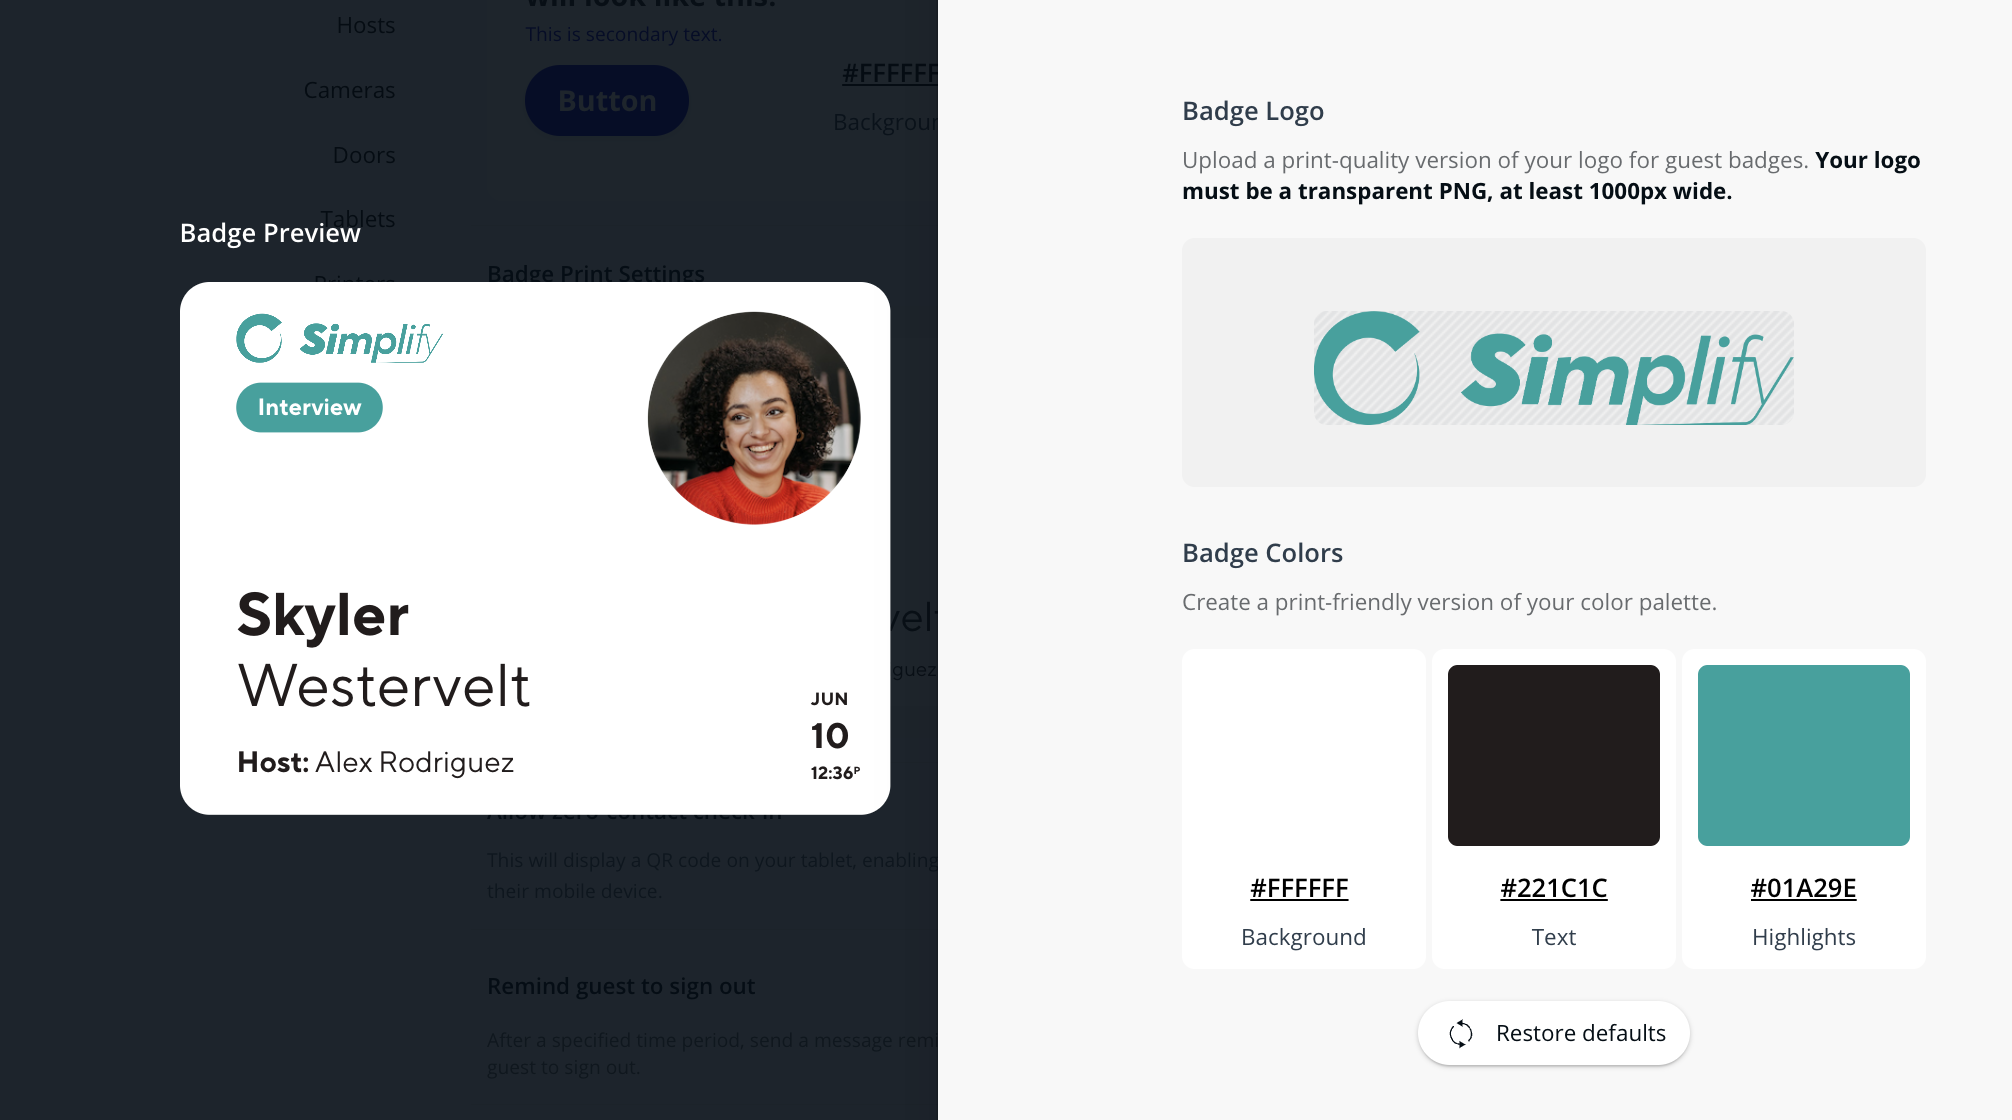
訪問者バッジは、オーガナイゼーション' が訪問者を追跡するのに役立つ重要な指標です。さまざまなカスタマイズ オプションにより、オーガナイゼーション' は訪問者バッジを使って有用な情報を明確に表示できます。
* 訪問者バッジは、 [Basic Designer](#basic-designer)
* 訪問者バッジは、 [Advanced Designer](#advanced-designer)
***
## バッジを設定する
{% hint style="warning" %}
訪問者バッジは、Guest Type レベルで設定されます。
{% endhint %}
{% stepper %}
{% step %}
**Verkada Command で、All Products > Workplace > Guest に移動します。**
{% endstep %}
{% step %}
**左側のナビゲーションで、Guest Settings をクリックします。**
a. **オーガナイゼーション'** **> Guest Types の下で、** をクリックします **[Guest Types の管理]。**\
b. (任意)上部で、 **サイト** を選択し、個別サイトの Guest Type 用の訪問者バッジを作成するサイトを選択します。
{% endstep %}
{% step %}
**目的のゲストタイプを選択します。**
{% endstep %}
{% step %}
**バッジをクリックして、バッジ設定を変更します。**
{% endstep %}
{% endstepper %}
### サイト固有のバッジ色とロゴを設定する
デフォルトでは、サイト固有の色とロゴが設定されていない限り、バッジはオーガナイゼーション' レベルのテキスト、色、ロゴを使用します。特定のサイトのバッジに使用するテキスト色とロゴを設定するには、
{% stepper %}
{% step %}
**Verkada Command で、All Products > Guest に移動します。**
{% endstep %}
{% step %}
**左側のナビゲーションで、Guest Settings をクリックします。**
{% endstep %}
{% step %}
**Sites > Details の下で、Badge Print Settings に移動します。**
{% endstep %}
{% step %}
**バッジをクリックして、バッジ設定を変更します。**
{% endstep %}
{% endstepper %}
***
## 基本モード
バッジは、基本モード デザイナーで簡単にカスタマイズできます。このモードでは、バッジに次の情報を含めることができます。
* **ゲスト名**
* **ホスト名**
* **バッジ写真**:サインイン時に訪問者が撮影する写真
* **ゲストの回答**:訪問者が選択した質問に対して提供する回答
### バッジデザインルール
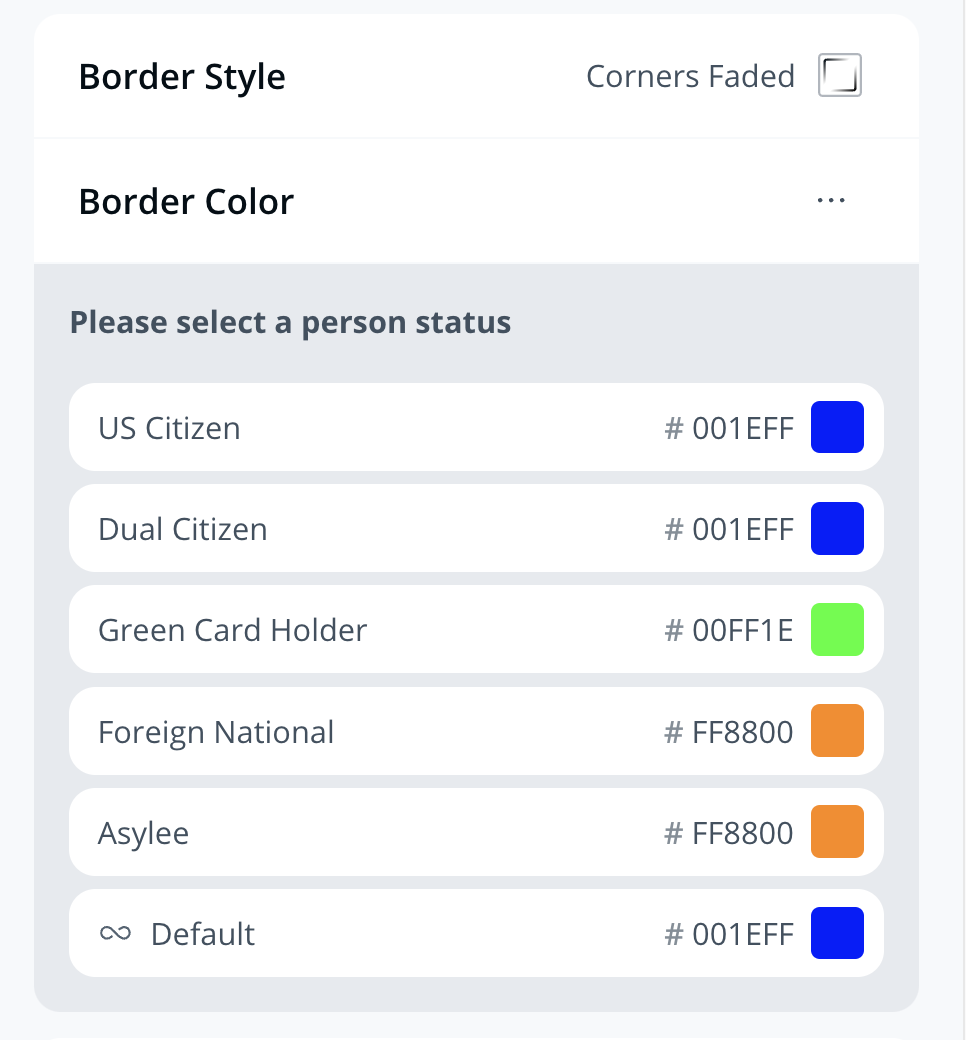
バッジデザインルールでは、選択式の質問に対するゲストの回答をバッジデザインに反映できます。選択式の質問には、次のパラメータを関連付けることができます。
* 向き
* 枠線のスタイル
* 枠線の色
Guest Type の手順である選択式の質問および [アンケート](/guest/ja/she-ding/guest-documents/guest-questionnaires.md) の一部である選択式の質問は、バッジデザインルールに使用できます。各選択式質問の回答に対して、パラメータ条件が設定されます。
任意のバッジデザインルールのデフォルト オプションは、関連付けられた選択式の質問に未回答の場合、または「その他」フィールドが選択された場合に、パラメータ設定を適用します。
バッジの向き、枠線の色、枠線のスタイルは、任意の Guest Type に対してカスタマイズできます。カラー プリンター、または2色紙をセットした [Brother プリンター](/guest/ja/purint/brother-printer-setup-guide/two-tone-printing-for-the-brother-printer.md) が、枠線の色をカスタマイズするために Guest サイトにある必要があります。
{% hint style="danger" %}
枠線の色を設定するには、先に枠線のスタイルを設定する必要があります。
{% endhint %}
### バッジデザインをプレビュー
バッジのプレビュー ウィンドウには、設定されたルールに準拠する可能なバッジデザインが表示されます。バッジデザインルールの概要を示す PDF を印刷または保存するには、 **Rules** **印刷ガイド** を使用します。
***
## 詳細モード
詳細モードでは、より広範なバッジのカスタマイズが可能です。Advanced Designer で作成したバッジには、次のコンポーネントを含めることができます。
1. **ゲスト名**
2. **サイト名**
3. **ゲストタイプ**
4. **サイトロゴ**
5. **ホスト名**
6. **バッジ写真**
7. **日付**
8. **画像:** 管理者は .jpg および .png 画像をアップロードして、バッジ上に配置できます
9. **テキスト:** 管理者はバッジに特別なテキストを含めることができます
10. **ゲストの回答:** 訪問者が選択した質問に対して提供する回答
管理者は、これらのコンポーネントを移動、拡大縮小、削除できます。
### 設定
{% stepper %}
{% step %}
**Verkada Command で、All Products > Workplace > Guest に移動します。**
{% endstep %}
{% step %}
**左側のナビゲーションで、Guest Settings をクリックします。**
a. **オーガナイゼーション'** **> Guest Types の下で、** をクリックします **[Guest Types の管理]。**\
b. (任意)上部で、 **サイト** を選択し、個別サイトの Guest Type 用の訪問者バッジを作成するサイトを選択します。
{% endstep %}
{% step %}
**目的のゲストタイプを選択します。**
{% endstep %}
{% step %}
**バッジ設定をクリックします。**
{% endstep %}
{% step %}
**詳細モードをオンにします。**
{% endstep %}
{% endstepper %}
{% hint style="danger" %}
詳細モードで作成したバッジを印刷するには、Guest アプリがバージョン 2.17.0 以降である必要があります。
{% endhint %}
### 詳細モードでのバッジデザインルール
Advanced Designer のバッジデザインルールは、次の項目に適用できます。
1. 向き
2. 枠線のスタイル
3. 枠線の色
4. 背景
5. テキスト
6. 画像
***
## FAQ
選択式の質問をバッジデザインルールに関連付けることはできますか?
はい。バッジデザインルールは、1 回のみの回答を許可する選択式の質問に関連付ける必要があり、選択式の質問オプション **複数回答を許可** は無効にする必要があります。
バッジロゴの要件は何ですか?
バッジロゴは、幅が 1000 ピクセル以上 5000 ピクセル以下、かつ高さが最低 200 ピクセルの透過 PNG ファイルである必要があります。
バッジのテキスト、画像、またはロゴのサイズを変更できますか?
はい。バッジのコンテンツは詳細モードでサイズ変更できます。
***
{% hint style="info" %}
**実際の動きを見ますか?** こちらをチェック [ビデオチュートリアル](https://www.youtube.com/watch?v=NZBiwBRBky4).
{% endhint %}
---
# Agent Instructions
This documentation is published with GitBook. GitBook is the documentation platform designed so that both humans and AI agents can read, navigate, and reason over technical content effectively. Learn more at gitbook.com.
## Querying This Documentation
If you need additional information that is not directly available in this page, you can query the documentation by asking a question.
Perform an HTTP GET request on the following URL with the `ask` and `goal` query parameters:
```
GET https://help.verkada.com/guest/ja/she-ding/configure-guest-types/design-a-visitor-badge-in-guest.md?ask=&goal=
```
`ask` is the immediate question: it should be specific, self-contained, and written in natural language.
`goal` is what the user is ultimately trying to achieve, the reason they need the answer. Sharing it helps GitBook give you a better, more relevant answer. A goal is most helpful when it describes the outcome the user wants rather than restating the question. For example, with `ask=how do I create an API token`, a goal like `automate deployments from our CI pipeline` lets GitBook tailor the answer to that use case.
The response will contain a direct answer to the question and relevant excerpts and sources from the documentation.
Use this mechanism when the answer is not explicitly present in the current page, you need clarification or additional context, or you want to retrieve related documentation sections.