> For the complete documentation index, see [llms.txt](https://help.verkada.com/llms.txt). Markdown versions of documentation pages are available by appending `.md` to page URLs; this page is available as [Markdown](https://help.verkada.com/guest/ja/purint/epson-printer-setup-guide.md).
# Epson プリンターのセットアップガイド
Verkada Guest と Mailroom 用に Epson プリンターを設定
Epson CW-C4000u は、Verkada Guest でサポートされているカラーラベルプリンターです。これはインクジェットプリンターで、4" x 3" のダイカットラベルロールが必要です。ラベルを自動印刷するには、プリンターを Guest iPad に接続できます。
{% hint style="info" %}
Epson C4000 プリンターは、Verkada の10年保証の対象です。
{% endhint %}
***
## Epson CW-C4000u の開梱
Verkada から直接注文した Epson CW-C4000u プリンターは、メーカー純正の梱包で出荷され、プリンターとインクが含まれます。このパッケージにはサンプルラベルのロールも含まれます、 **ただし、これらは Verkada Guest と互換性がありません。** Verkada Guest で使用するには、ACCX-LBL-PRT-2 カラーラベルロールの使用が推奨されます。
{% stepper %}
{% step %}
**プリンターを箱から取り出します。**
{% endstep %}
{% step %}
**プリンターの外側と内部にある保護材をすべて取り除きます。**
{% endstep %}
{% step %}
**電源アダプターを組み立てます。**
* アダプターの DC コネクターをプリンターに差し込みます。
* AC ケーブルコネクターをアダプターに差し込みます。
* AC ケーブルをアース付きのコンセントに差し込みます。
{% endstep %}
{% step %}
**電源 LED が点灯するまで電源ボタンを押し続けます。言語と日時の設定を行います。**
{% endstep %}
{% step %}
**指示に従ってインクカートリッジを振ってから、カートリッジを取り付けます。画面上の指示に従ってインクを充填します。インク充填プロセスには約20分かかります。初回充填ではかなりの量のインクを使用する場合があります。**
{% endstep %}
{% step %}
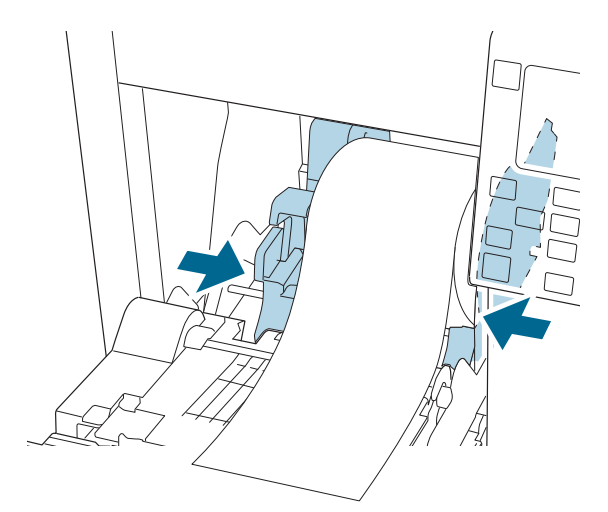
**ラベルロールをプリンターに挿入します。プリンターの電源が入っている間に:**
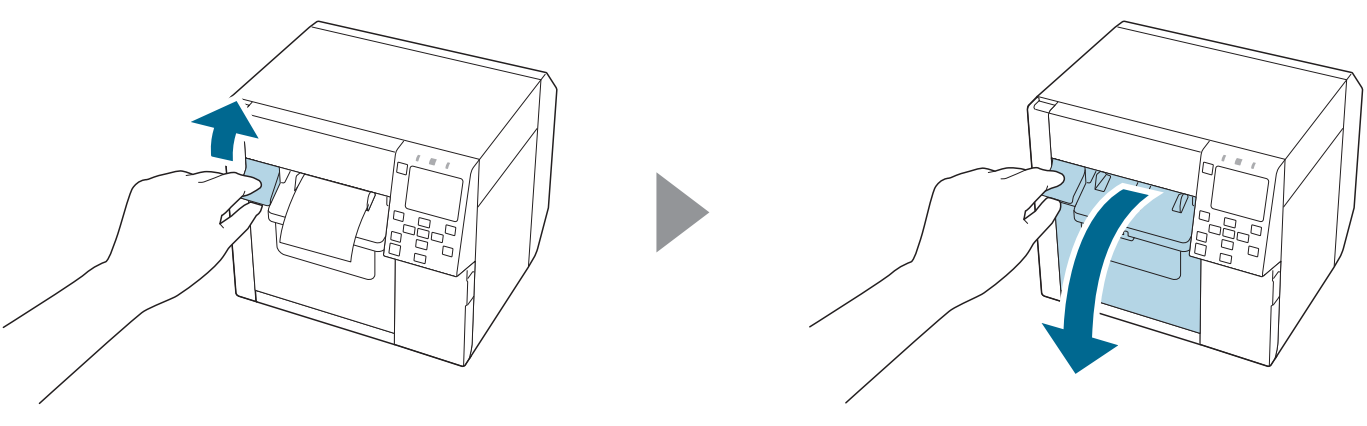
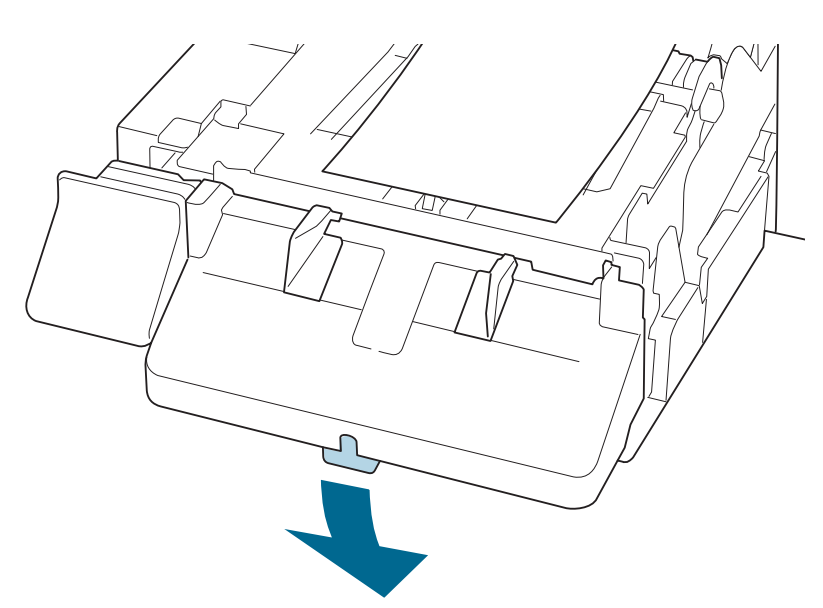
a. 前面カバーを開きます。
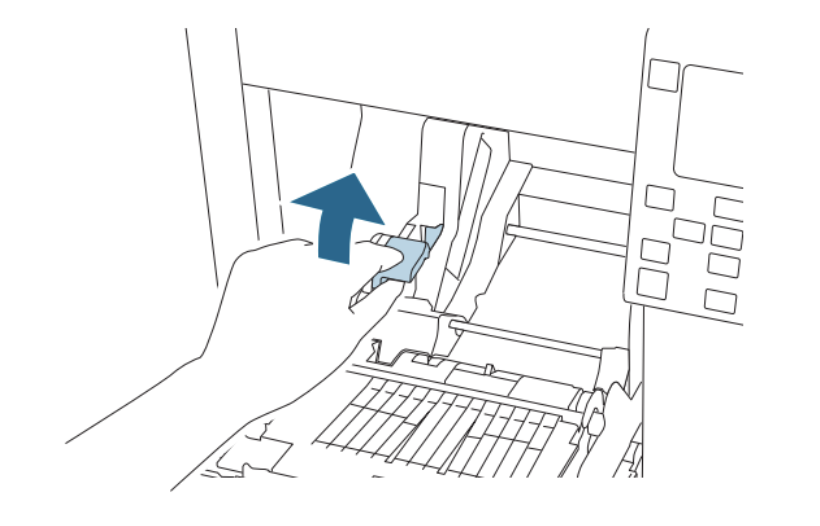
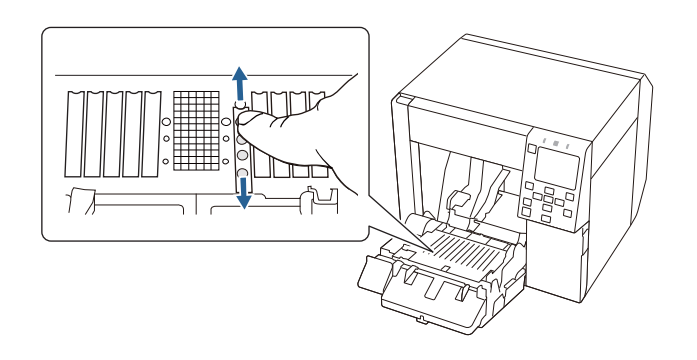
b. ロール紙ガイドのロックレバーを上げます。
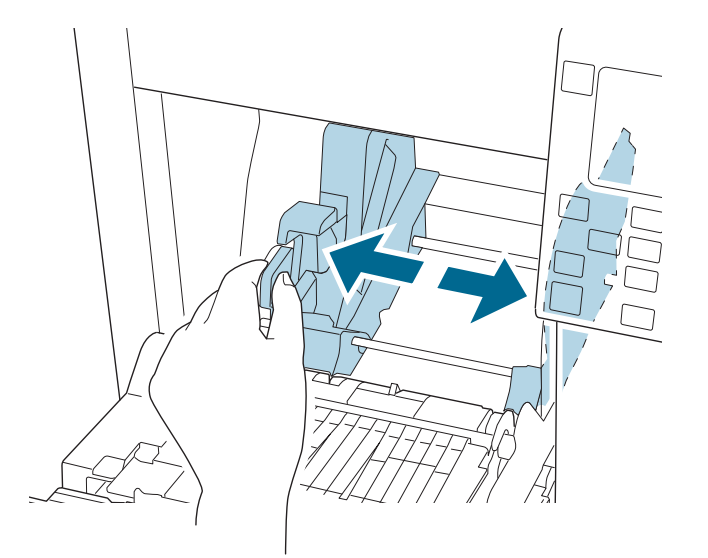
c. ロール紙ガイドを止まるところまで外側にスライドさせます。
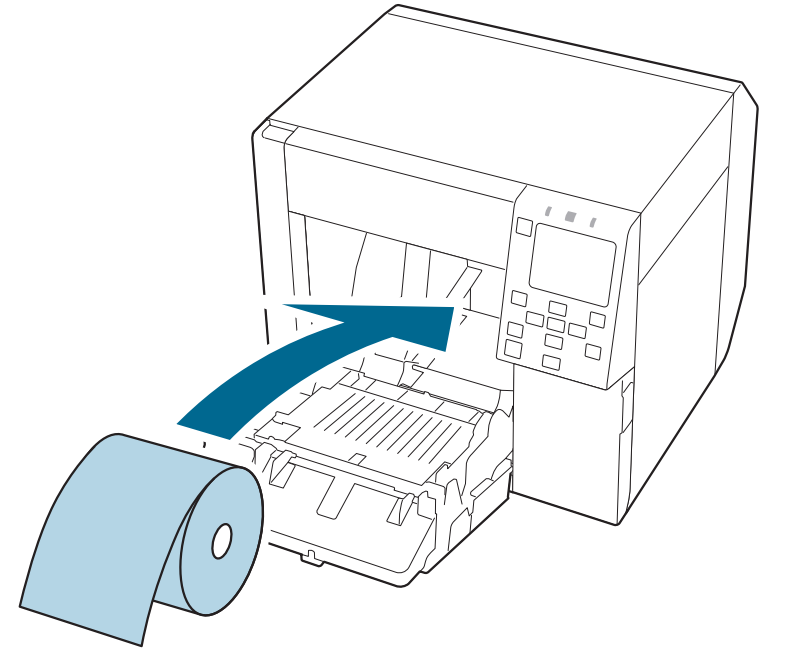
d. ロール紙ガイドのロックレバーを下げ、印刷面を上にして用紙を挿入します。
e. ロール紙ガイドのロックレバーを上げます。ロール紙ガイドを用紙に合わせてスライドさせます。
f. ロール紙ガイドのロックレバーを下げます。
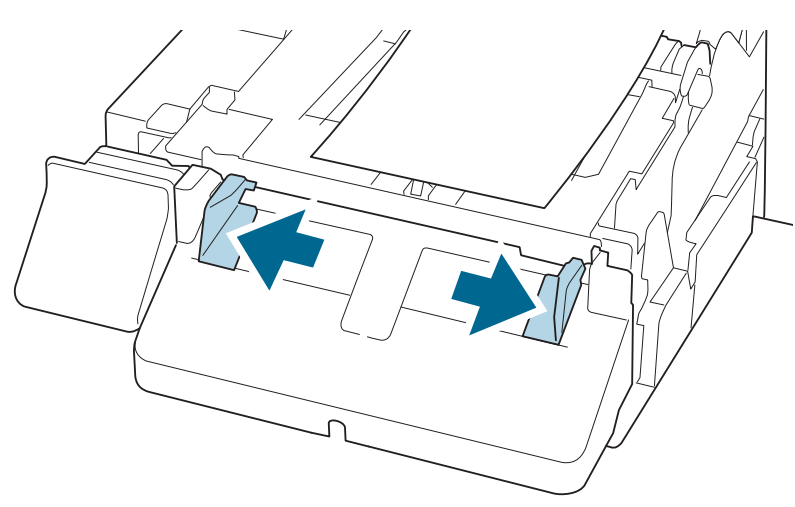
g. シャッターをラベルロールの幅に合わせて調整します。
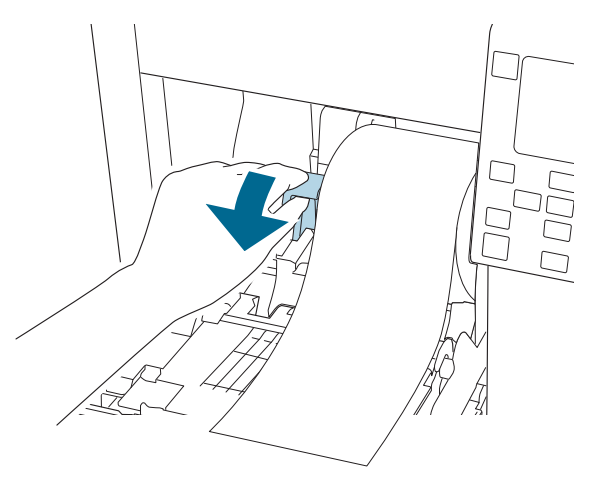
h. 紙排出ガイドのロックレバーを下げます。
i. 紙排出ガイドを外側にスライドさせます。
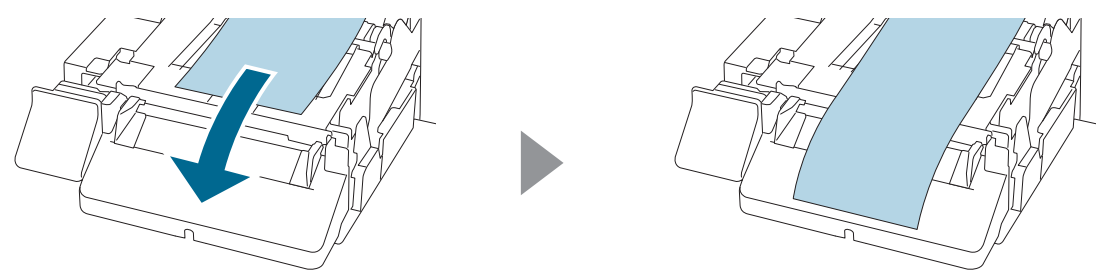
j. 図のように用紙を引き出します。
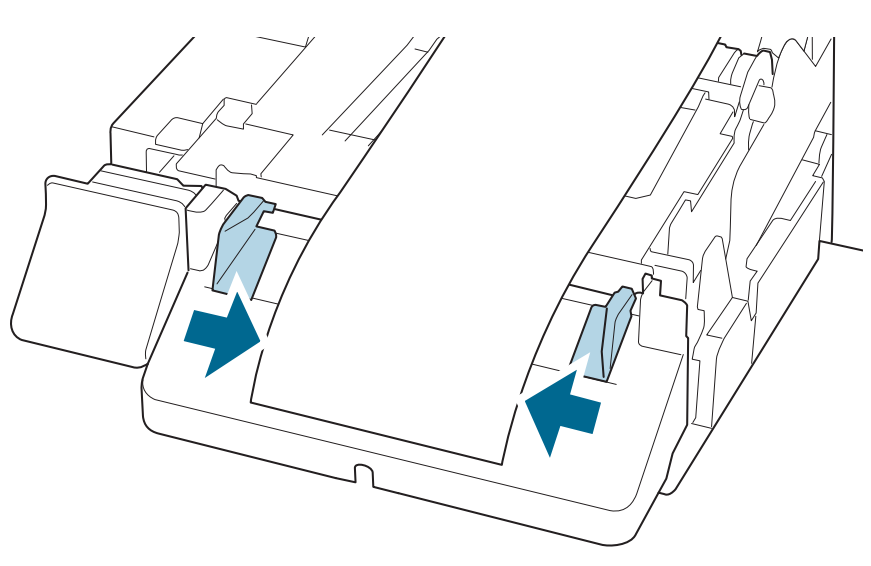
k. 用紙を手で押さえながら、紙排出ガイドを用紙に合わせてスライドさせます。
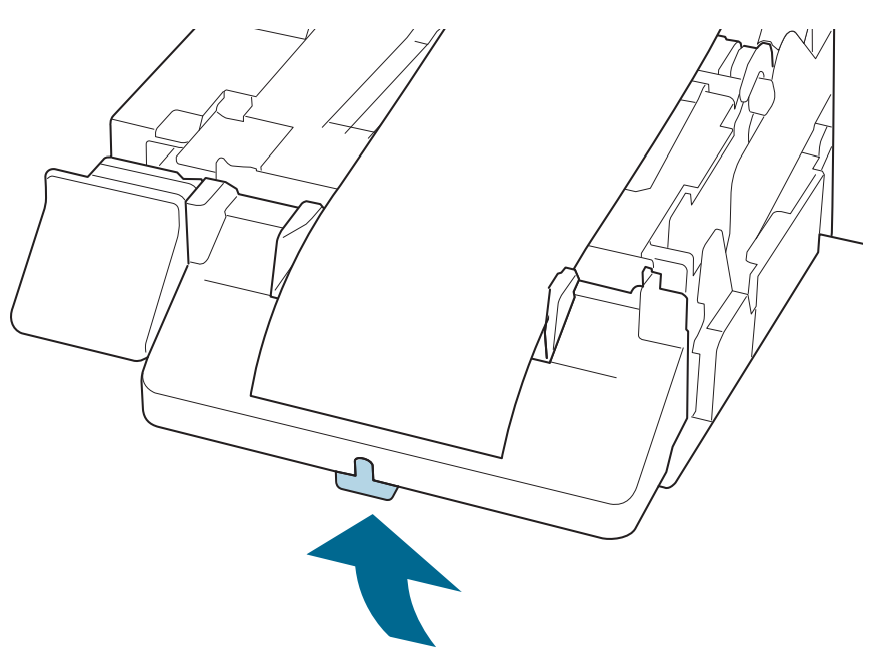
l. 紙排出ガイドのロックレバーを、カチッと音がするまで上げます。
m. ロール紙の先端を引き出し、前面カバーを閉じます。
{% endstep %}
{% endstepper %}
***
## プリンターのネットワーク接続の設定
CW-C4000u はネットワークへのイーサネット接続をサポートしています。
{% stepper %}
{% step %}
**背面の LAN ポートを使用して、プリンターをネットワークに接続します。**
{% endstep %}
{% step %}
**メニュー > 一般設定 > ネットワーク設定 > ネットワークステータス > 有線 LAN ステータス に移動して、プリンターの IP アドレスを確認します。**
{% endstep %}
{% endstepper %}
***
{% hint style="info" %}
**実際の動きを見ますか?** こちらをチェック [ビデオチュートリアル](https://www.youtube.com/watch?v=LZvmhKkFdww).
{% endhint %}
---
# Agent Instructions
This documentation is published with GitBook. GitBook is the documentation platform designed so that both humans and AI agents can read, navigate, and reason over technical content effectively. Learn more at gitbook.com.
## Querying This Documentation
If you need additional information that is not directly available in this page, you can query the documentation by asking a question.
Perform an HTTP GET request on the following URL with the `ask` and `goal` query parameters:
```
GET https://help.verkada.com/guest/ja/purint/epson-printer-setup-guide.md?ask=&goal=
```
`ask` is the immediate question: it should be specific, self-contained, and written in natural language.
`goal` is what the user is ultimately trying to achieve, the reason they need the answer. Sharing it helps GitBook give you a better, more relevant answer. A goal is most helpful when it describes the outcome the user wants rather than restating the question. For example, with `ask=how do I create an API token`, a goal like `automate deployments from our CI pipeline` lets GitBook tailor the answer to that use case.
The response will contain a direct answer to the question and relevant excerpts and sources from the documentation.
Use this mechanism when the answer is not explicitly present in the current page, you need clarification or additional context, or you want to retrieve related documentation sections.