> For the complete documentation index, see [llms.txt](https://help.verkada.com/llms.txt). Markdown versions of documentation pages are available by appending `.md` to page URLs; this page is available as [Markdown](https://help.verkada.com/connectivity/ja/she-ding/enable-ipsec-site-to-site-vpn.md).
# IPsecサイト間VPNを有効にする
Verkada GatewayでIPsecサイト間VPNを設定する方法を学ぶ
Verkada ゲートウェイはサイト間 IPSec IKEv2 VPN クライアントとして動作できます。これにより、ゲートウェイは IPsec VPN サーバーに接続し、暗号化されたトラフィックをルーティングできます。ゲートウェイは、VPN を介して接続されたデバイスからのトラフィックのみをルーティングできます。接続されたデバイスのトラフィックをインターネット経由および VPN トンネル内でルーティングできるようにするには、VPN サーバー上で適切な送信ルールと NAT ルールを設定する必要があります。
{% hint style="info" %}
設定することを強く推奨します [Dynamic DNS ](/connectivity/ja/she-ding/add-cellular-gateway-to-command/set-up-dynamic-dns-for-cellular-gateways.md)静的なパブリック IP のない SIM カードを使用している場合は、ゲートウェイ上で。これにより、動的なパブリック IP が割り当てられたときに、VPN が切断されたり非アクティブになったりするのを防ぐのに役立ちます。
{% endhint %}
***
## ゲートウェイで IPsec VPN を設定する
{% stepper %}
{% step %}
**Verkada Command で、\[All Products] > \[Gateways] に移動します。**
{% endstep %}
{% step %}
**設定するゲートウェイを選択します。**
{% endstep %}
{% step %}
**右上で \[Settings] をクリックします。**
{% endstep %}
{% step %}
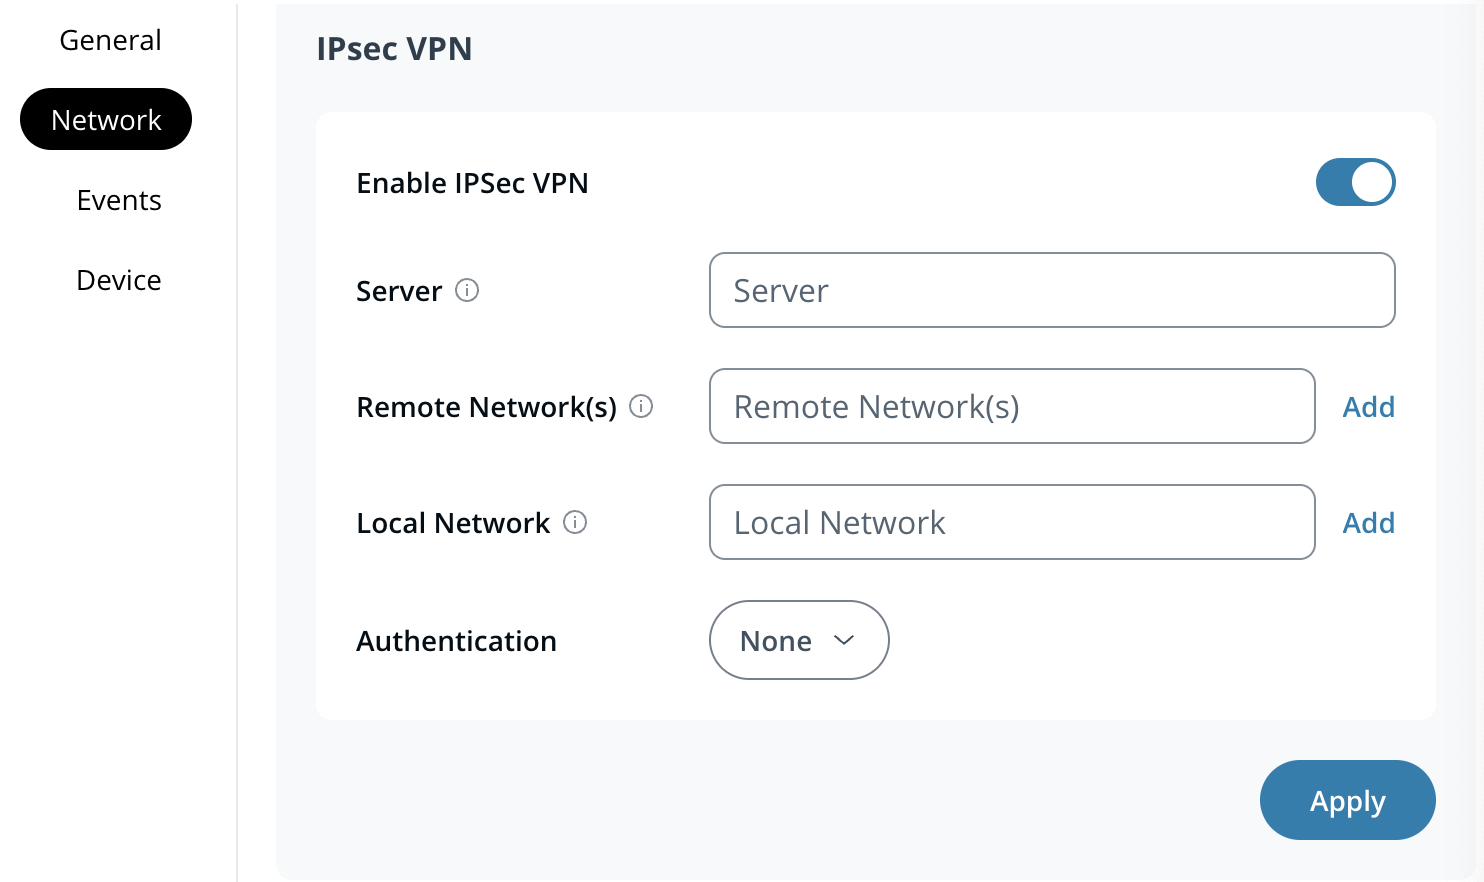
**\[Network] > \[IPsec VPN] で、\[Enable IPSec VPN] をオンにします。**
{% endstep %}
{% step %}
**\[Server] 欄に VPN サーバーの IP またはドメイン名を入力します。**
{% endstep %}
{% step %}
**ゲートウェイは 2 つの認証タイプをサポートしています:**
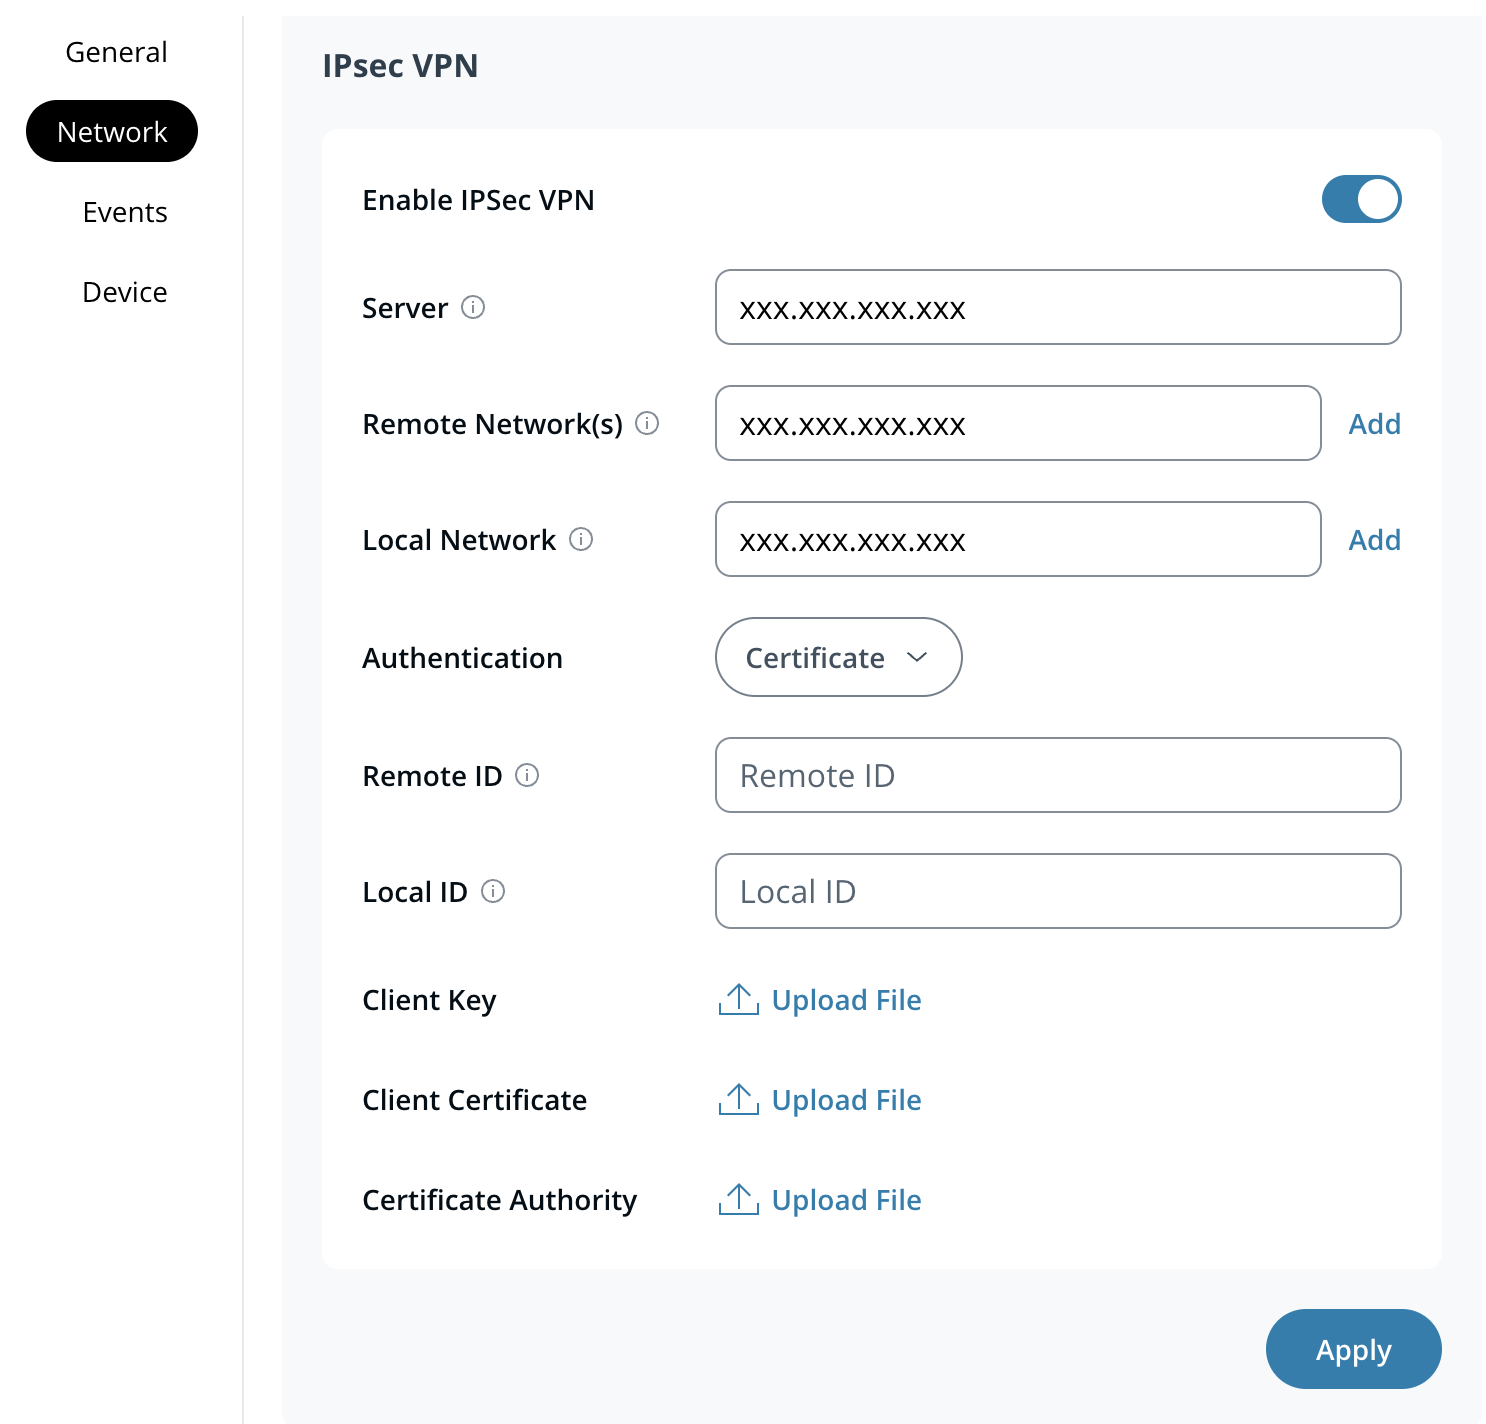
a.(手順 7 を参照) **証明書**:必要 *認証局* 証明書、 *クライアント* *証明書、* および *キー。*\
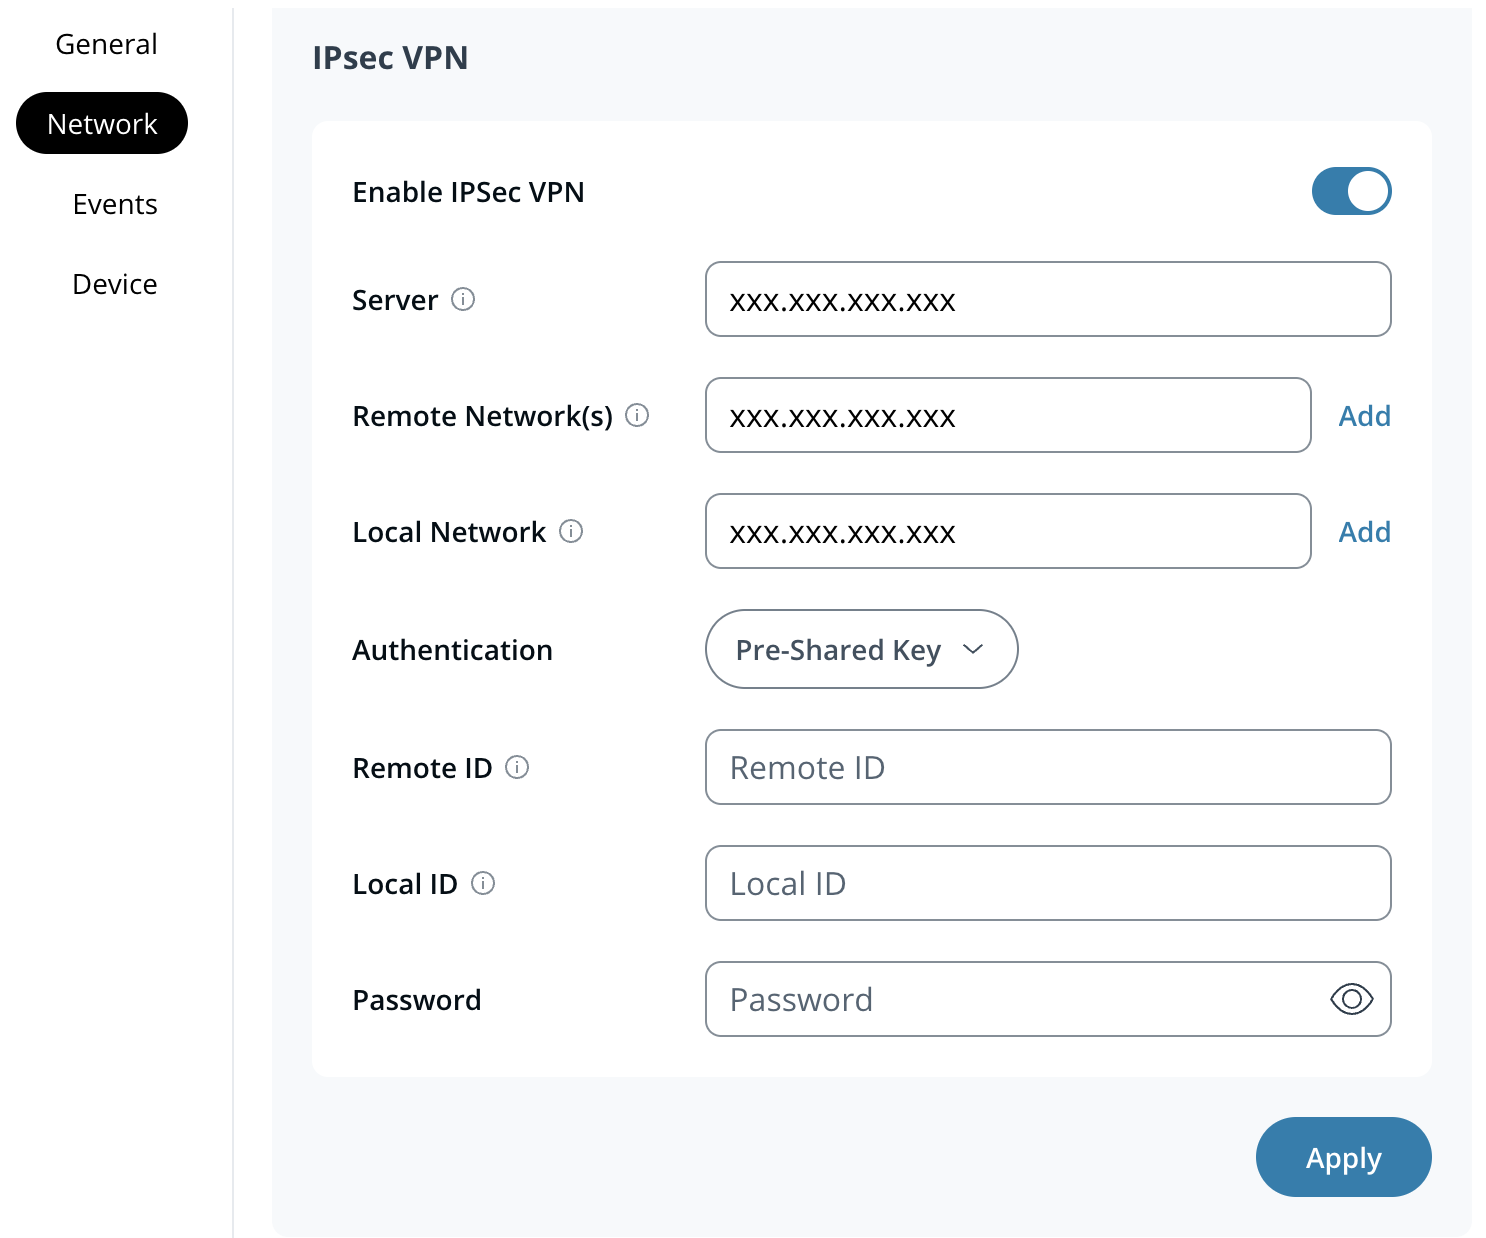
b.(手順 8 を参照) **事前共有キー**:共有キーが必要です。
{% endstep %}
{% step %}
**[Authentication]ドロップダウンで、[証明書]を選択します。**
a.[ **Remote ID]に、** リモート証明書を入力します *subjectAltName* または *サブジェクト DN*。\
b.[ **Local ID]に、** ローカル証明書を入力します *subjectAltName* または *サブジェクト DN*.
c. 次の項目をアップロードします: **Client Key、** **Client Certificate**、および **認証局** 次の証明書を *.pem* 形式でアップロードします。 **注:** クライアントキーと証明書を生成し、認証局を設定する手順は [こちら](https://docs.strongswan.org/docs/5.9/pki/pkiQuickstart.html)にあります。\
d. 手順 9 に進みます。
{% endstep %}
{% step %}
**[Authentication]ドロップダウンで、[事前共有キー]を選択します。**
a.[ **Remote ID]に、** 事前共有キーのリモート ID を入力します。\
b.[ **Local ID]に、** 事前共有キーのローカル ID を入力します。\
c.[ **Password]、** 事前共有キーのパスワードを入力します。
{% endstep %}
{% step %}
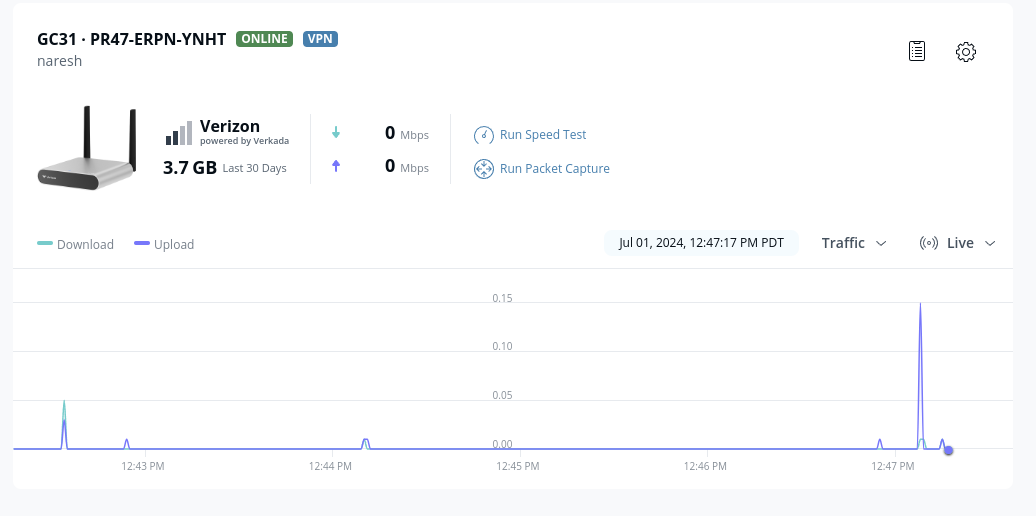
**[Apply]をクリックし、次に[Confirm]をクリックして保存します。これでゲートウェイ名の横に VPN バッジが表示され、接続が成功したことを示します。**
{% endstep %}
{% endstepper %}
***
## VPN サーバーを設定する
VPN サーバーを設定する際は、VPN トンネルを確立し、サーバーとクライアント間のデータ転送を有効にするために、特定の詳細を設定する必要があります。
#### 対応する VPN ルーティングタイプ
* ポリシーベースルーティング
#### 対応する鍵交換バージョン
* IKEv2
{% hint style="warning" %}
Perfect Forward Secrecy (PFS) は、VPN クライアントとしてのゲートウェイではサポートされていません。
{% endhint %}
#### IKE フェーズ 1 およびフェーズ 2 でサポートされる暗号スイート
* 暗号化
* AES 128
* AES 256
* ハッシュ
* SHA 256
* SHA 384
* SHA 512
* DH グループ
* グループ 14
{% hint style="info" %}
[DDNS を設定する](/connectivity/ja/she-ding/add-cellular-gateway-to-command/set-up-dynamic-dns-for-cellular-gateways.md) 対応している無料の DDNS プロバイダーを使用して、VPN がクライアントの Dynamic Public IP アドレスに常に接続されるようにします。これにより、指定された「hostname」は常に VPN クライアント上の現在のパブリック IP アドレスに解決されます。
{% endhint %}
---
# Agent Instructions
This documentation is published with GitBook. GitBook is the documentation platform designed so that both humans and AI agents can read, navigate, and reason over technical content effectively. Learn more at gitbook.com.
## Querying This Documentation
If you need additional information that is not directly available in this page, you can query the documentation by asking a question.
Perform an HTTP GET request on the following URL with the `ask` and `goal` query parameters:
```
GET https://help.verkada.com/connectivity/ja/she-ding/enable-ipsec-site-to-site-vpn.md?ask=&goal=
```
`ask` is the immediate question: it should be specific, self-contained, and written in natural language.
`goal` is what the user is ultimately trying to achieve, the reason they need the answer. Sharing it helps GitBook give you a better, more relevant answer. A goal is most helpful when it describes the outcome the user wants rather than restating the question. For example, with `ask=how do I create an API token`, a goal like `automate deployments from our CI pipeline` lets GitBook tailor the answer to that use case.
The response will contain a direct answer to the question and relevant excerpts and sources from the documentation.
Use this mechanism when the answer is not explicitly present in the current page, you need clarification or additional context, or you want to retrieve related documentation sections.