> For the complete documentation index, see [llms.txt](https://help.verkada.com/llms.txt). Markdown versions of documentation pages are available by appending `.md` to page URLs; this page is available as [Markdown](https://help.verkada.com/connectivity/ja/she-ding/add-wi-fi-gateway-to-command.md).
# Wi-Fi GatewayをCommandに追加
自分のWi-Fi GatewayをVerkada Commandアカウントに追加する
GW31-E Outdoor Wi-Fi Gateway は、電源と Wi-Fi があればどこでも Verkada を簡単に導入でき、駐車場、フェンス沿い、屋外施設など配線が難しい場所にも対応します。
{% hint style="danger" %}
作成する必要があります。 [Verkada Command アカウント](https://command.verkada.com/register) そして次の権限でログインします [Org Admin](/command/ja/yzto/roles-and-permissions-for-command.md) ゲートウェイを有効化して設定する権限。
{% endhint %}
***
## ゲートウェイを登録する
{% stepper %}
{% step %}
**Verkada Command で、All Products > Devices に移動します。**
{% endstep %}
{% step %}
**Devices で、右上の Add Devices をクリックします。**
{% endstep %}
{% step %}
**ゲートウェイのシリアル番号を入力するか、スキャンします。**
{% endstep %}
{% step %}
**追加すると、デバイスは Unassigned Devices サイトで見つけることができます。**
{% endstep %}
{% endstepper %}
***
## ゲートウェイをセットアップする
### Command
{% hint style="danger" %}
Command から Wi-Fi を設定できるようにするには、ゲートウェイを PoE IN ポート経由で WAN アップリンクに接続する必要があります。
{% endhint %}
{% stepper %}
{% step %}
**Verkada Command で、All Products > Devices に移動します。**
{% endstep %}
{% step %}
**My Unassigned Devices サイトで、Wi-Fi ゲートウェイを選択します。**
{% endstep %}
{% step %}
**[General]の下:**
a. 一意の名前を入力します。\
b. サイトを選択します。\
c. 場所を入力します。
{% endstep %}
{% step %}
**[Wi-Fi]の下:**
a. Wi-Fi ネットワークを選択します。\
b. ネットワークの認証情報を入力します。\
c. クリック **適用**.
{% endstep %}
{% step %}
**ゲートウェイを WAN アップリンクから取り外します。**
{% endstep %}
{% endstepper %}
### Bluetooth(Command iOS アプリ)
{% hint style="danger" %}
Bluetooth は Command モバイルアプリからのみ検出できます。
{% endhint %}
{% stepper %}
{% step %}
**Command モバイルアプリを開き、オーガナイゼーション' にログインします。**
{% endstep %}
{% step %}
**左上の Add Device をクリックします。**
a. QR コードをスキャンするか、シリアル番号を入力します。\
b. クリック **デバイスを追加します。**
{% endstep %}
{% step %}
**Set Up Gateway をクリックします。**
a. 次の項目の下 **[General]:**
1. 一意の名前を入力します。
2. サイトを選択します。
3. 場所を入力します。
e. 次の項目の下 **ネットワーク**:
1. クリック **Wi-Fi ネットワークを選択します。**
2. Wi-Fi ネットワークを選択します。
3. ネットワークの認証情報を入力します。
{% endstep %}
{% step %}
**Done をクリックします。**
{% endstep %}
{% endstepper %}
### ローカルサーバーページ
{% stepper %}
{% step %}
**ゲートウェイを Ethernet ケーブルでノートパソコン/コンピュータに接続します。**
{% endstep %}
{% step %}
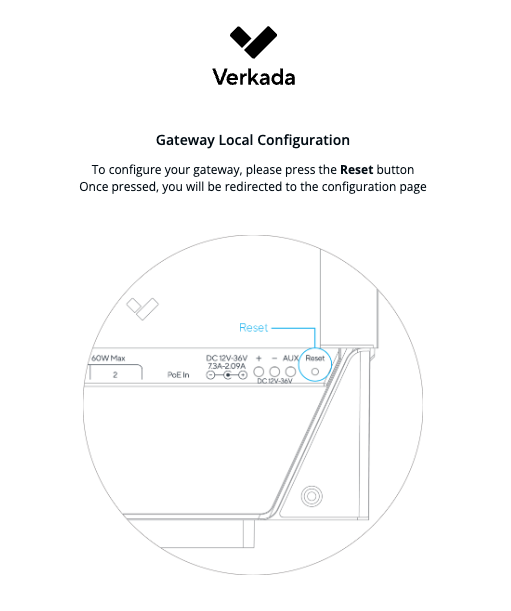
**ブラウザーを開いて入力します** [**192.168.1.1**](http://verkadagateway.com/) **ローカルのランディングページを開きます。**
{% endstep %}
{% step %}
**画面の指示に従ってローカルサーバーページに進みます。**
{% endstep %}
{% step %}
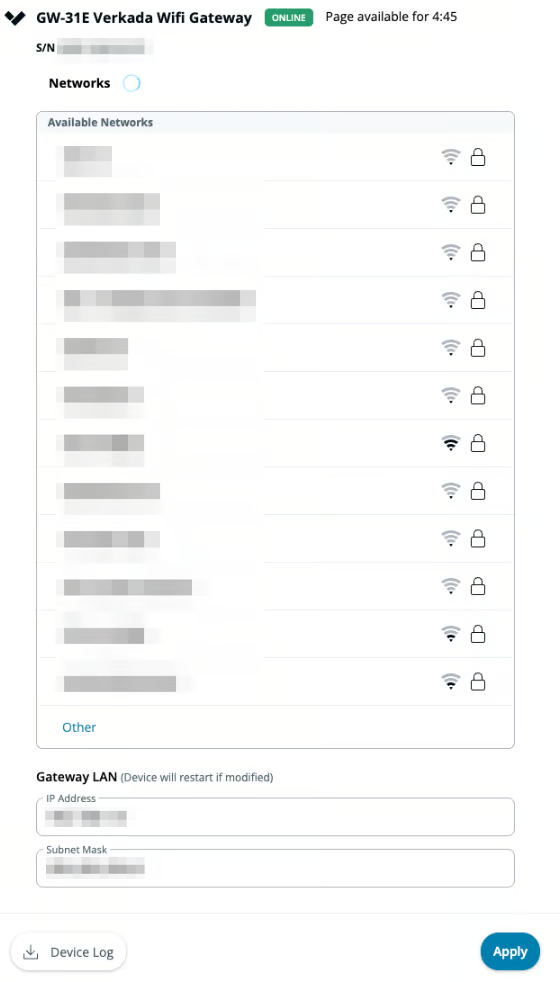
**デバイスは利用可能な Wi-Fi ネットワークをスキャンします。接続したいネットワークを選択し、認証情報を入力します。**
{% endstep %}
{% step %}
**Apply をクリックします。**
{% endstep %}
{% endstepper %}
{% hint style="warning" %}
ローカルサーバーページは、自動更新されるまで 5 分間開いたままになります。
{% endhint %}
---
# Agent Instructions
This documentation is published with GitBook. GitBook is the documentation platform designed so that both humans and AI agents can read, navigate, and reason over technical content effectively. Learn more at gitbook.com.
## Querying This Documentation
If you need additional information that is not directly available in this page, you can query the documentation by asking a question.
Perform an HTTP GET request on the following URL with the `ask` and `goal` query parameters:
```
GET https://help.verkada.com/connectivity/ja/she-ding/add-wi-fi-gateway-to-command.md?ask=&goal=
```
`ask` is the immediate question: it should be specific, self-contained, and written in natural language.
`goal` is what the user is ultimately trying to achieve, the reason they need the answer. Sharing it helps GitBook give you a better, more relevant answer. A goal is most helpful when it describes the outcome the user wants rather than restating the question. For example, with `ask=how do I create an API token`, a goal like `automate deployments from our CI pipeline` lets GitBook tailor the answer to that use case.
The response will contain a direct answer to the question and relevant excerpts and sources from the documentation.
Use this mechanism when the answer is not explicitly present in the current page, you need clarification or additional context, or you want to retrieve related documentation sections.