> For the complete documentation index, see [llms.txt](https://help.verkada.com/llms.txt). Markdown versions of documentation pages are available by appending `.md` to page URLs; this page is available as [Markdown](https://help.verkada.com/command/ja/ganaizshon/integrations/verkada-splunk-integration.md).

# Splunk

Splunk は、組織がさまざまなサードパーティソースからのデータを検索、モニター、分析するのを支援するソフトウェアプラットフォームです。Verkada では、ユーザーが組み込みの統合機能を通じて、自社の Command オーガナイゼーション' から Splunk インスタンスへ情報を送信する効率的なワークフローを構築できます。

Verkada を Splunk と統合すると、ビデオ監視データを運用データ全体の文脈の中で一元化して分析でき、より良いインサイトと意思決定が可能になります。この実装を使用すると、デバイス通知を含む、組織内のすべてのカメラにわたる人物数と車両数を取り込めます。

{% hint style="danger" %}
始める前に、次のものが必要です：

* Admin アクセス権を持つアクティブな Splunk インスタンス。詳細はこちら： [Commandのロールと権限](/command/ja/yzto/roles-and-permissions-for-command.md).
* Verkada 組織への Org Admin 権限。
* 有効な Verkada API キー。方法はこちら： [Verkada API キーを生成する](https://apidocs.verkada.com/reference/quick-start-guide)
  {% endhint %}

統合を設定する方法は 2 つあります：

* [Splunk Enterprise ソフトウェアをダウンロードしてインストールする](#h_c45403a4de)
* [Splunkbase からソフトウェアをダウンロードしてインストールする](#h_7b8e057156)

***

## Splunk Enterprise ソフトウェアをダウンロードしてインストールする

{% stepper %}
{% step %}
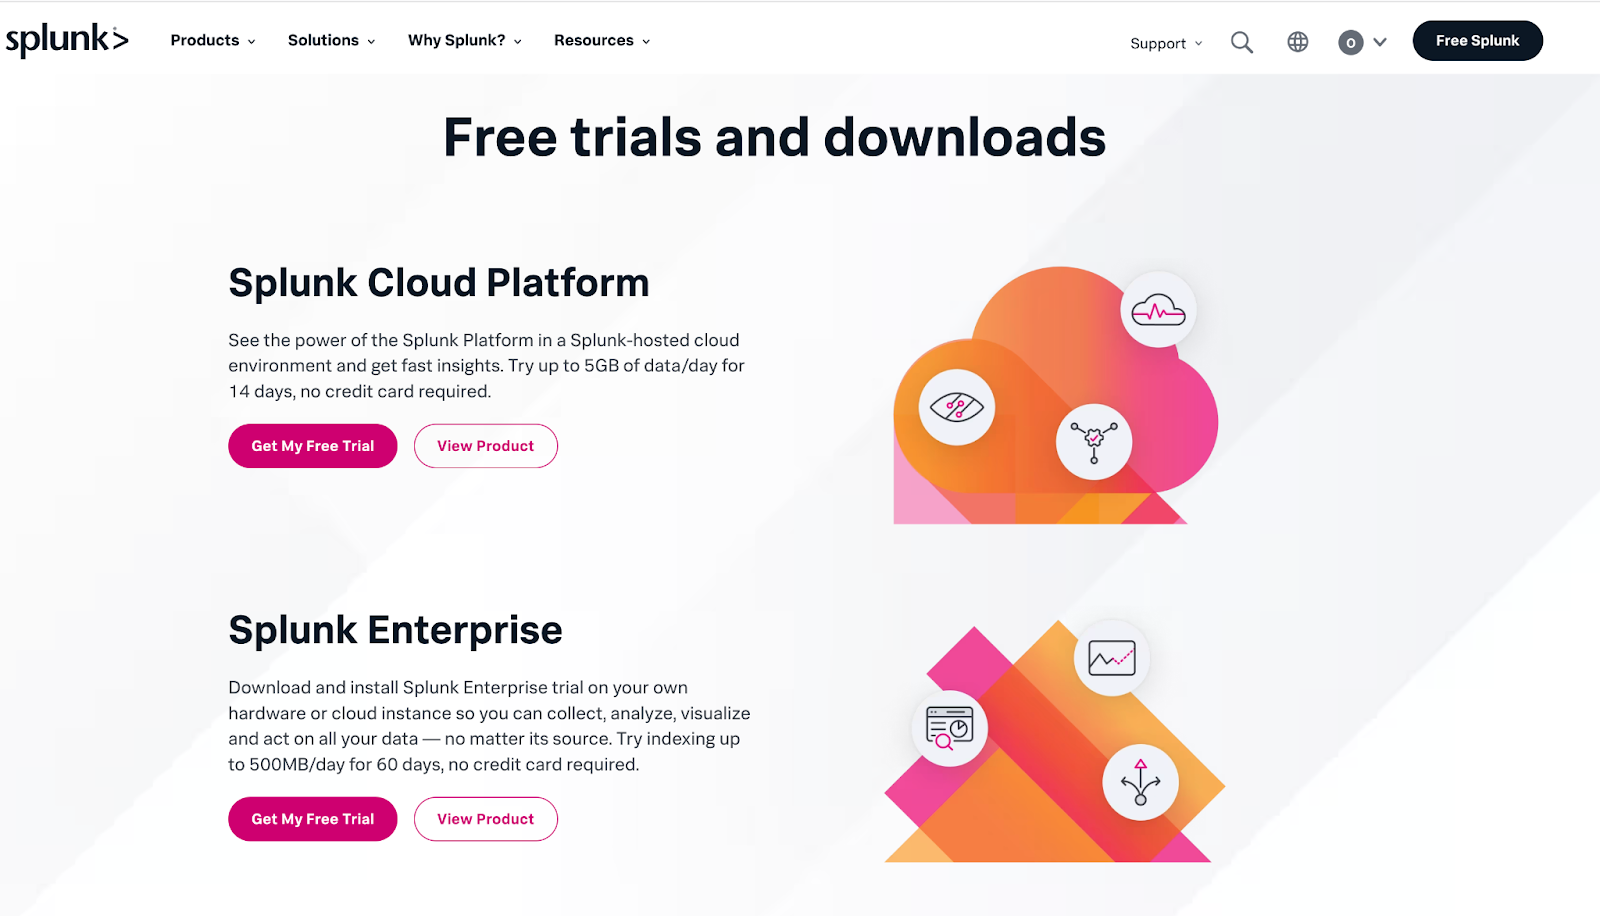
**Splunk Enterprise ソフトウェアを以下からダウンロードしてください：** [**https://www.splunk.com/en\_us/download.html**](https://www.splunk.com/en_us/download.html)**。すでに Splunk Enterprise アカウントをインストールして設定している場合は、手順 4 に進んでください。**

<div align="left" data-with-frame="true"><img src="/files/551a27719c5f0209f96f7f1a5bc029eeea41b63c" alt="" width="800"></div>
{% endstep %}

{% step %}
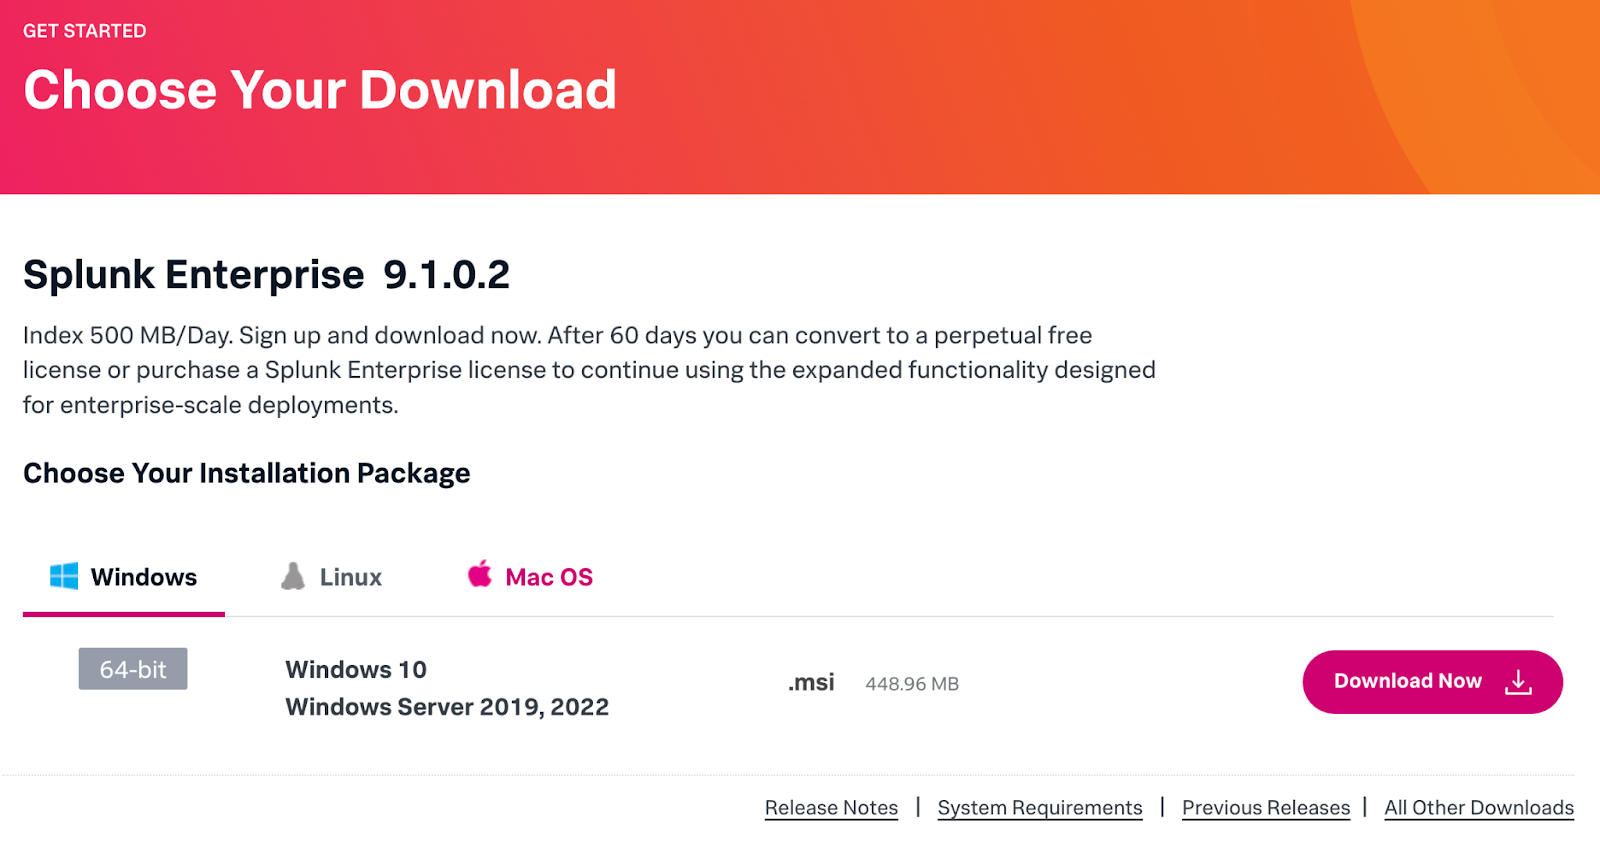
**使用しているオペレーティングシステム（Windows、Linux、または MacOS）に応じて、対応するインストールパッケージを選択します。より簡単に設定できるため、.dmg パッケージのダウンロードを推奨します。**

<div align="left" data-with-frame="true"><img src="/files/dc42b71ca6e0b808b9212914ccf290a57186dbf3" alt="" width="800"></div>
{% endstep %}

{% step %}
**Splunk Enterprise パッケージのインストールが完了したら、アプリケーションを開きます。Terminal または PowerShell ウィンドウにリダイレクトされ、そこでアカウント資格情報（ユーザー名とパスワード）を作成できます。**

\
**重要**：これらの資格情報は保管してください。後で Splunk にログインして Verkada の統合を設定する際に必要になります。アカウントを作成すると、アカウント確認用のメールが届くはずです。受信トレイを確認し、セットアップを進める前にこの手順を完了してください。
{% endstep %}

{% step %}
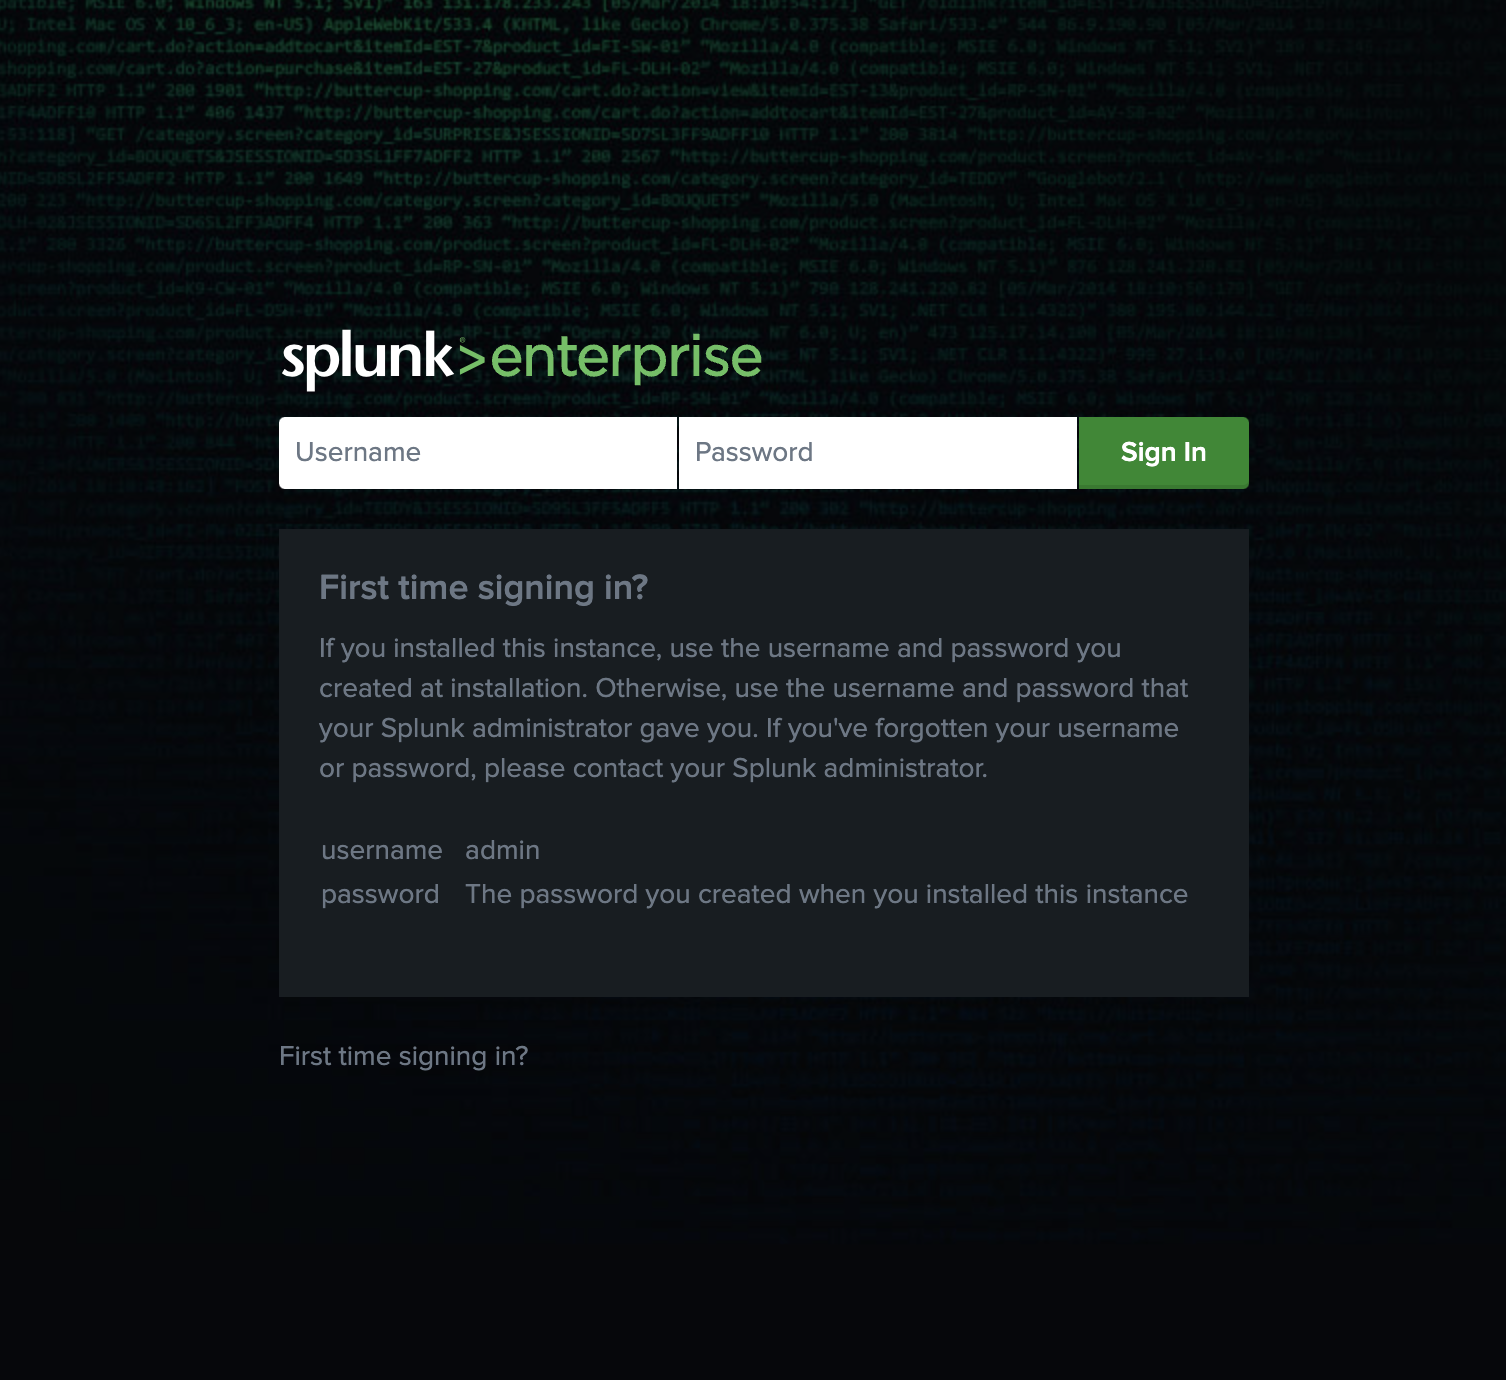
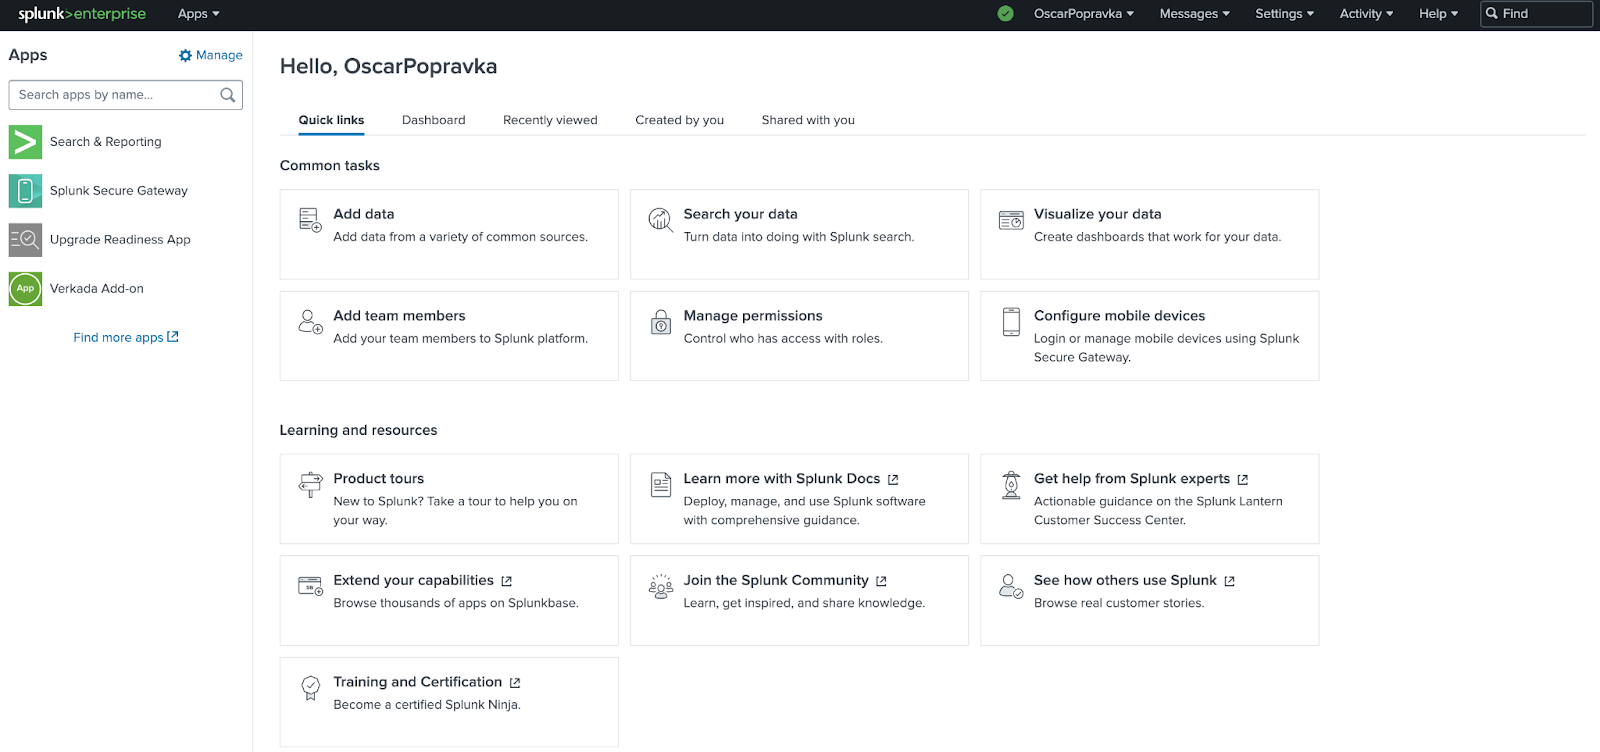
**ユーザー名とパスワードを設定すると、Splunk アプリケーションは自動的に開くはずです。手順 3 で設定した資格情報でログインしてください。Splunk Enterprise ウィンドウが開かない場合は、次の URL にアクセスしてログインしてください：**

\ <kbd><http://localhost:8000/en-US/account/login?return\\_to=%2Fen-US%2Fapp%2Flauncher%2Fhome></kbd>

<div align="left" data-with-frame="true"><img src="/files/90264fc284fda519c40d6207987a9b6595816e27" alt="" width="753"></div>

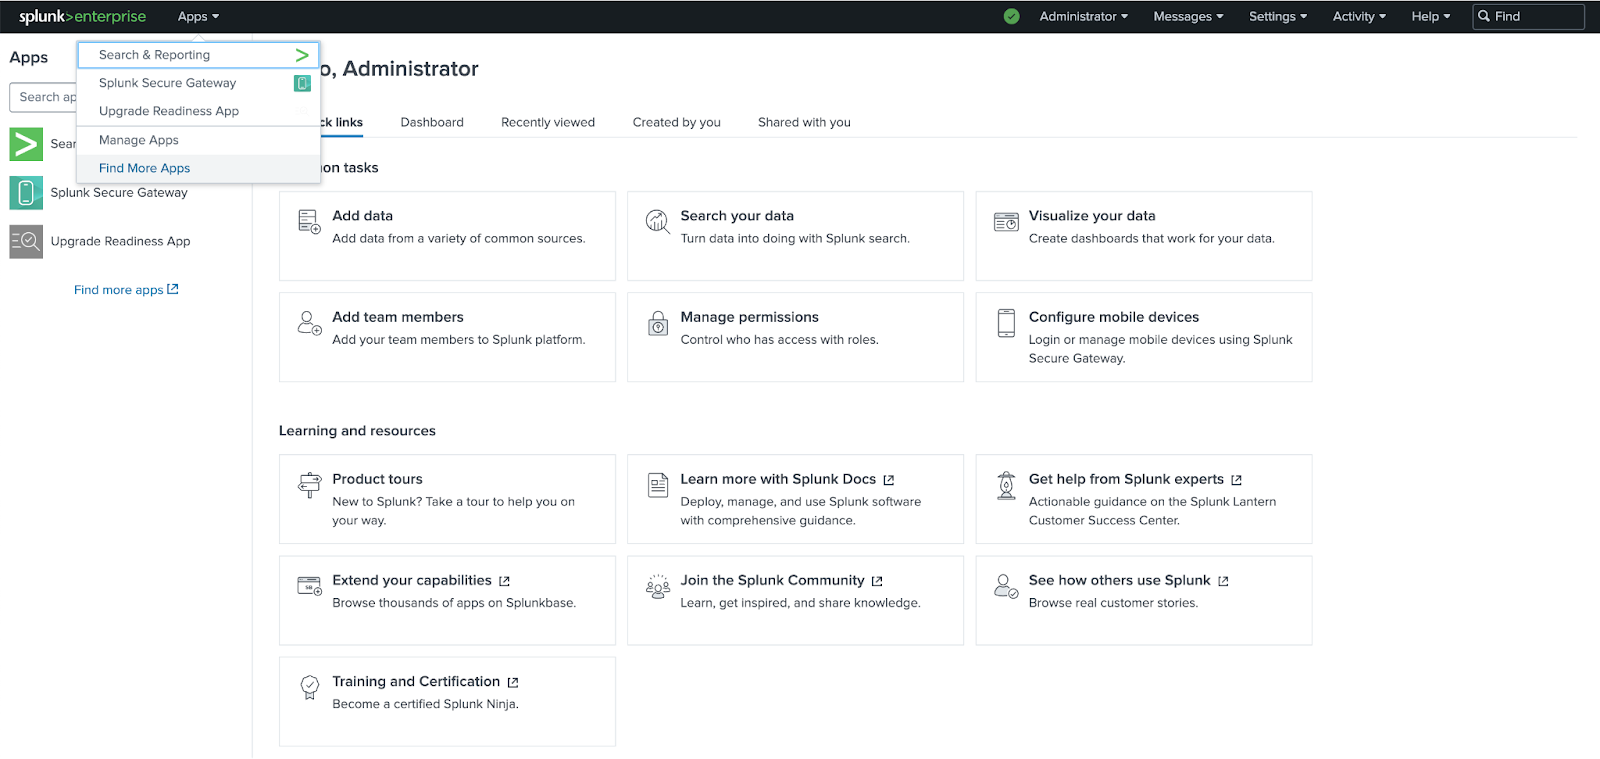
Splunk のホームページでは、Verkada を含むさまざまな統合用のすべてのアプリケーションが管理・設定されます。
{% endstep %}

{% step %}
**左上の Apps ドロップダウンをクリックし、「Find more apps」を選択します。**

<div align="left" data-with-frame="true"><img src="/files/e7547c37ec9f529ba7b093447172f30a8d5add17" alt="" width="800"></div>
{% endstep %}

{% step %}
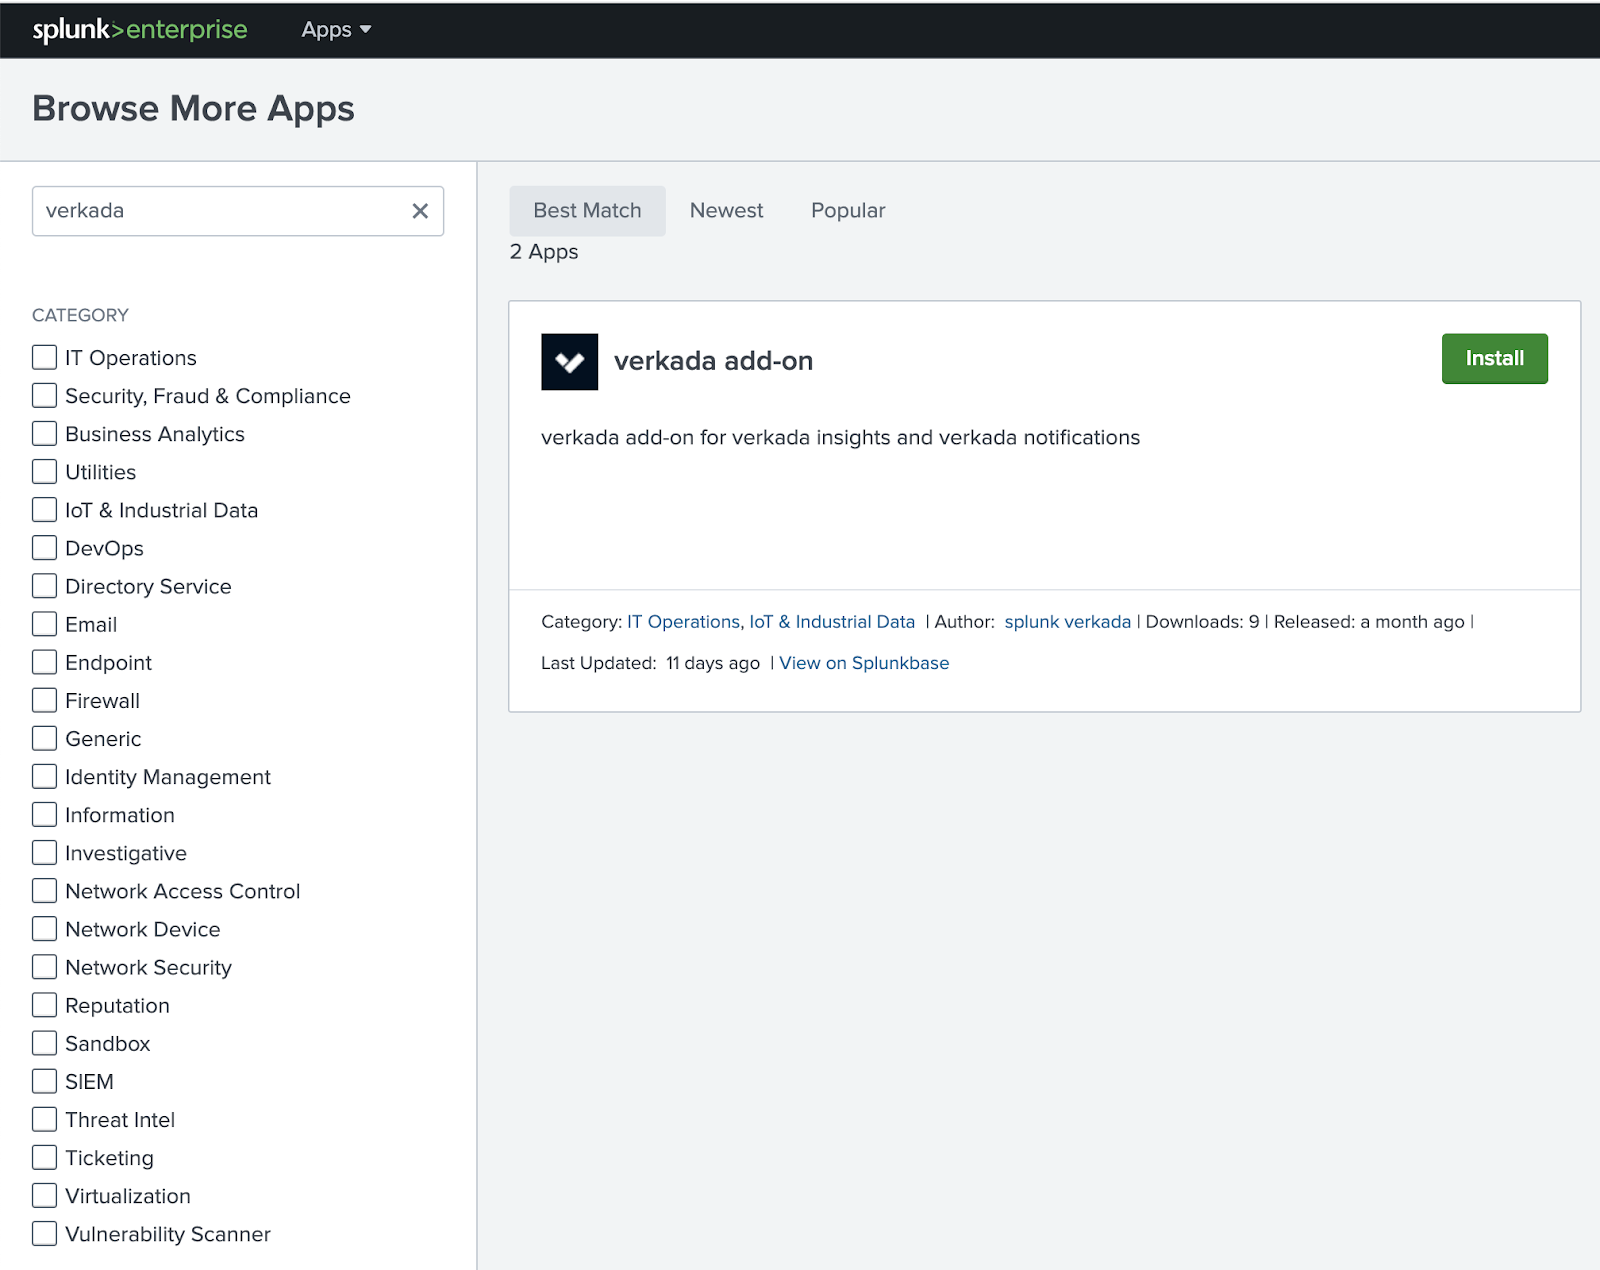
**Browse More Apps で：**

a. 検索ボックスに次を入力します： **Verkada**。すると 2 つのアプリケーションが表示されます。\
b. 最も最近更新された Verkada アプリケーション（**Verkada アドオン**）。\
c. 次をクリックします： **インストール** を Verkada アプリに対して実行します。

<div align="left" data-with-frame="true"><img src="/files/7246bef98ff6914388989c20db7cb6f33b7a4bbe" alt="" width="800"></div>
{% endstep %}

{% step %}
**Login and Install で：**

1. アカウントを確認するために、Splunk アカウントの資格情報を入力します。

{% hint style="info" %}
これらの資格情報は、手順 3 で作成したものとは異なります。アプリをインストールするには、通常の Splunk アカウントにログインするときに使用したメールアドレスとパスワードを使います。（<https://www.splunk.com/>).
{% endhint %}

2. クリック **同意してインストール**.
   {% endstep %}
   {% endstepper %}

***

## Splunkbase からソフトウェアをダウンロードしてインストールする

もし [上記のインストール方法](#h_c45403a4de) が機能しない場合は、ここで説明する別の方法があります。

{% stepper %}
{% step %}
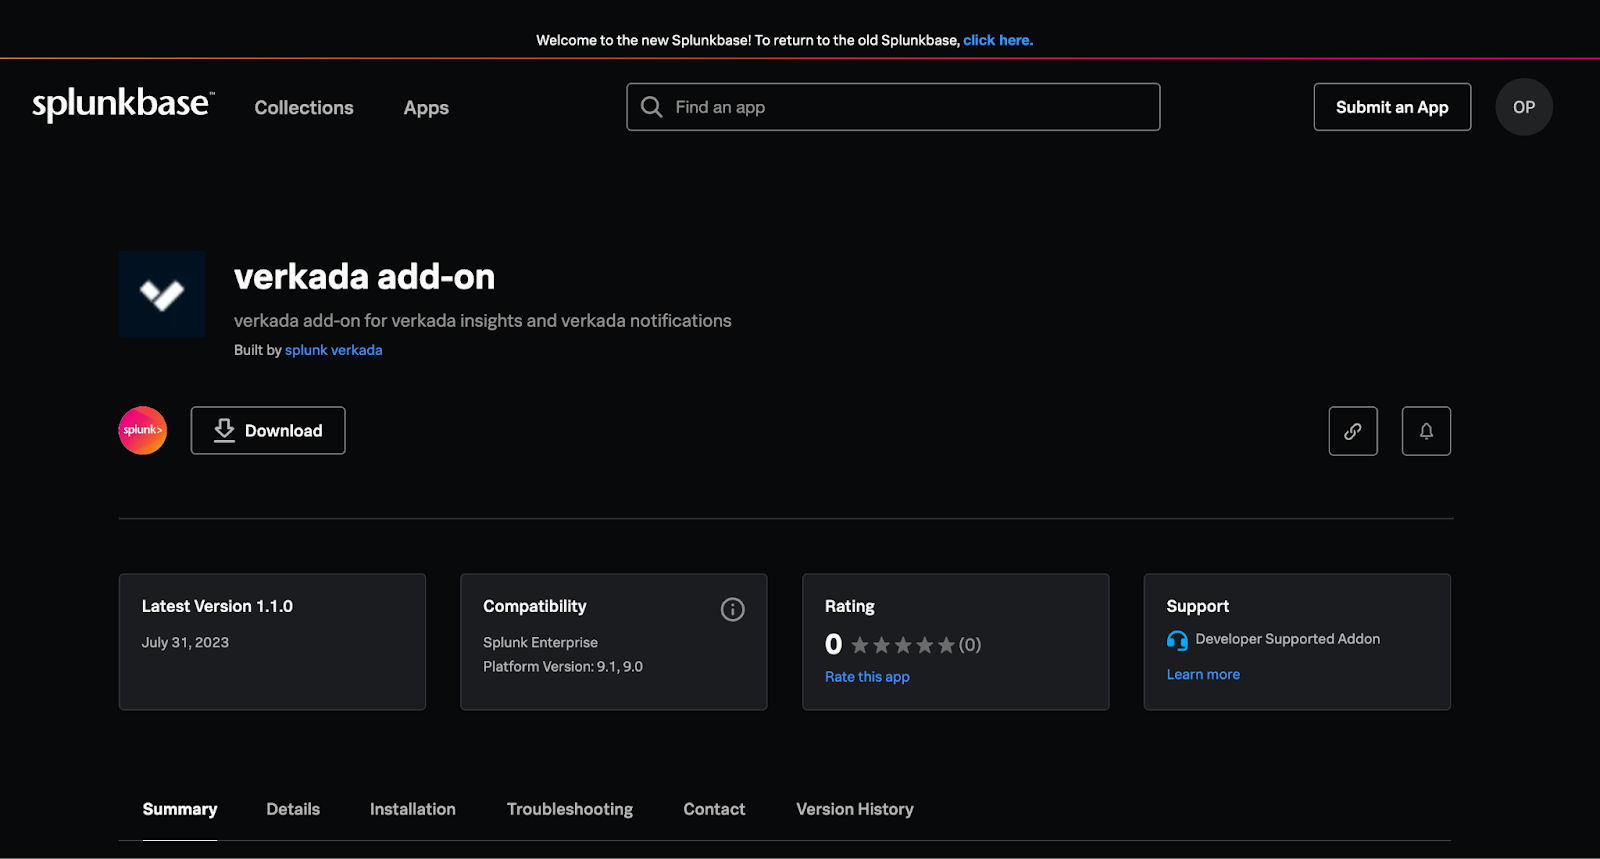
**アプリを以下からダウンロードしてください：** [**https://splunkbase.splunk.com/app/6971**](https://splunkbase.splunk.com/app/6971)**.**
{% endstep %}

{% step %}
**Download をクリックして、Verkada アドオンアプリケーションをダウンロードします。**

<div align="left" data-with-frame="true"><img src="/files/b584f3ff43098eb519665e66a8cf0523e7dd923a" alt="" width="800"></div>
{% endstep %}

{% step %}
**パッケージのダウンロードが完了したら：**

a. Splunk Enterprise アカウントに戻ります。\
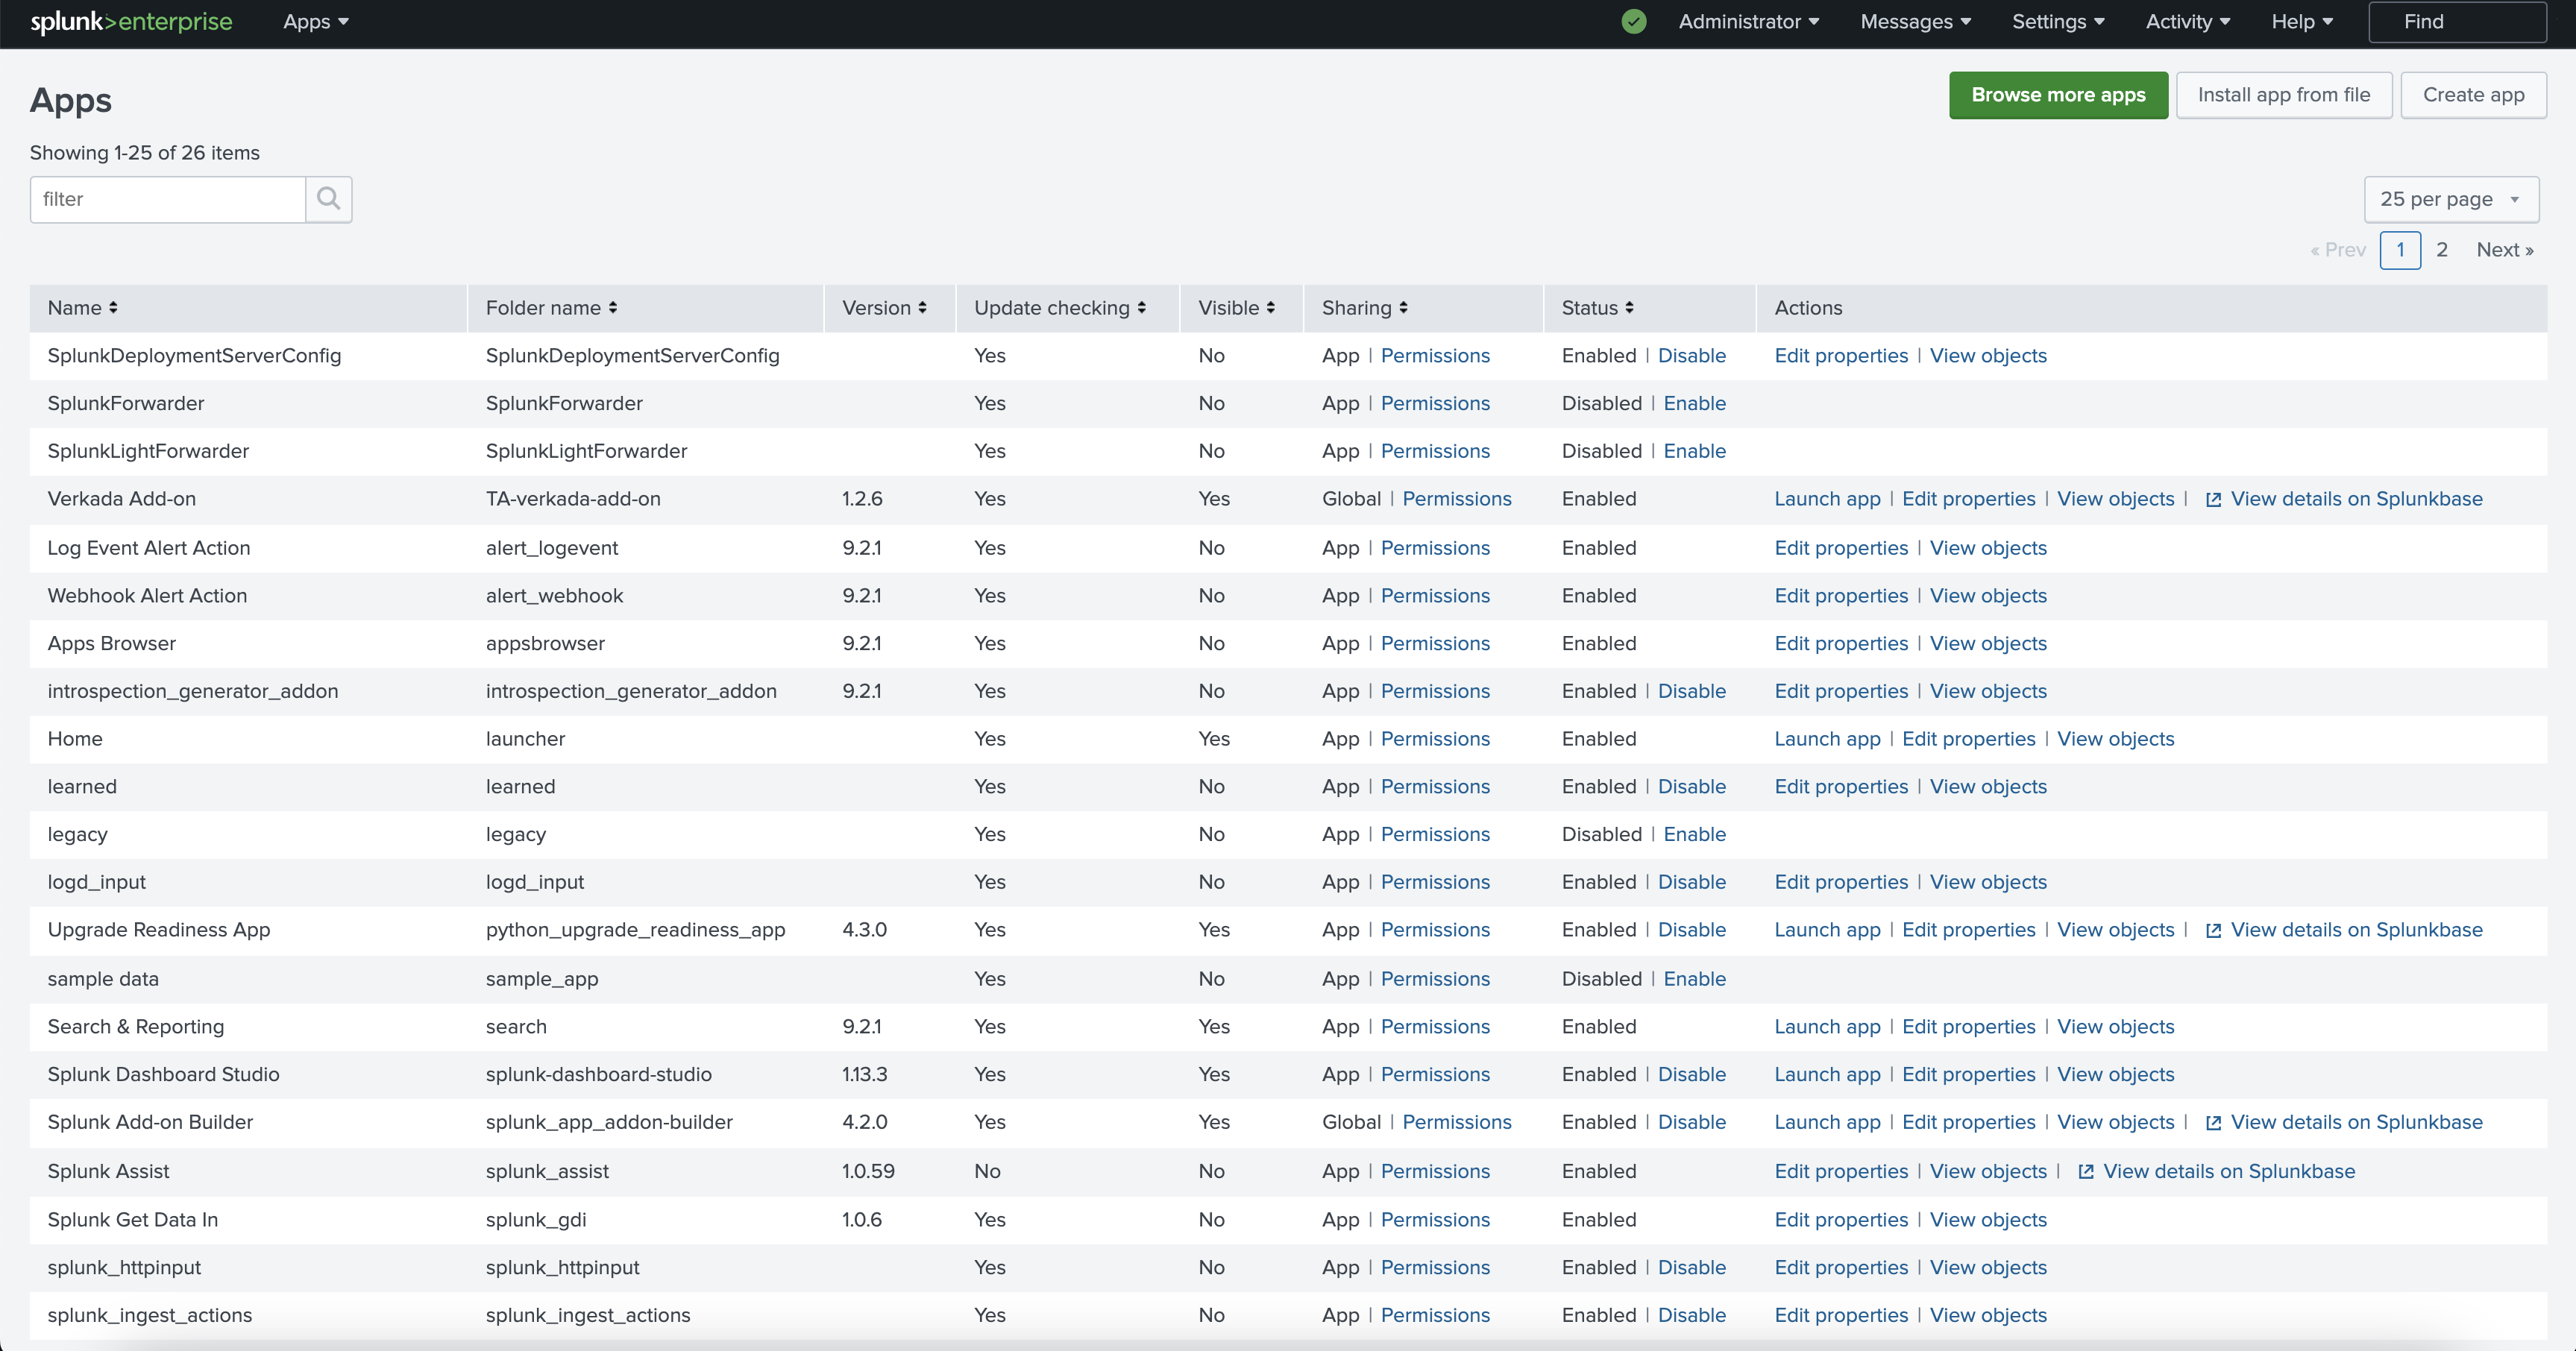
b. 次の項目の下で： **Apps** ドロップダウンから次を選択します： **アプリの管理**.
{% endstep %}

{% step %}
**Manage Apps で、右上の「Install app from file」をクリックします。**

<div align="left" data-with-frame="true"><img src="/files/ead6fec29bcfc66237a1166d2d4680cee27238c4" alt="" width="1727"></div>
{% endstep %}

{% step %}
**すると新しいページにリダイレクトされ、Splunk インスタンスに追加するアプリケーションのインストールファイルを選択するよう求められます。**
{% endstep %}

{% step %}
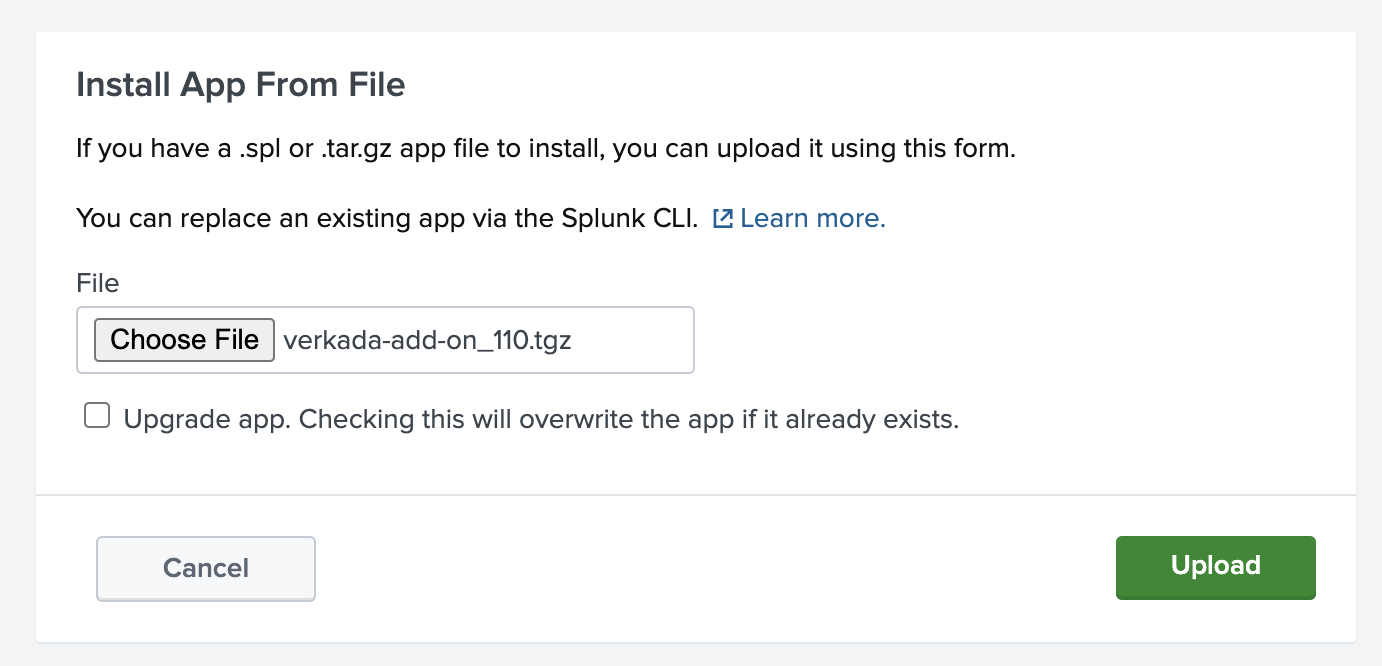
**Install App From File で：**

a. クリック **ファイルを選択**。\
b. 次の場所で： **Downloads** フォルダで、最近ダウンロードしたファイル（**verkada-add-on\_126.tgz**）。\
c. ファイルを選択し、次をクリックします： **アップロード**.

<div align="left" data-with-frame="true"><img src="/files/76633e01e16e6a152d274411cbb02c19e2153a95" alt="" width="691"></div>
{% endstep %}

{% step %}
**アプリのダウンロードが完了すると、Apps の下のホームページに Verkada Add-On タブが表示されます。**

<div align="left" data-with-frame="true"><img src="/files/b090f2cf1ead6090f3bc529ccac1cc24f5bc6055" alt="" width="800"></div>
{% endstep %}

{% step %}
**Verkada Add-On タブをクリックします。すると新しいページに移動し、そこで Verkada 統合を設定・管理できます。**

<div align="left" data-with-frame="true"><img src="/files/178649a661e8d9fc5866f6e652f090b550ce2e78" alt="" width="1728"></div>
{% endstep %}

{% step %}
**Verkada App ページで、右上の Add Input をクリックします。これにより、次の 2 種類の入力を作成できます：**

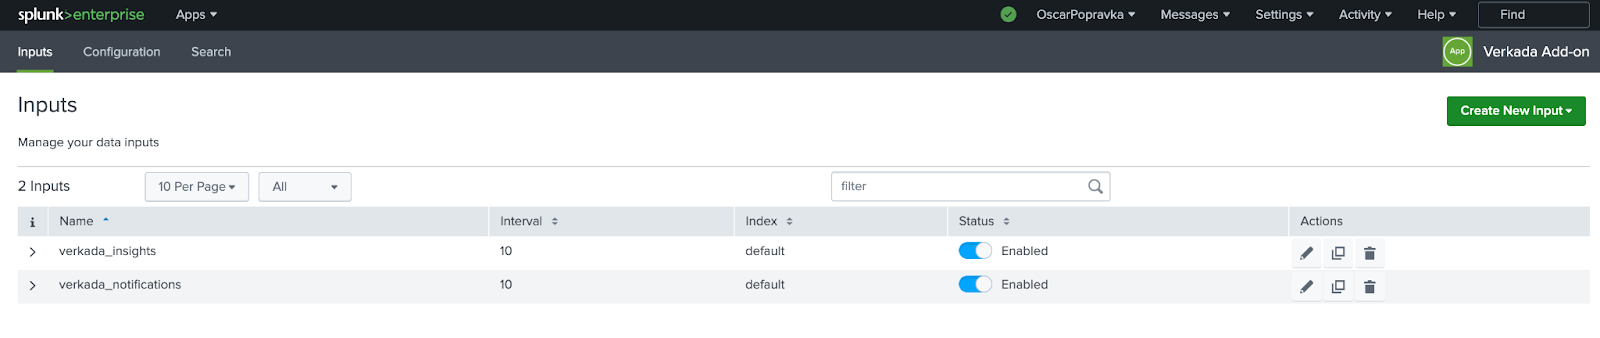
* **verkada\_insights** は、組織内の各カメラのオブジェクト検出情報を提供します。定期的な間隔で、検出された人物数と車両数、およびそれらのカウントに対応するタイムスタンプを表示します。
* **verkada\_notifications** は、Verkada デバイスによって生成されたすべての通知の一覧を提供します。
  {% endstep %}

{% step %}
**Verkada の Splunk 統合のユースケースに応じて、verkada\_insights、verkada\_notifications、または両方の新しい入力を作成します。**

{% hint style="warning" %}
両方のオプションの結果を生成するには、各機能ごとに 2 つの個別入力を作成する必要があります。<br>
{% endhint %}
{% endstep %}

{% step %}
**入力を選択すると、次の設定を入力するよう求められます：**

a. データ入力の一意の名前\
b. 各処理入力の時間間隔（秒）\
c. インデックス（推奨 **デフォルト**）\
d. あなたの Verkada Command 組織 ID\
e. あなたの [Verkada API キー](https://apidocs.verkada.com/reference/quick-start-guide)。\
f. 次をクリックします： **追加**.
{% endstep %}

{% step %}
**この新しいデータ入力を追加すると、Verkada アプリの Input タブで、手順 11 で作成した対応する名前で確認できます。**

<div align="left" data-with-frame="true"><img src="/files/91d062eaebd74590c6134b056065fc71ddc74e2a" alt="" width="800"></div>
{% endstep %}

{% step %}
**統合が成功したことを確認します：**

a. 次へ移動します： **検索** タブ。\
b. 次を入力します： **source="verkada\_insights"** または **source="verkada\_notifications"**。設定したデータ入力に応じて入力します。

<div align="left" data-with-frame="true"><img src="/files/95cfa9572dfbc19755f2a55ca0afa6dcfa54950f" alt=""></div>

<div align="left" data-with-frame="true"><img src="/files/f68833ad6e3692096488a57ffc28172830964a3c" alt=""></div>

<div align="left" data-with-frame="true"><img src="/files/825ce50f9b4c62d46e12a847b9e5455b25e93d7f" alt=""></div>
{% endstep %}
{% endstepper %}

***

## トラブルシューティング

バージョン 1.1.0 からバージョン 1.2.6 に更新すると、一部の新しい入力がすぐには表示されない場合があります。その場合は、次の手順に従って問題を解決してください：

* Splunk インスタンスを再起動し、アカウントに再度ログインします。
* それでも 3 つすべての入力が表示されない場合は、Verkada Add-On アプリを削除して再インストールします：
  1. Splunk Application ディレクトリに移動します。
  2. 次のフォルダを削除します： `SPLUNK_HOME/etc/apps/TA-verkada-add-on`.

{% hint style="info" %}
変更を有効にするには、Splunk インスタンスを再起動する必要がある場合があります。
{% endhint %}

3. このセットアップガイドの手順 1 に戻り、Splunk から Verkada Add-On アプリケーションをダウンロードしてください。
4. これで、Verkada アプリの下に新しい入力が表示されるはずです。

データ取得エラーにつながる可能性のある、他の一般的な問題もあります：

* Verkada API キーの有効期限切れ。
* 誤った Command オーガナイゼーション' ID

進行中の統合問題をより詳細に確認・把握するには、ユーザーは以下にある完全な Splunk ログにアクセスできます： `SPLUNK_HOME/var/log/splunk`。ログレベルはアドオンの設定タブで調整できます。


---

# Agent Instructions
This documentation is published with GitBook. GitBook is the documentation platform designed so that both humans and AI agents can read, navigate, and reason over technical content effectively. Learn more at gitbook.com.

## Querying This Documentation
If you need additional information that is not directly available in this page, you can query the documentation dynamically by asking a question.

Perform an HTTP GET request on the current page URL with the `ask` query parameter, and the optional `goal` query parameter:

```
GET https://help.verkada.com/command/ja/ganaizshon/integrations/verkada-splunk-integration.md?ask=<question>&goal=<endgoal>
```

`ask` is the immediate question: it should be specific, self-contained, and written in natural language.
`goal` is optional and describes the broader end goal you are ultimately trying to accomplish on behalf of the user. GitBook uses it to tailor the answer towards what is most useful for that goal.

The response will contain a direct answer to the question and relevant excerpts and sources from the documentation.

Use this mechanism when the answer is not explicitly present in the current page, you need clarification or additional context, or you want to retrieve related documentation sections.