> For the complete documentation index, see [llms.txt](https://help.verkada.com/llms.txt). Markdown versions of documentation pages are available by appending `.md` to page URLs; this page is available as [Markdown](https://help.verkada.com/classic-alarms/ja/she-zhi/set-up-universal-transmitter-mode-on-a-br31-with-classic-alarms.md).
# BR31 でユニバーサルトランスミッターモードを設定する
BR31 無線ドアセンサーでユニバーサルトランスミッターモードを設定する
{% hint style="success" %}
Verkada は Classic アラーム のグローバルな販売終了(2026年8月1日)および製品終了(2027年8月1日)を発表しました。対象のお客様は2027年1月31日まで、New アラーム に無償でアップグレードできます。ご覧ください [Verkada.com/alarms/upgrade](https://www.verkada.com/alarms/upgrade) 開始するには。
{% endhint %}
{% hint style="success" %}
この記事はクラシック アラーム向けのガイドです。こちらを参照してください [記事](/new-alarms/ja/insutru/set-up-universal-transmitter-mode-on-a-br31.md) 新しいアラームをお使いの場合は、以下をご覧ください。 [新しいアラーム vs クラシック アラーム](/new-alarms/ja/hajimeni/new-alarms-vs-classic-alarms.md) どのバージョンのアラームをお使いか不明な場合は。
{% endhint %}
***
この [Verkada BR31 無線ドアセンサー](https://docs.verkada.com/docs/br31-quick-start-guide.pdf) ユニバーサル送信機として使用でき、有線アラームデバイスが Verkada 無線ハブと無線で通信できるようになります。
{% stepper %}
{% step %}
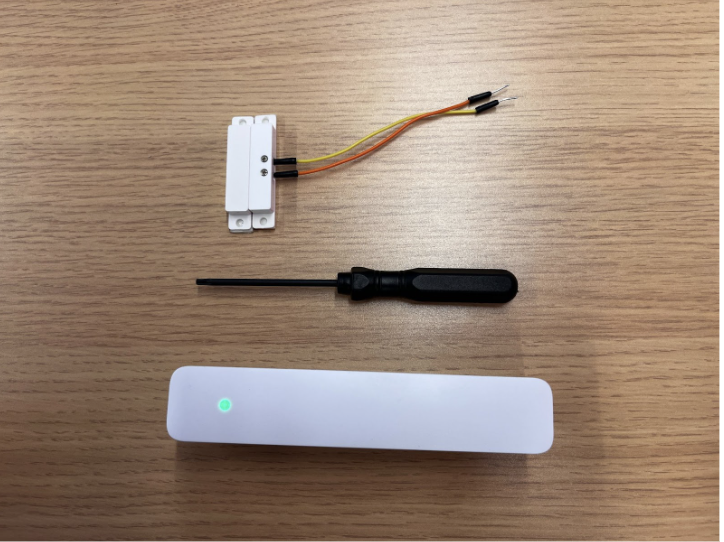
**BR31本体、T10トルクスドライバー、有線センサーを含む必要な部品を準備します。**
{% endstep %}
{% step %}
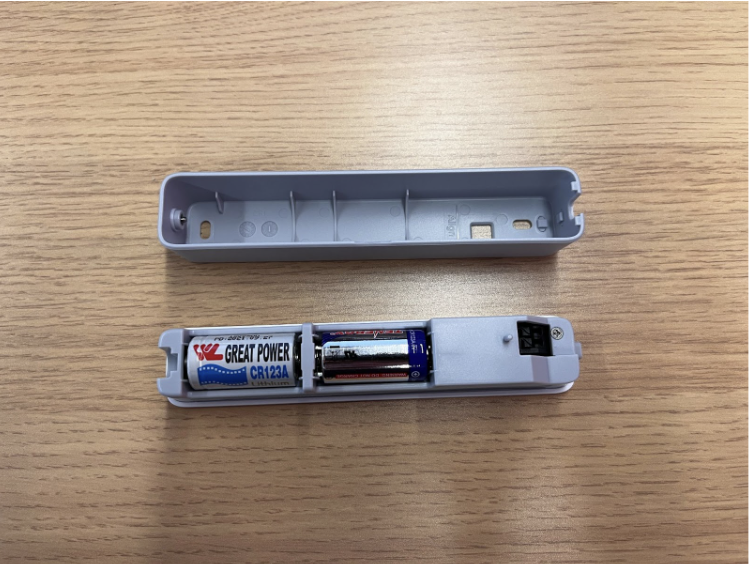
**T10トルクスドライバーを使用して、BR31の底面にあるトルクスねじを外します。ユニットの背面プレートを取り外します。**
{% endstep %}
{% step %}
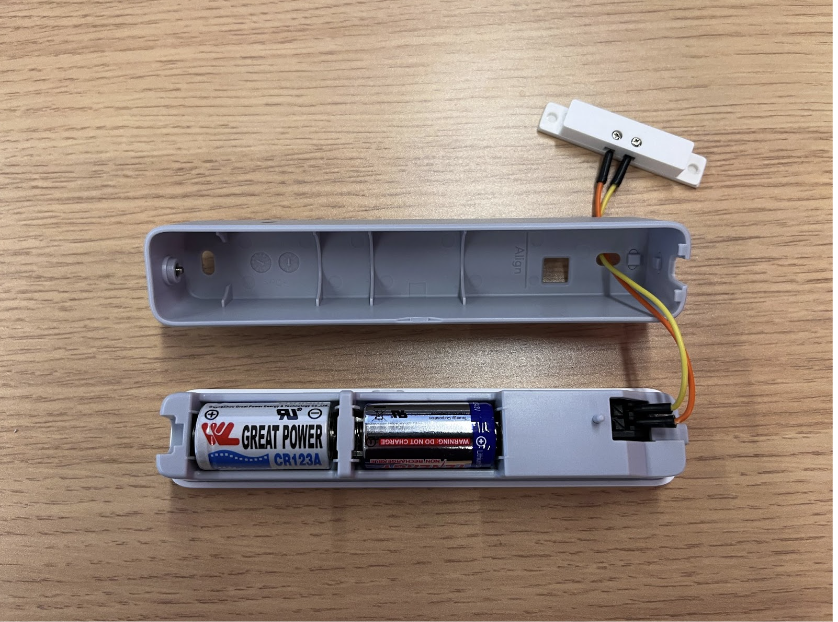
**有線アラームセンサーのリード線を、BR31ユニット上部にある2つの入力端子に接続します。この場合、極性は関係ありません。**
{% endstep %}
{% endstepper %}
***
## Commandのセットアップ
{% hint style="danger" %}
[デバイスを追加](/command/ja/ganaizshon/add-a-device-to-your-command-organization.md) 続行する前にCommandへ
{% endhint %}
{% stepper %}
{% step %}
**アラームサイトのデバイスページに移動します。**
1. センサーを選択します。
2. 右上で、クリックします :ellipsis: >をクリック **センサーを編集**.
{% endstep %}
{% step %}
**デバイス設定で:**
1. オンに切り替え **ユニバーサル送信機モード**.
2. センサーの通常状態を選択します(該当するセンサーを参照してください)。有線ドア接点センサーは通常、「Normally Closed」です。
3. クリック **完了** そして、新しい設定がBR31に反映されるまで数分待ちます。
{% endstep %}
{% step %}
**有線センサーを手動でトリガーし、BR31がセンサーイベントをCommandに送信していることを確認します。**
{% endstep %}
{% step %}
**デバイスの動作が確認できたら、** [**BR31インストールガイド**](https://docs.verkada.com/docs/br31-quick-start-guide.pdf) **の取り付け手順に従って、インストールを完了します。**
{% endstep %}
{% endstepper %}
---
# Agent Instructions
This documentation is published with GitBook. GitBook is the documentation platform designed so that both humans and AI agents can read, navigate, and reason over technical content effectively. Learn more at gitbook.com.
## Querying This Documentation
If you need additional information that is not directly available in this page, you can query the documentation by asking a question.
Perform an HTTP GET request on the following URL with the `ask` and `goal` query parameters:
```
GET https://help.verkada.com/classic-alarms/ja/she-zhi/set-up-universal-transmitter-mode-on-a-br31-with-classic-alarms.md?ask=&goal=
```
`ask` is the immediate question: it should be specific, self-contained, and written in natural language.
`goal` is what the user is ultimately trying to achieve, the reason they need the answer. Sharing it helps GitBook give you a better, more relevant answer. A goal is most helpful when it describes the outcome the user wants rather than restating the question. For example, with `ask=how do I create an API token`, a goal like `automate deployments from our CI pipeline` lets GitBook tailor the answer to that use case.
The response will contain a direct answer to the question and relevant excerpts and sources from the documentation.
Use this mechanism when the answer is not explicitly present in the current page, you need clarification or additional context, or you want to retrieve related documentation sections.