> For the complete documentation index, see [llms.txt](https://help.verkada.com/llms.txt). Markdown versions of documentation pages are available by appending `.md` to page URLs; this page is available as [Markdown](https://help.verkada.com/classic-alarms/ja/she-zhi/set-up-the-bc51-alarm-console.md).
# BC51 アラームコンソールを設定する
カメラとトークダウン機能を内蔵したアラームキーパッド
{% hint style="success" %}
Verkadaは、Classic Alarmsの全世界での販売終了日(2026年8月1日)および製品終了日(2027年8月1日)を発表しました。対象のお客様は、2027年1月31日まで追加費用なしでNew Alarmsにアップグレードできます。アクセス [Verkada.com/alarms/upgrade](https://www.verkada.com/alarms/upgrade) 開始するには。
{% endhint %}
{% hint style="warning" %}
**2023年8月現在、** Verkada は BC51 アラームコンソールを [BC82 アラームコンソール](https://www.verkada.com/alarms/console/)。詳細については、次を参照してください。 [販売終了のお知らせ](/command/ja/herupugadesuka/end-of-sale-products-policy-overview/end-of-sale-announcement-for-bc51.md).
{% endhint %}
BC51 アラームコンソールは、アラームサイトの警戒設定/警戒解除に使用されます。追加機能として、デジタルのパニックボタン、デバイスステータスページ、イベントフィード、および Command からの遠隔監視と呼びかけ用のカメラとマイクが内蔵されています。
## Verkada BC51 の設置
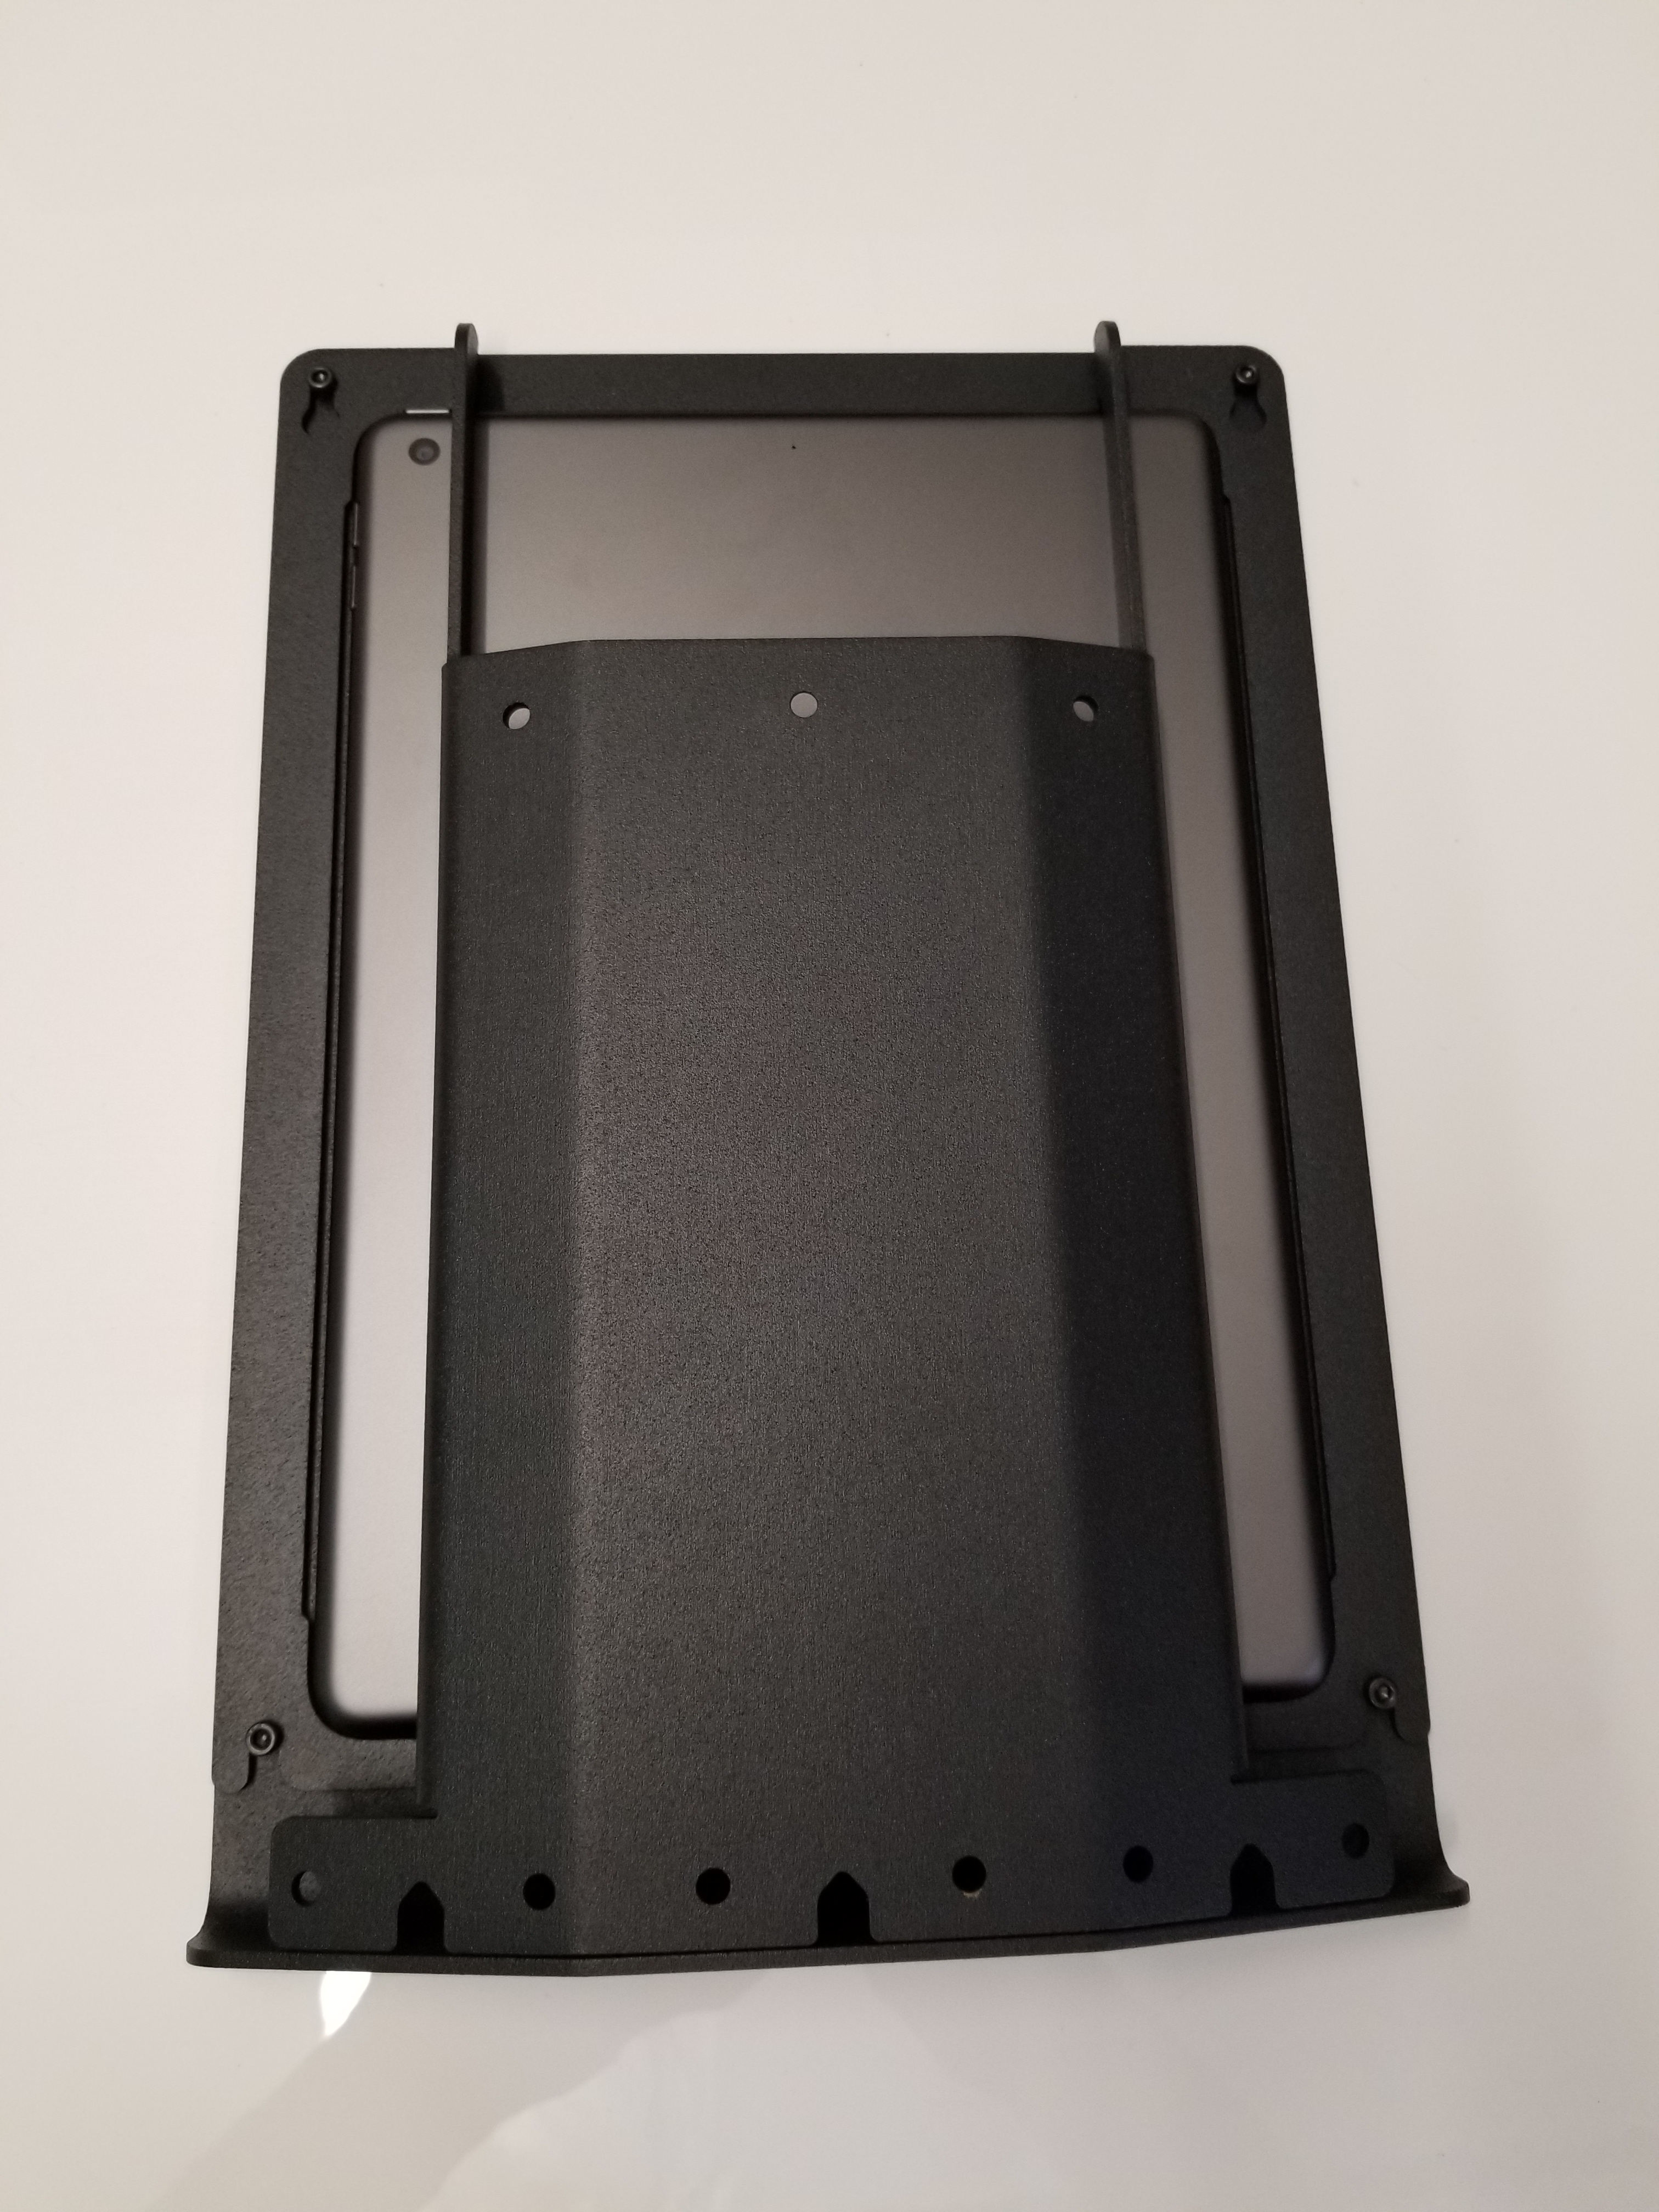
お使いのアラームコンソールには、電源とネットワーク接続用の 10W PoE アダプター(IEEE 802.3af)が付属しており、安全に取り付けられる粉体塗装のスチール製筐体も含まれています。
{% hint style="warning" %}
アラームコンソールは縦向きで取り付ける必要があります。
{% endhint %}
{% hint style="info" %}
アラームコンソールを箱から取り出したら、取り付ける前に仮設置して機能をテストすることをおすすめします。
{% endhint %}
{% stepper %}
{% step %}
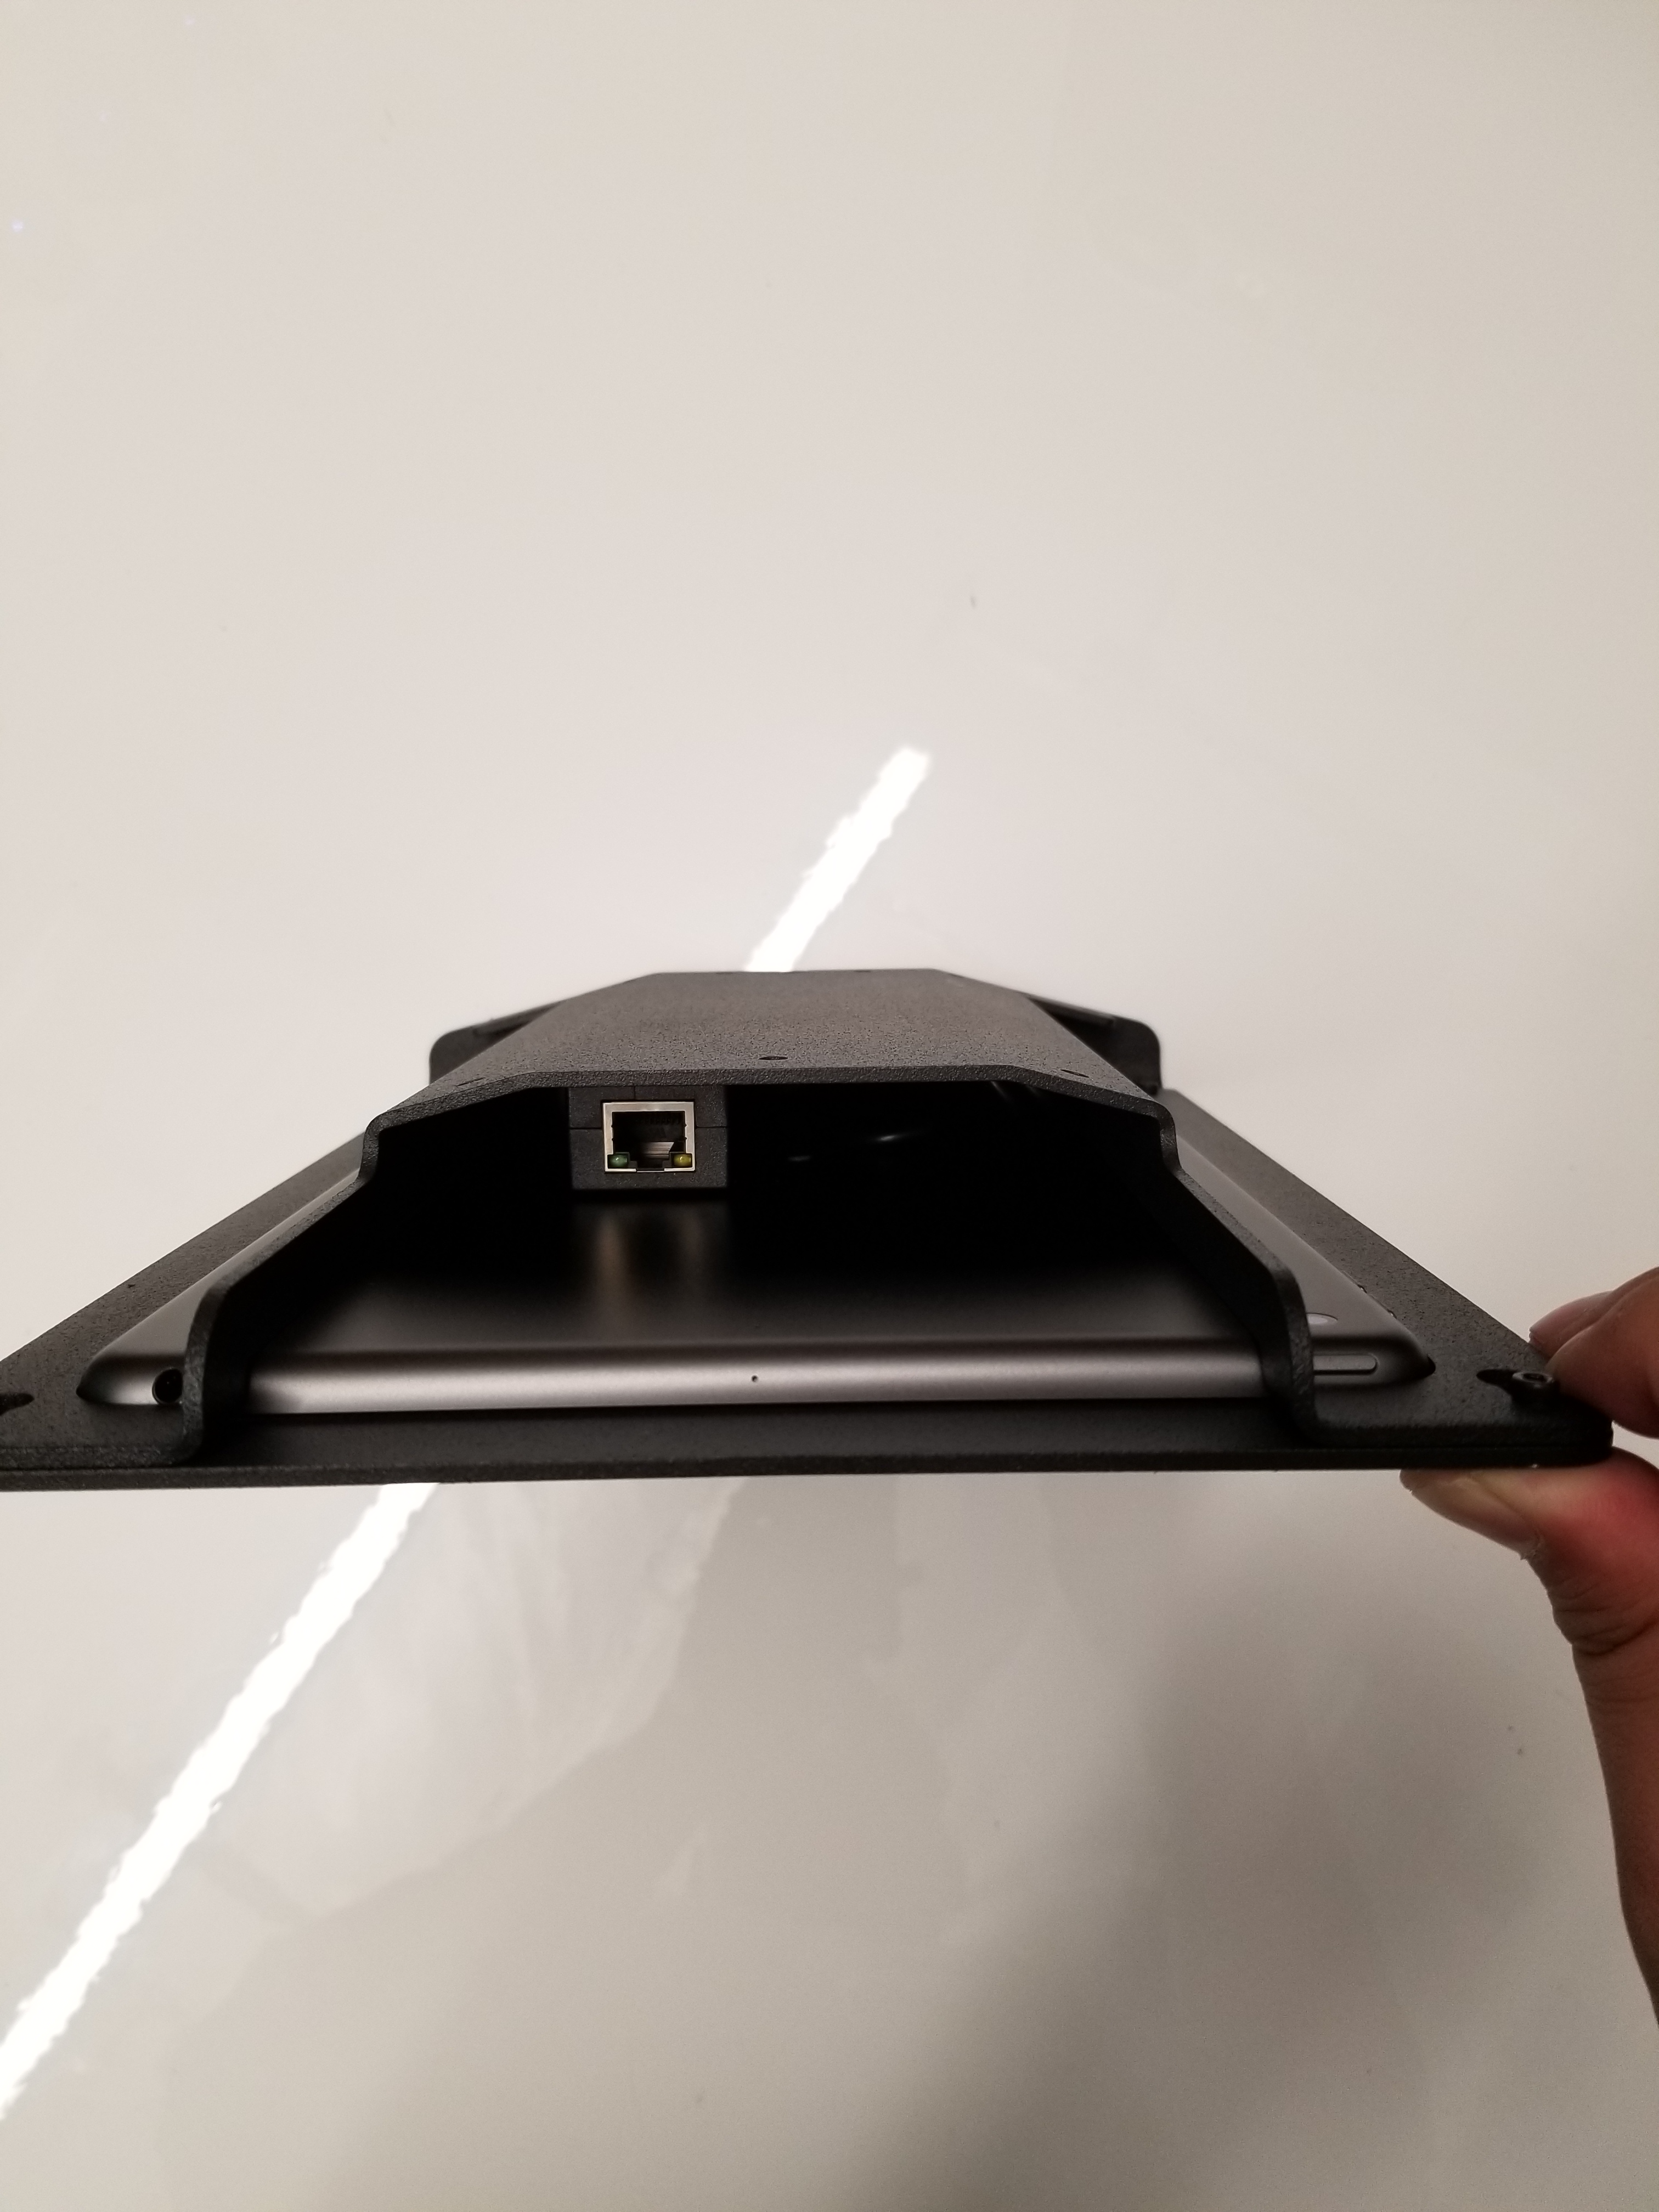
**アラームコンソールのマウント上部から、Ethernet ケーブルを PoE アダプターに接続します。**
{% endstep %}
{% step %}
**Ethernet ケーブルを PoE スイッチの空いているポートに接続します。**
{% hint style="warning" %}
初めてデバイスを受け取った時点でアラームコンソールの電源が切れている場合、PoE スイッチに接続してから起動するまで最大 15 分かかることがあります。
{% endhint %}
{% endstep %}
{% step %}
**コンソールの電源が入ったら、箱とコンソールの表示画面に記載されているシリアル番号を使用して、Web インターフェースからデバイスを Verkada Command に追加します。Command では、コンソールが適切なアラームサイトに追加されていることを確認してください。**
{% endstep %}
{% step %}
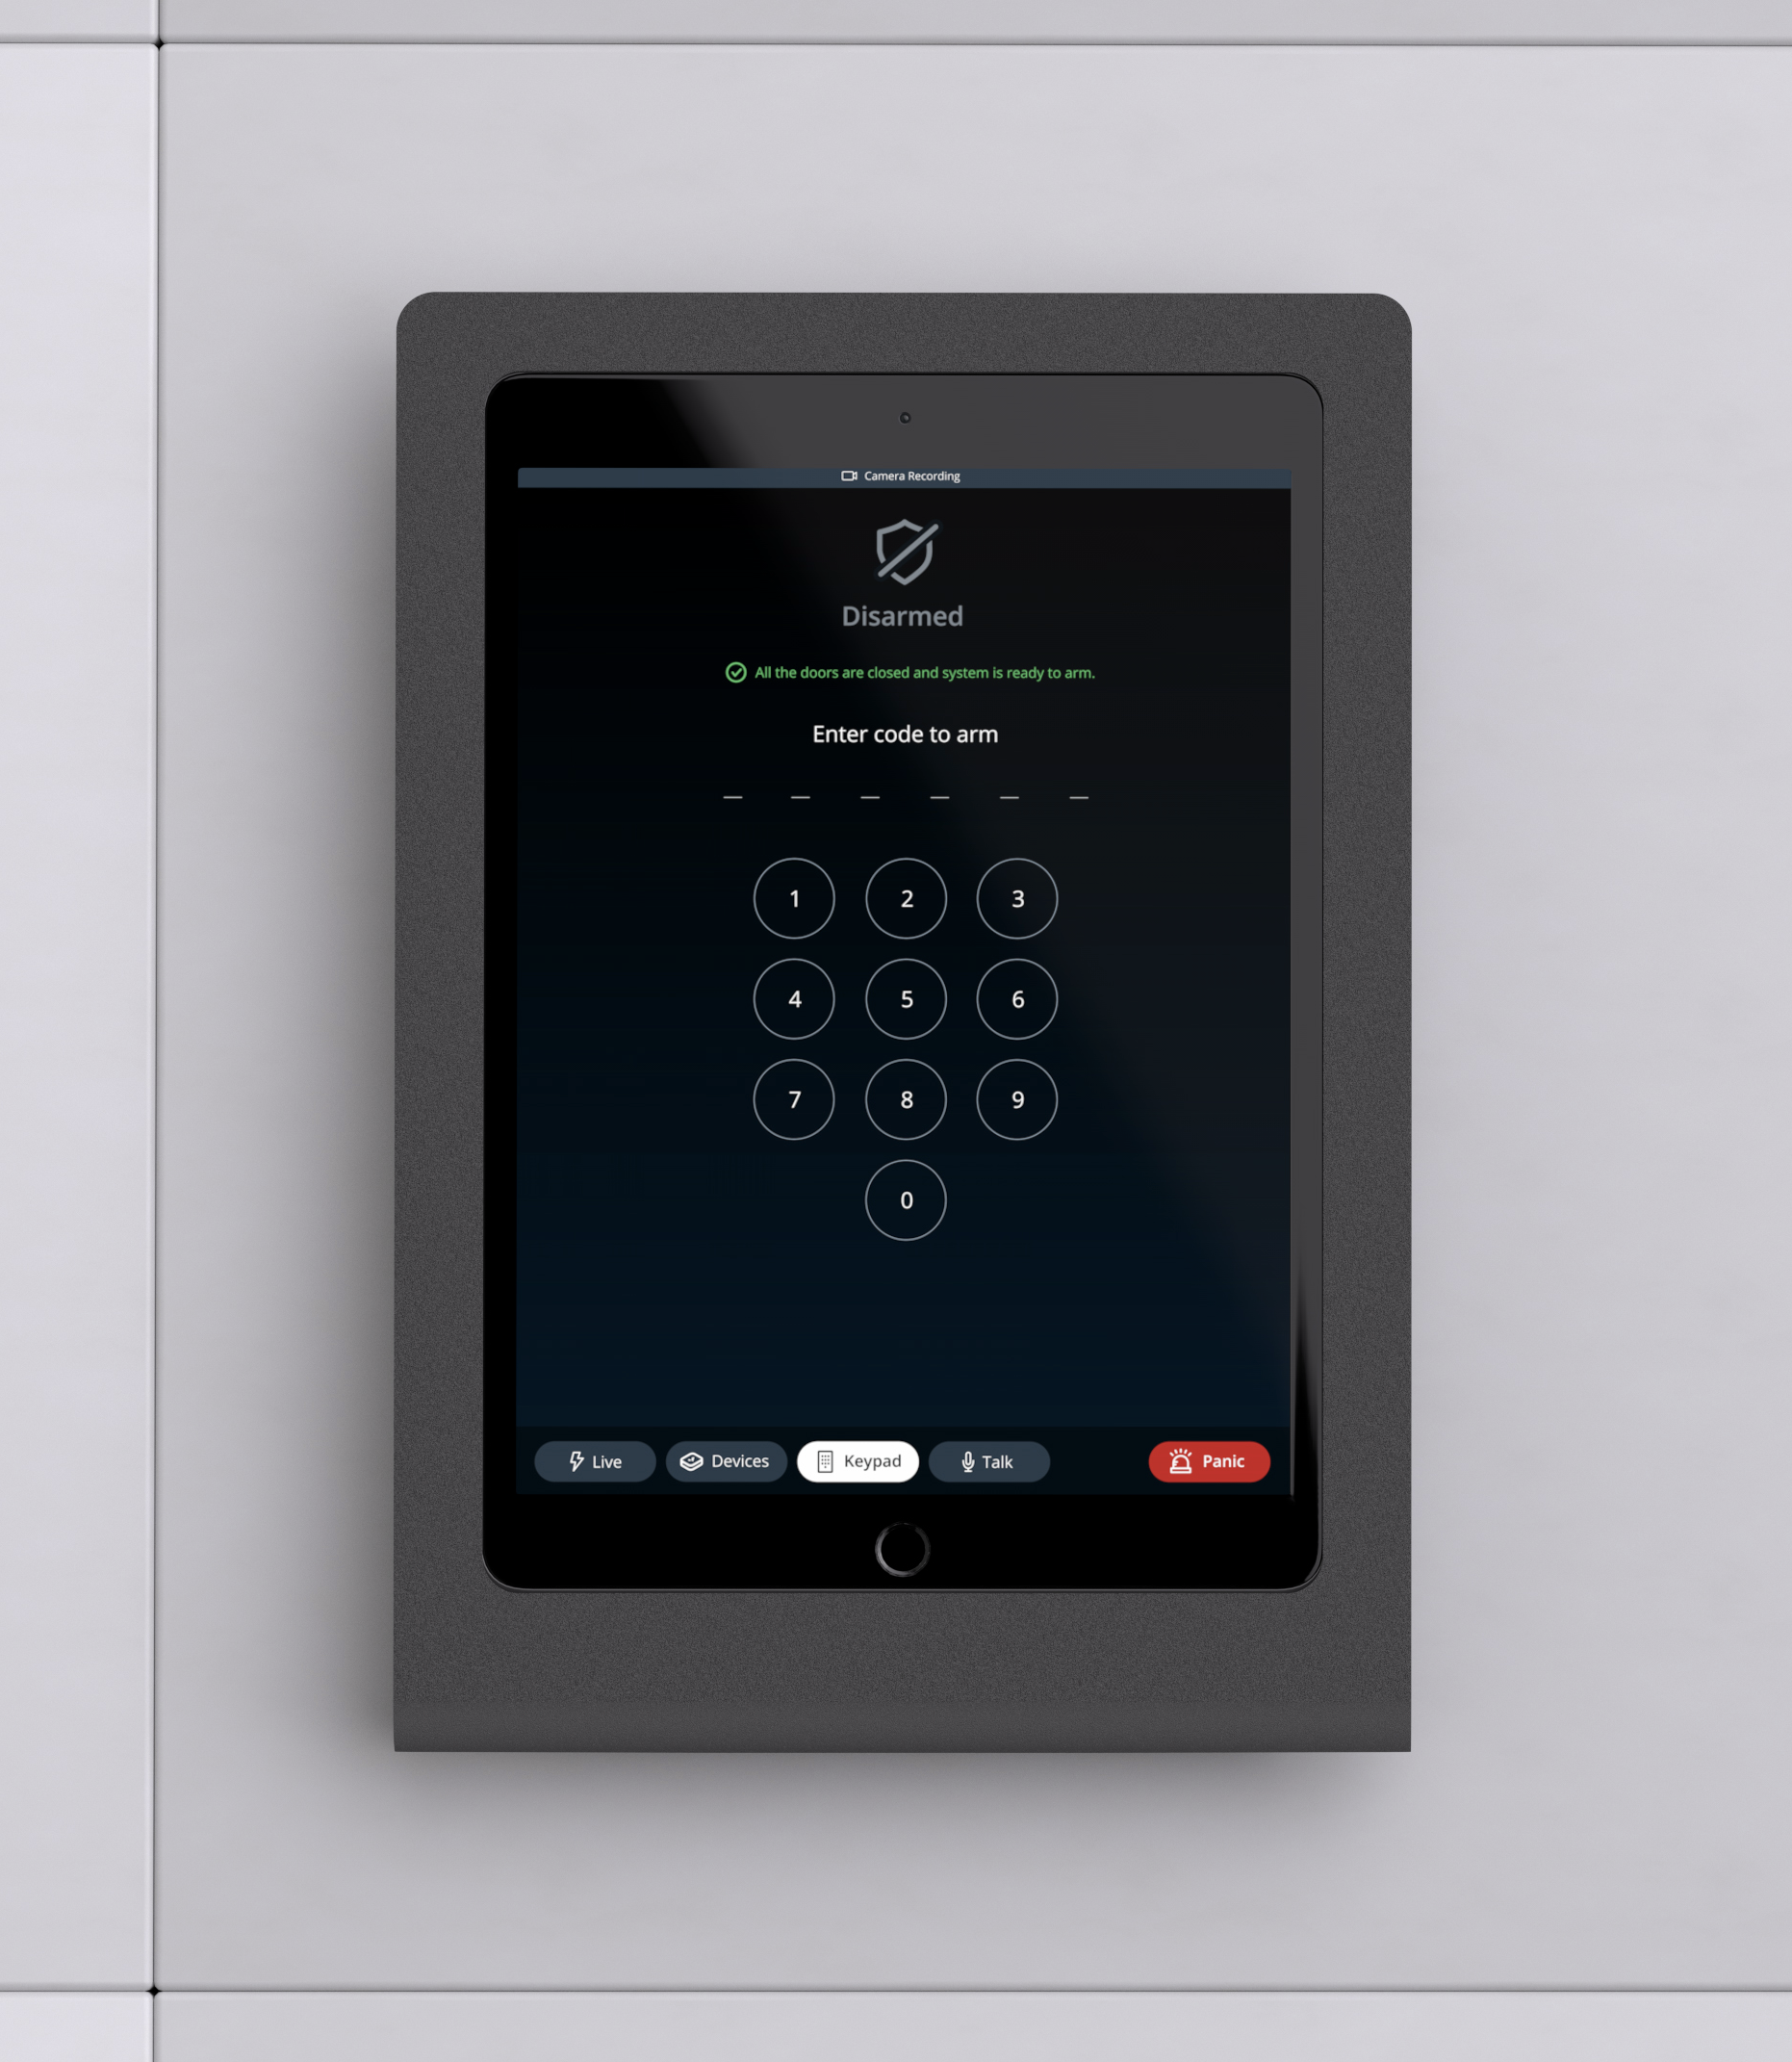
**コンソールが当社のサーバーにネットワーク接続され、シリアル番号が Command に追加されている場合、このキーパッドインターフェースが表示されるはずです:**
{% endstep %}
{% step %}
**最終的な設置場所に取り付ける前に、キーパッド機能をテストして、すべてが想定どおりに動作していることを確認してください:**
* **イベント**\
このタブでは、アラームサイトで発生したすべてのライブイベントを確認できます。これは、Command のアラームサイトにあるアクティビティタブと同様の内容になります。また、アラームサイト内のカメラのビデオフィードも表示できます。
* **デバイス**\
このタブでは、アラームサイトにあるすべてのデバイスと最新のイベントを表示できます。これは、Command のアラームサイトにあるデバイスタブと同様の内容になります。
* **キーパッド**\
このタブでは、お使いの [設定済みのキーコード](/classic-alarms/ja/she-ding/configure-classic-alarms-site-settings.md) Command で。
* **双方向の呼びかけと聴取**\
このテストは、別々の部屋にいる 2 人で行うのが最適です。1 人はコンソールの前に、もう 1 人は Command Web インターフェースにいてください。Command インターフェースでは、アラームコンソールにライブフィードが表示されるはずです。聴取機能をテストするには、アラームコンソールのミュートを解除し、コンソールが拾っている音が聞こえることを確認します。双方向の呼びかけをテストするには、コンソールのビデオフィードで通話ボタンを押してビデオ通話を開始します。\
* また、屋外スピーカーを含む、より広範囲/大音量の呼びかけ通信用に、3.5 mm オーディオジャックをコンソールに接続することもできます。
{% hint style="info" %}
アラームコンソールには、Command からの遠隔監視用にカメラとマイクが内蔵されており、コンソール画面上部のバナーには、映像または音声が視聴・録音されているときにその旨が示されます。
{% endhint %}
* **パニック**\
デジタルのパニックボタンを押して即時アラームをテストしてください。設定済みのキーコードまたは Command Web インターフェースから警戒解除できます。
{% endstep %}
{% step %}
**これらの機能をテストした後は、箱に同梱されている取り付け手順に従って、アラームコンソールを最終設置場所に取り付けることができます。**
{% endstep %}
{% endstepper %}
---
# Agent Instructions
This documentation is published with GitBook. GitBook is the documentation platform designed so that both humans and AI agents can read, navigate, and reason over technical content effectively. Learn more at gitbook.com.
## Querying This Documentation
If you need additional information that is not directly available in this page, you can query the documentation by asking a question.
Perform an HTTP GET request on the following URL with the `ask` and `goal` query parameters:
```
GET https://help.verkada.com/classic-alarms/ja/she-zhi/set-up-the-bc51-alarm-console.md?ask=&goal=
```
`ask` is the immediate question: it should be specific, self-contained, and written in natural language.
`goal` is what the user is ultimately trying to achieve, the reason they need the answer. Sharing it helps GitBook give you a better, more relevant answer. A goal is most helpful when it describes the outcome the user wants rather than restating the question. For example, with `ask=how do I create an API token`, a goal like `automate deployments from our CI pipeline` lets GitBook tailor the answer to that use case.
The response will contain a direct answer to the question and relevant excerpts and sources from the documentation.
Use this mechanism when the answer is not explicitly present in the current page, you need clarification or additional context, or you want to retrieve related documentation sections.