> For the complete documentation index, see [llms.txt](https://help.verkada.com/llms.txt). Markdown versions of documentation pages are available by appending `.md` to page URLs; this page is available as [Markdown](https://help.verkada.com/air-quality/events-and-alerts/air-quality-sensor-zones.md).
# Air Quality Sensor Zones
Learn how to group air quality sensors together to create sensor zones
Verkada [sensor zones](https://www.verkada.com/blog/adding-more-control-to-environmental-monitoring-with-audio-alert-and-device/) let you treat a group of sensors as a single virtual sensor. Sensor zones are designed to ensure that a single trigger source (for example, a student vaping) does not create duplicate alerts across multiple devices within the same area.
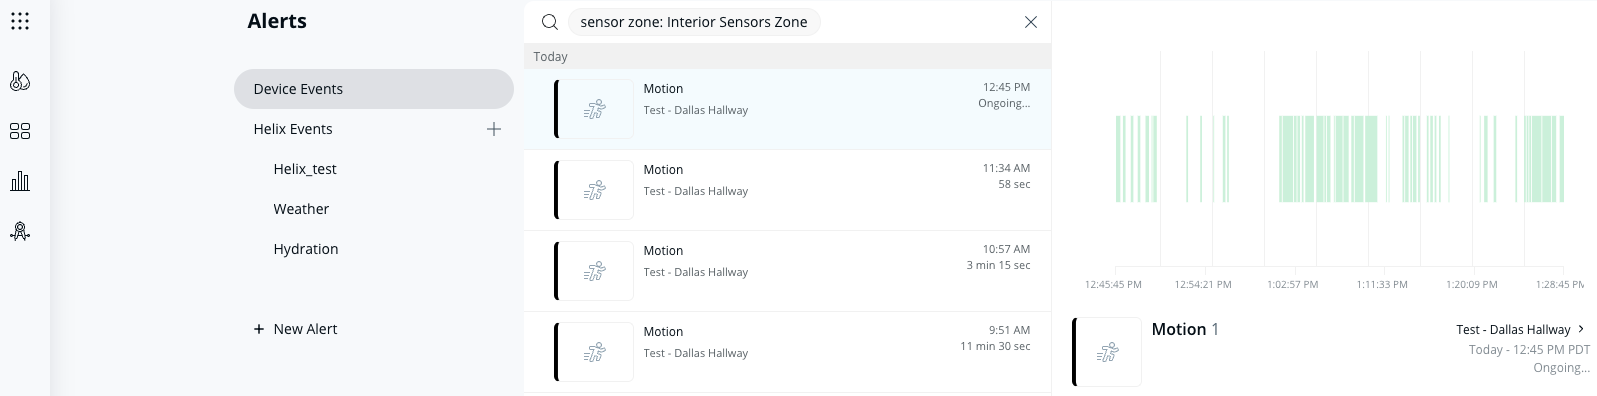
Alerts from zones are similar to alerts from individual sensors, except that they also include the zone name, followed by the name of the first sensor that triggered the alert.
To use a zone effectively, you should have at least 2 devices selected. If you’re looking to set up alerts at the device level, we recommend using [device-level alerts](/air-quality/events-and-alerts/configure-air-quality-event-alerts.md) instead of zone functionality.
{% hint style="warning" %}
An ongoing alert prevents additional alerts from any other devices in the zone for that specific sensor reading until the zone event has been resolved for at least 10 minutes.
{% endhint %}
### Before you begin
We recommend reviewing these guidelines before you create a sensor zone:
* All sensors in the zone must be on the same site or subsite.
* You can have as many zones per site as you want, with any number of sensors.
* Zones are treated differently from subsites.
* Sensors do not have to be at the same physical location; however, each sensor can be part of only one zone. We recommend that sensors in a zone be in the same room or space.
***
## Sensor zones
### Create a zone
Once you create a zone, you will see the sensors appear in a box with the zone label at the top left. Sensors not in a zone appear as normal.
{% stepper %}
{% step %}
**In Verkada Command, go to All Products > Air Quality.**
{% endstep %}
{% step %}
**On the right, in the middle of the page, click Sensors Zone.**
{% endstep %}
{% step %}
**On Create Sensors Zone:**
a. Give the zone a unique **Name**.\
b. Add devices from your site into that zone. You can only group devices from the same site into a zone.\
c. Click **Apply** to create the zone.
{% endstep %}
{% endstepper %}
### Edit a zone
{% hint style="warning" %}
You can still configure sensor event triggers at the device level. If you change a sensor trigger on the device level, it will override what was configured for the zone. When you go to edit the zone, you will see **Mixed** for that trigger value.
{% endhint %}
{% stepper %}
{% step %}
**In Verkada Command, go to All Products > Air Quality.**
{% endstep %}
{% step %}
**Find a zone under the Summary section.**
{% endstep %}
{% step %}
**At the top right of the zone, click Edit to edit the following options:**
a. Zone name.\
b. Selected sensors.\
c. Notifications.\
d. Delete the zone.
{% endstep %}
{% endstepper %}
### Mute sensor zone
{% stepper %}
{% step %}
**In Verkada Command, go to All Products > Air Quality.**
{% endstep %}
{% step %}
**Find a zone under the Summary section.**
{% endstep %}
{% step %}
**At the top right of the zone, click Edit.**
{% endstep %}
{% step %}
**Scroll down to Notifications and click next to the alert you want to mute.**
{% endstep %}
{% step %}
**Click Mute Alert:**
a. Choose the duration for the alert to mute: **1 day, 1 week, Always, or Custom.**\
b. If you choose **Custom**, set the duration, and click **Mute**.
{% endstep %}
{% endstepper %}
### Delete sensor zone
{% stepper %}
{% step %}
**In Verkada Command, go to All Products > Air Quality.**
{% endstep %}
{% step %}
**Find a zone under the Summary section.**
{% endstep %}
{% step %}
**At the top right of the zone, click Edit.**
{% endstep %}
{% step %}
**Scroll down to Notifications and click next to the alert you want to delete.**
{% endstep %}
{% step %}
**Click Delete Alert, then Yes to confirm.**
{% endstep %}
{% endstepper %}
***
## Sensor zone alerts
### Create zone alerts
{% stepper %}
{% step %}
**In Verkada Command, go to All Products > Air Quality.**
{% endstep %}
{% step %}
**Find a zone under the Summary section.**
{% endstep %}
{% step %}
**At the top right of the zone, click Edit.**
{% endstep %}
{% step %}
**Scroll down to Notifications and click Create Alert.**
{% endstep %}
{% step %}
**Continue with configuration on the Create Alert modal. See** [**Sensor Alerts and Events > Create Alert**](/air-quality/events-and-alerts/configure-air-quality-event-alerts.md)**.**
{% endstep %}
{% endstepper %}
### View zone alerts
{% stepper %}
{% step %}
**In Verkada Command, go to All Products > Air Quality.**
{% endstep %}
{% step %}
**Find a zone under the Summary section.**
{% endstep %}
{% step %}
**At the top right, click Zone Alerts.**
{% endstep %}
{% step %}
**You are automatically redirected to the Alerts page with alerts filtered to your selected zone.**
{% endstep %}
{% endstepper %}
### Edit sensor zone alerts
{% stepper %}
{% step %}
**In Verkada Command, go to All Products > Air Quality.**
{% endstep %}
{% step %}
**Find a zone under the Summary section.**
{% endstep %}
{% step %}
**At the top right of the zone, click Edit.**
{% endstep %}
{% step %}
**Scroll down to Notifications and click next to the alert you want to edit.**
{% endstep %}
{% step %}
**Click Edit Alert:**
Continue the configuration on the **Create Alert** modal.
See [Sensor Alerts and Events > Create Alert](/air-quality/events-and-alerts/configure-air-quality-event-alerts.md) for more information.
{% endstep %}
{% endstepper %}
---
# Agent Instructions
This documentation is published with GitBook. GitBook is the documentation platform designed so that both humans and AI agents can read, navigate, and reason over technical content effectively. Learn more at gitbook.com.
## Querying This Documentation
If you need additional information that is not directly available in this page, you can query the documentation by asking a question.
Perform an HTTP GET request on the following URL with the `ask` and `goal` query parameters:
```
GET https://help.verkada.com/air-quality/events-and-alerts/air-quality-sensor-zones.md?ask=&goal=
```
`ask` is the immediate question: it should be specific, self-contained, and written in natural language.
`goal` is what the user is ultimately trying to achieve, the reason they need the answer. Sharing it helps GitBook give you a better, more relevant answer. A goal is most helpful when it describes the outcome the user wants rather than restating the question. For example, with `ask=how do I create an API token`, a goal like `automate deployments from our CI pipeline` lets GitBook tailor the answer to that use case.
The response will contain a direct answer to the question and relevant excerpts and sources from the documentation.
Use this mechanism when the answer is not explicitly present in the current page, you need clarification or additional context, or you want to retrieve related documentation sections.