> For the complete documentation index, see [llms.txt](https://help.verkada.com/llms.txt). Markdown versions of documentation pages are available by appending `.md` to page URLs; this page is available as [Markdown](https://help.verkada.com/access-control/ja/she-zhi/wire-a-door-to-a-verkada-access-controller/set-up-an-inout-door-with-two-readers.md).
# 2台のリーダーで入出用ドアをセットアップする
入室用リーダーと退室用リーダーを備えた単一ドアをセットアップする
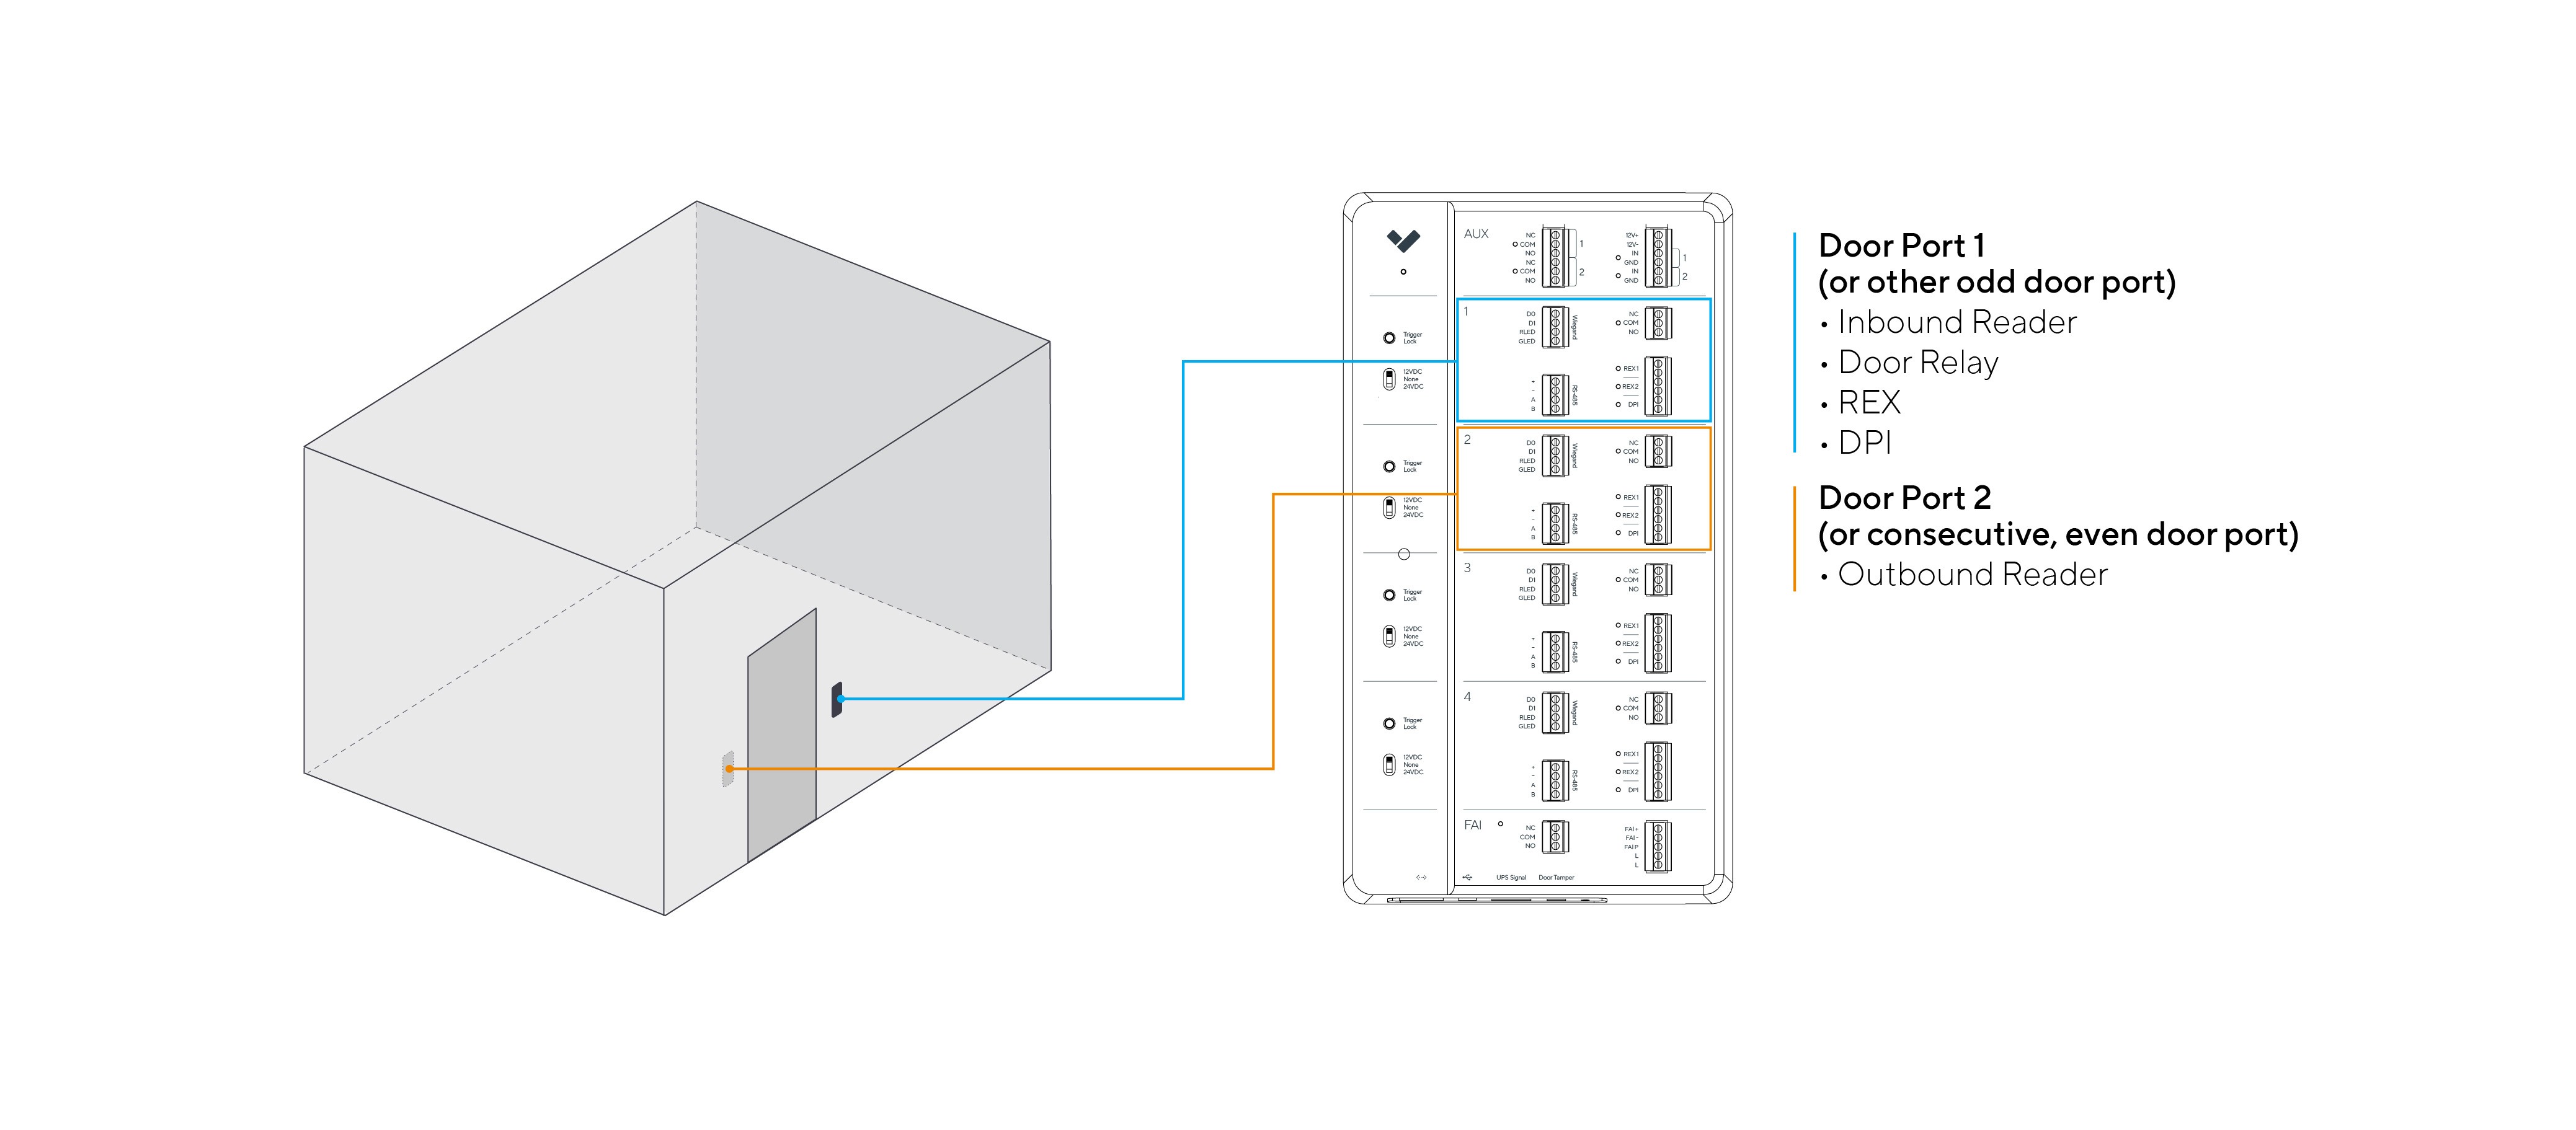
入退室ドアでは、アクセスコントローラ上の連続する2つのドアポートを使用します:
* ドアポート1(および連続するすべての **奇数番号の** ポート)は、以下に使用されます:
* ドアリレー出力
* REX入力
* DPI入力
* **入室側アクセスリーダー**、WiegandまたはRS-485リーダー入力に有線接続
* ドアポート2(および連続するすべての **偶数番号の** ポート)は、以下のために使用されます: **退出側アクセスリーダー**、WiegandまたはRS-485リーダー入力に有線接続:
詳細はこちら [ドアをVerkadaアクセスコントローラに配線する](/access-control/ja/she-zhi/wire-a-door-to-a-verkada-access-controller.md).
***
## Verkada Commandから入退室ドアを設定する
入退室ドアの設定は通常のドア設定と非常によく似ていますが、2つの小さな違いがあります:
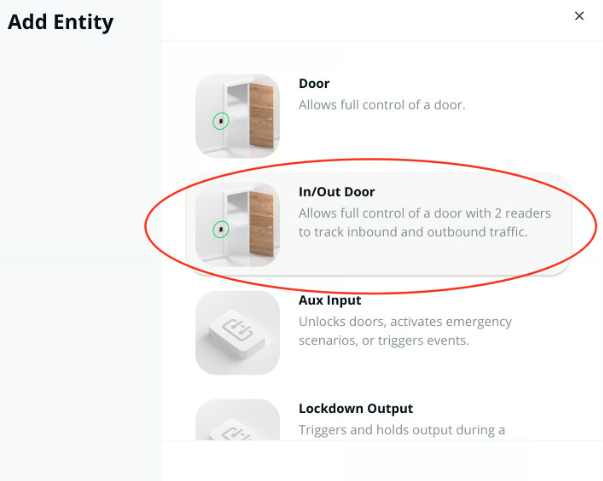
* ドアをアクセスコントローラに追加する際は、次を選択します **入退室ドア** の代わりに **ドア**.
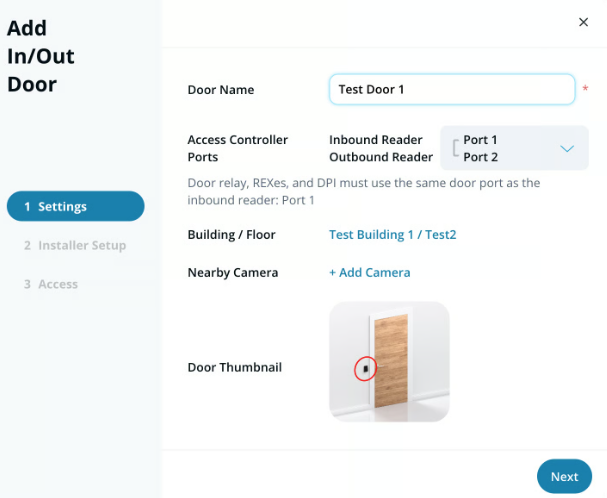
* 入退室ドアを設定する際は、アクセスコントローラ上で連続する2つのドアポートを選択します。
### 要件
* Verkadaアクセスコントローラがあることを確認してください。このアクセスコントローラには **必ず** 設定する入退室ドア用の空きリーダースロットが2つ必要です。
* 入退室リーダーの設置時に干渉を回避し、信頼性の高い読み取りを確保するには:
* 厚さが約200 mm(7.9インチ)未満の面の反対側に、リーダーを背中合わせで直接取り付けないでください。
* 面の厚さが約200 mm未満の場合は、リーダーを垂直方向に少なくとも約130 mm(5.1インチ)ずらしてください。
* 面の厚さが約200 mmを超える場合、リーダーは背中合わせで直接取り付けることができます。
{% hint style="info" %}
**推奨事項**。互換性のある任意の2台のリーダーを使用できますが、Verkadaリーダーを2台使用することをお勧めします。
{% endhint %}
***
## 設定
{% stepper %}
{% step %}
**Commandで、[デバイス]ページに移動します。**
{% endstep %}
{% step %}
**入退室ドアを設定するアクセスコントローラを選択します。**
{% endstep %}
{% step %}
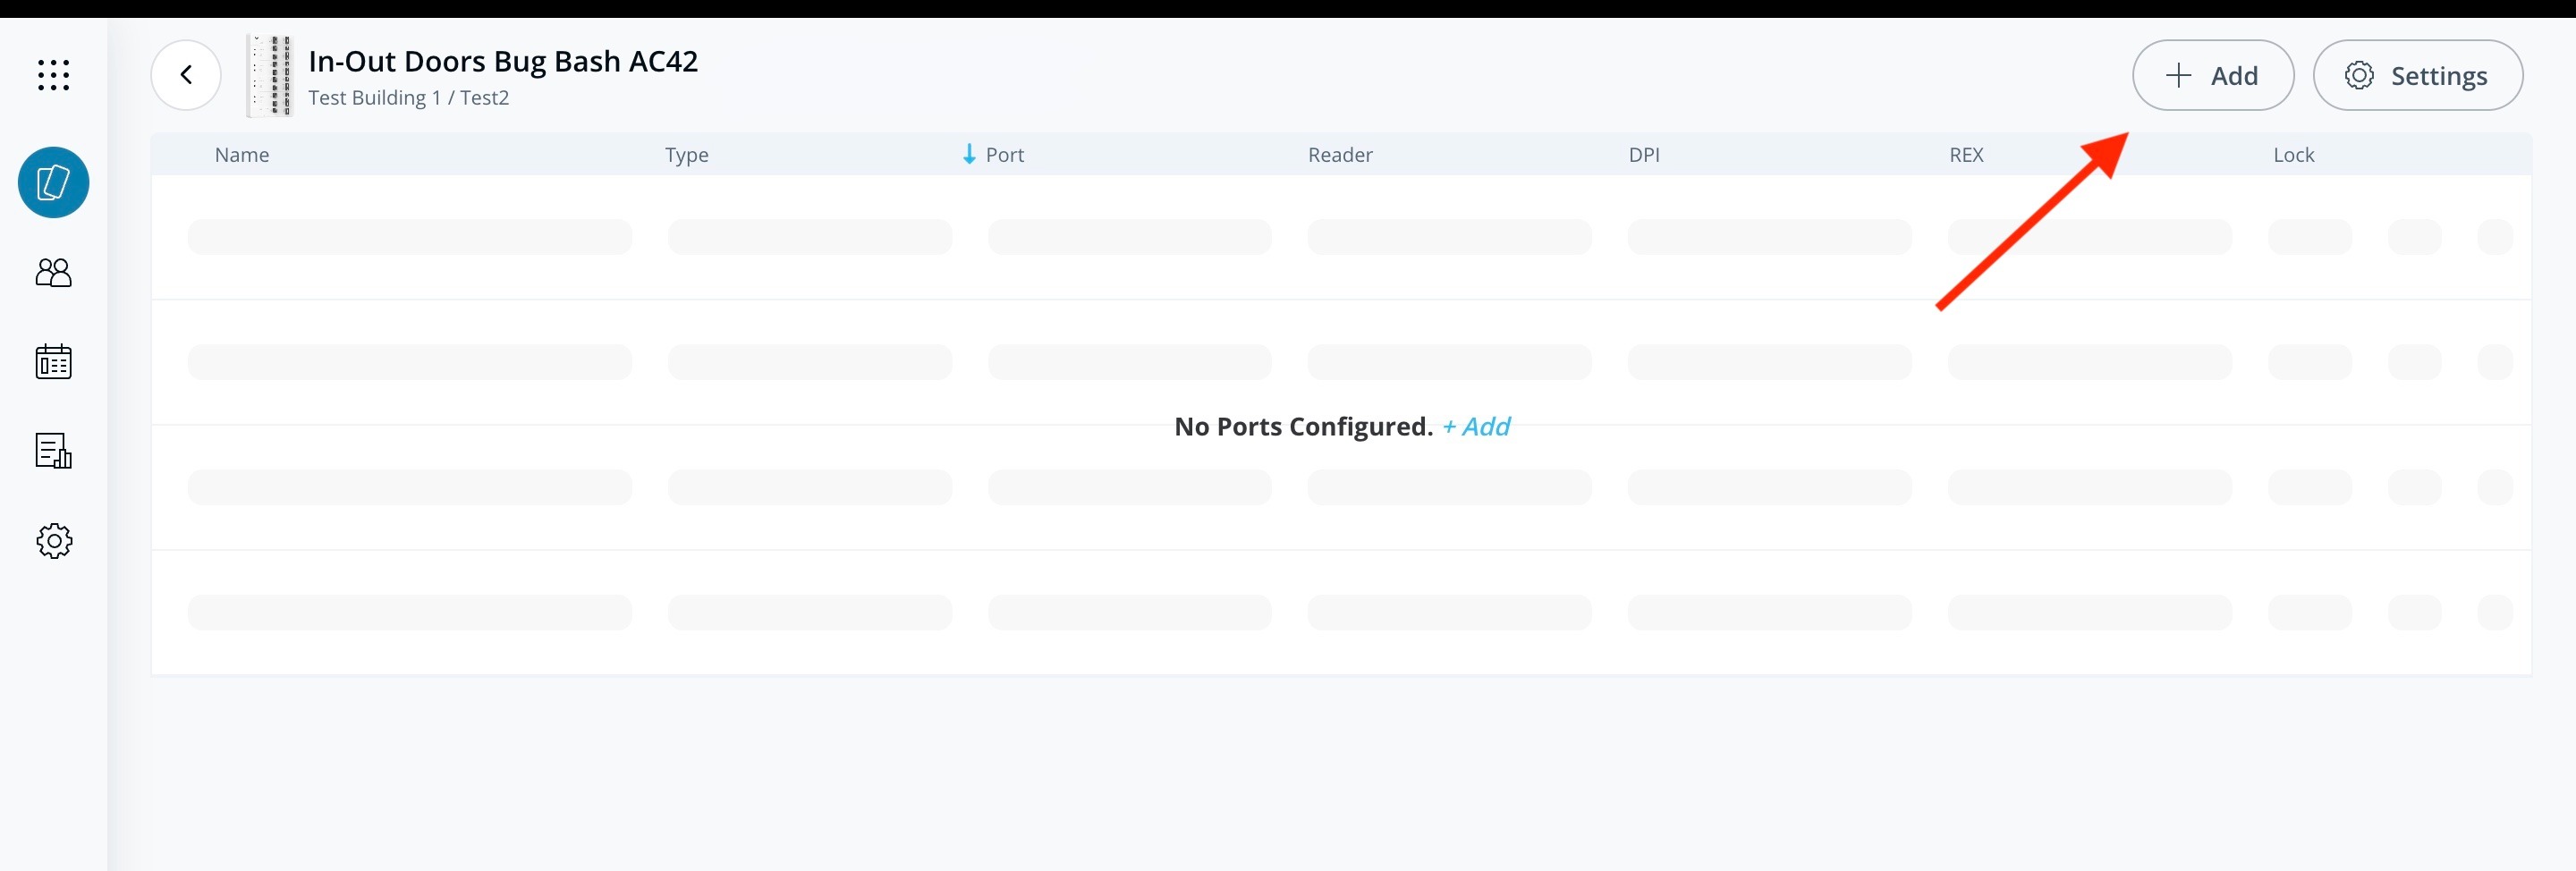
**[追加]をクリックします。**
{% endstep %}
{% step %}
**[エンティティを追加]モーダルで、[入退室ドア]を選択します。**
次の画面では、ドア名、建物/フロア、近くのカメラ、サムネイルを入力し、入室側および退出側リーダーのドアスロットを設定できます。 **入室側リーダー** は常に最初のスロットであり、 **退出側リーダー** は常に2番目のスロットです。
{% endstep %}
{% step %}
**[設定]で各フィールドの値を入力し、[次へ]をクリックします。**
{% endstep %}
{% step %}
**[インストーラー設定]を構成し、[次へ]をクリックします。**
{% endstep %}
{% step %}
**目的のアクセスレベルを選択し、[完了]をクリックします。アクセスコントローラの画面には、以下の例のようなドア設定が表示されます。表の[ポート]列に2つのポートがあることに注目してください。**
{% endstep %}
{% endstepper %}
これで、このドアを通常のドアと同様に設定し続けることができます。ドアにスケジュールを適用すると、そのスケジュールは両方のリーダーに適用されます。
***
## ドアイベントページの変更点
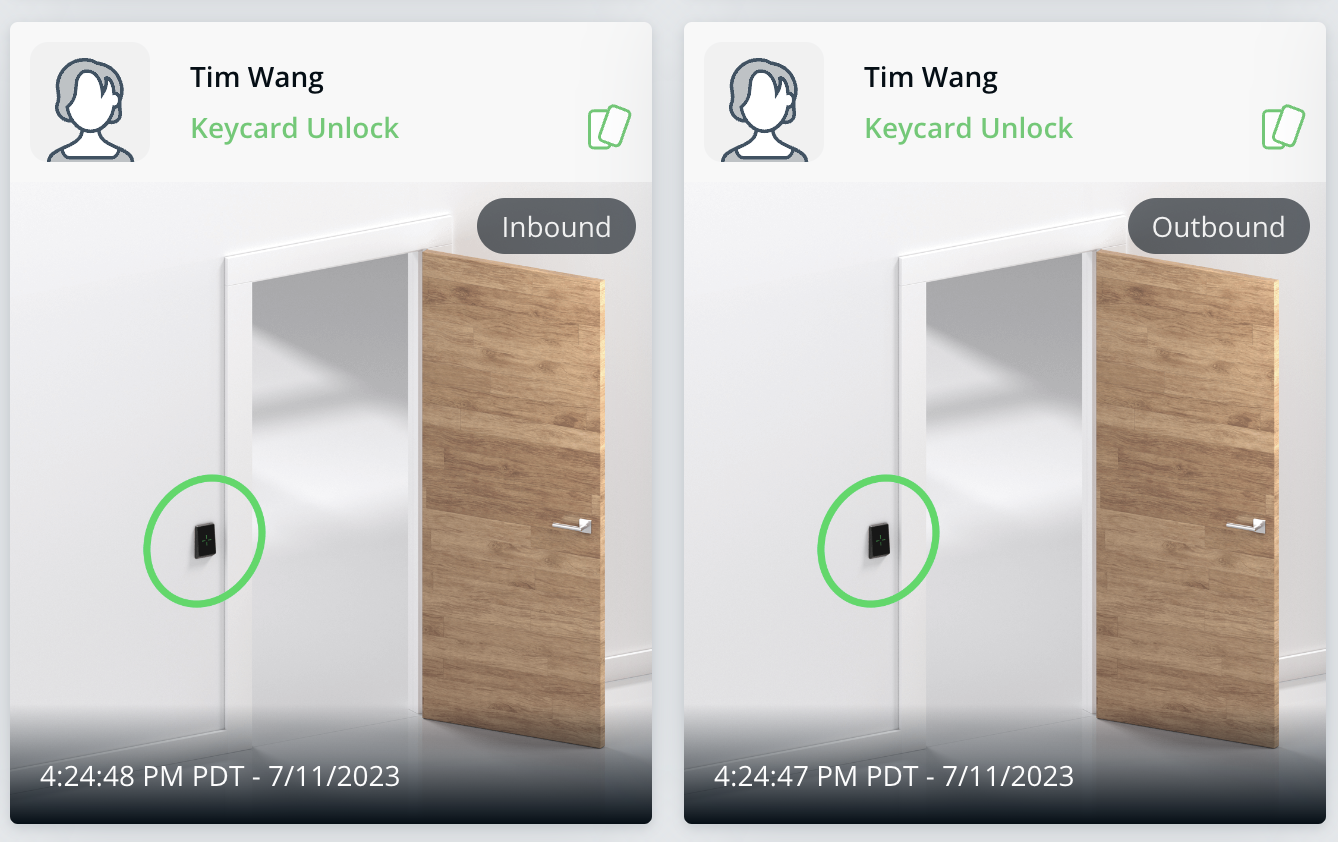
この *入室* および *退出* *リーダー* は、入室または退出の方向でタグ付けされたイベントを生成できます。たとえば、次のようなアクセス試行: *キーカードによる解錠/キーカード拒否*は、関連する方向の注釈付きで表示されるようになりました(以下を参照)。
ドアイベントページには、ユーザーが方向(入室/退出)に基づいてイベントをフィルタリングできるフィルターが追加されました。このフィルターは、他のすべての既存のフィルターと組み合わせて使用できます(以下を参照)。
---
# Agent Instructions
This documentation is published with GitBook. GitBook is the documentation platform designed so that both humans and AI agents can read, navigate, and reason over technical content effectively. Learn more at gitbook.com.
## Querying This Documentation
If you need additional information that is not directly available in this page, you can query the documentation dynamically by asking a question.
Perform an HTTP GET request on the current page URL with the `ask` query parameter, and the optional `goal` query parameter:
```
GET https://help.verkada.com/access-control/ja/she-zhi/wire-a-door-to-a-verkada-access-controller/set-up-an-inout-door-with-two-readers.md?ask=&goal=
```
`ask` is the immediate question: it should be specific, self-contained, and written in natural language.
`goal` is optional and describes the broader end goal you are ultimately trying to accomplish on behalf of the user. GitBook uses it to tailor the answer towards what is most useful for that goal.
The response will contain a direct answer to the question and relevant excerpts and sources from the documentation.
Use this mechanism when the answer is not explicitly present in the current page, you need clarification or additional context, or you want to retrieve related documentation sections.