> For the complete documentation index, see [llms.txt](https://help.verkada.com/llms.txt). Markdown versions of documentation pages are available by appending `.md` to page URLs; this page is available as [Markdown](https://help.verkada.com/access-control/es/configuracion/unlock-a-door-from-a-3rd-party-intercom-system-or-button.md).
# Desbloquee desde un intercomunicador o botón de terceros
Aprenda a usar una entrada para desbloquear una puerta con el control de acceso Verkada
Puede conectar dispositivos, como intercomunicadores y botones, al módulo AUX de cualquiera de los [controladores de acceso](https://docs.verkada.com/docs/access-controllers-series-overview.pdf) y luego se registran todos los eventos de desbloqueo asociados en [Verkada Command](/command/es/primeros-pasos/get-started-with-verkada-command.md).
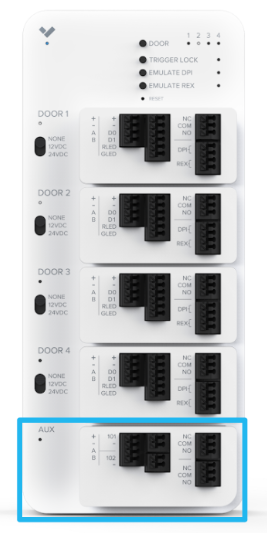
Todos los controladores de acceso Verkada tienen 2 entradas AUX, ubicadas en el bloque de terminales central, como se muestra a continuación:
***
## Configuración
{% stepper %}
{% step %}
**Conecte la salida normalmente abierta (NO) del sistema externo a la primera entrada de su controlador de acceso, usando la entrada IN1, como se muestra en el ejemplo:**
{% endstep %}
{% step %}
**En Verkada Command, ve a Todos los productos > Dispositivos.**
{% endstep %}
{% step %}
**Seleccione el controlador de acceso que desea configurar.**
{% endstep %}
{% step %}
**En la parte superior derecha, haga clic en Agregar y seleccione Entrada AUX.**
{% endstep %}
{% step %}
**Siga el flujo de configuración para configurar la entrada AUX.**
1. Confirme la configuración y haga clic en **Siguiente**.
2. Cuando haya terminado, haga clic en **Listo.**
{% endstep %}
{% step %}
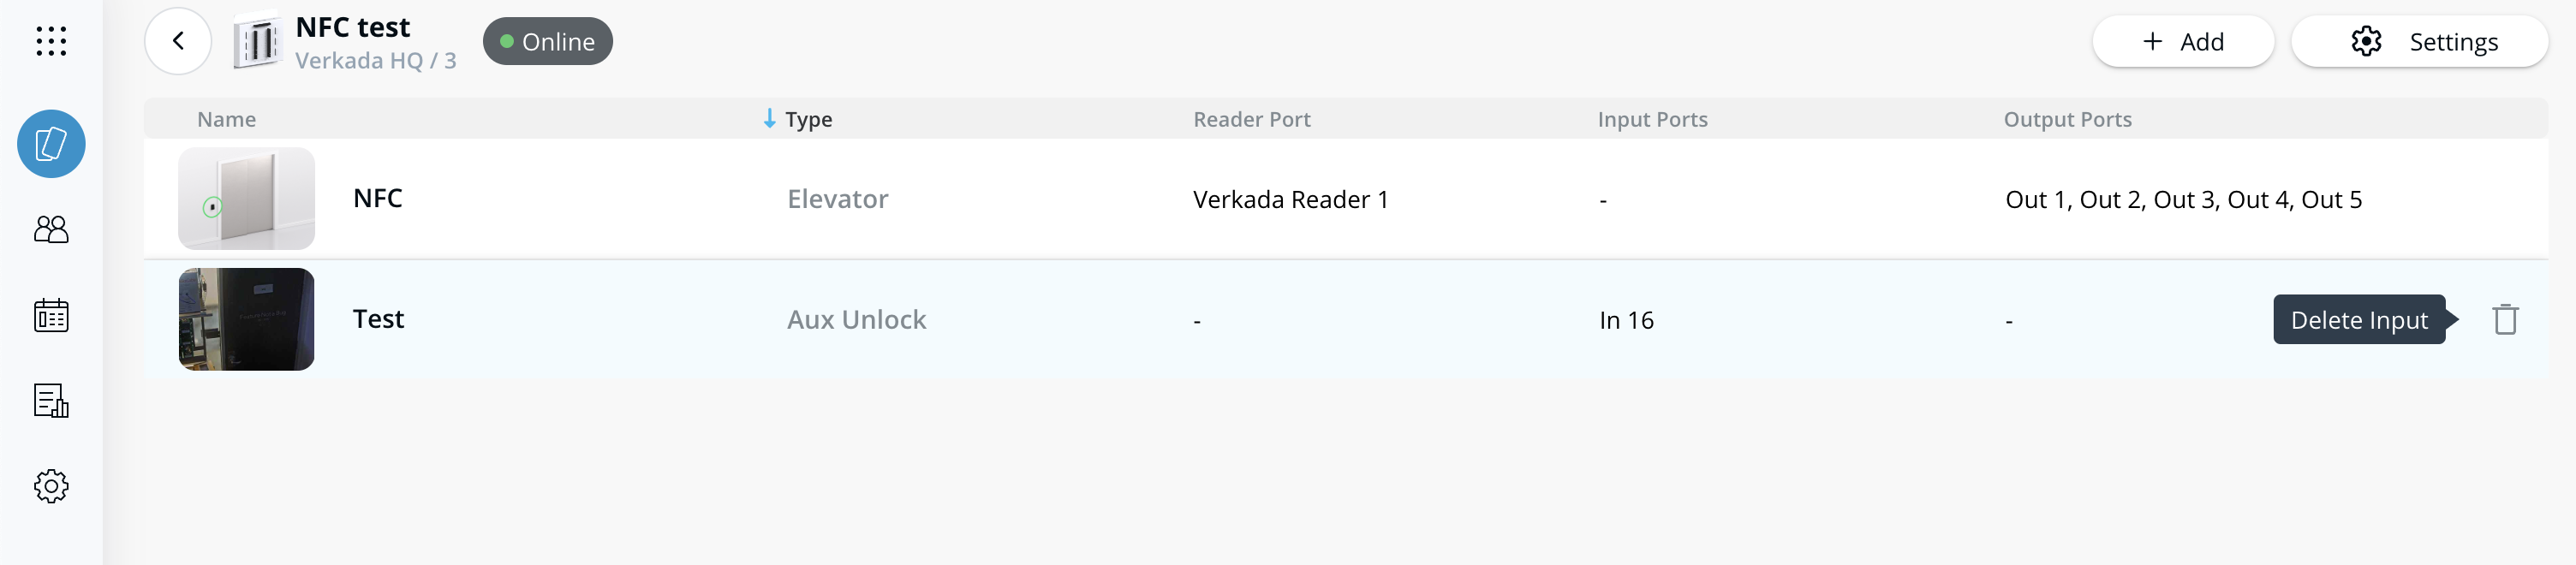
**A la derecha de la entrada AUX, haga clic en Eliminar para quitarla.**
{% endstep %}
{% endstepper %}
***
{% hint style="info" %}
**¿Prefiere verlo en acción?** Consulte el [tutorial en video](https://www.youtube.com/watch?v=5MqymenWMdw).
{% endhint %}
---
# Agent Instructions
This documentation is published with GitBook. GitBook is the documentation platform designed so that both humans and AI agents can read, navigate, and reason over technical content effectively. Learn more at gitbook.com.
## Querying This Documentation
If you need additional information that is not directly available in this page, you can query the documentation by asking a question.
Perform an HTTP GET request on the following URL with the `ask` and `goal` query parameters:
```
GET https://help.verkada.com/access-control/es/configuracion/unlock-a-door-from-a-3rd-party-intercom-system-or-button.md?ask=&goal=
```
`ask` is the immediate question: it should be specific, self-contained, and written in natural language.
`goal` is what the user is ultimately trying to achieve, the reason they need the answer. Sharing it helps GitBook give you a better, more relevant answer. A goal is most helpful when it describes the outcome the user wants rather than restating the question. For example, with `ask=how do I create an API token`, a goal like `automate deployments from our CI pipeline` lets GitBook tailor the answer to that use case.
The response will contain a direct answer to the question and relevant excerpts and sources from the documentation.
Use this mechanism when the answer is not explicitly present in the current page, you need clarification or additional context, or you want to retrieve related documentation sections.