> For the complete documentation index, see [llms.txt](https://help.verkada.com/llms.txt). Markdown versions of documentation pages are available by appending `.md` to page URLs; this page is available as [Markdown](https://help.verkada.com/access-control/access/door-schedules-and-exceptions/save-reports-and-schedule-automatic-delivery.md).
# Save Reports and Schedule Delivery
Learn how to create and schedule report filters for automatic delivery
Many users regularly need to run the same reports on a recurring basis. Reapplying the same filters each time can be repetitive and time-consuming. Saved reports and scheduled report delivery help streamline this process by letting users save filtered reports and automatically deliver them on a recurring schedule.
***
### Benefits
* An admin can return and easily re-run the report without having to reset the filters
* These saved reports can be turned into comma-separated value (CSV) files and automatically emailed to a specified list of recipients
* These emails can be scheduled daily, weekly, or monthly
{% hint style="danger" %}
You need **Access Admin** permissions to create and manage access reports.
{% endhint %}
***
## Create a saved report
{% stepper %}
{% step %}
**Navigate to the Access Control homepage and on the left side, select the Reports icon.**
{% endstep %}
{% step %}
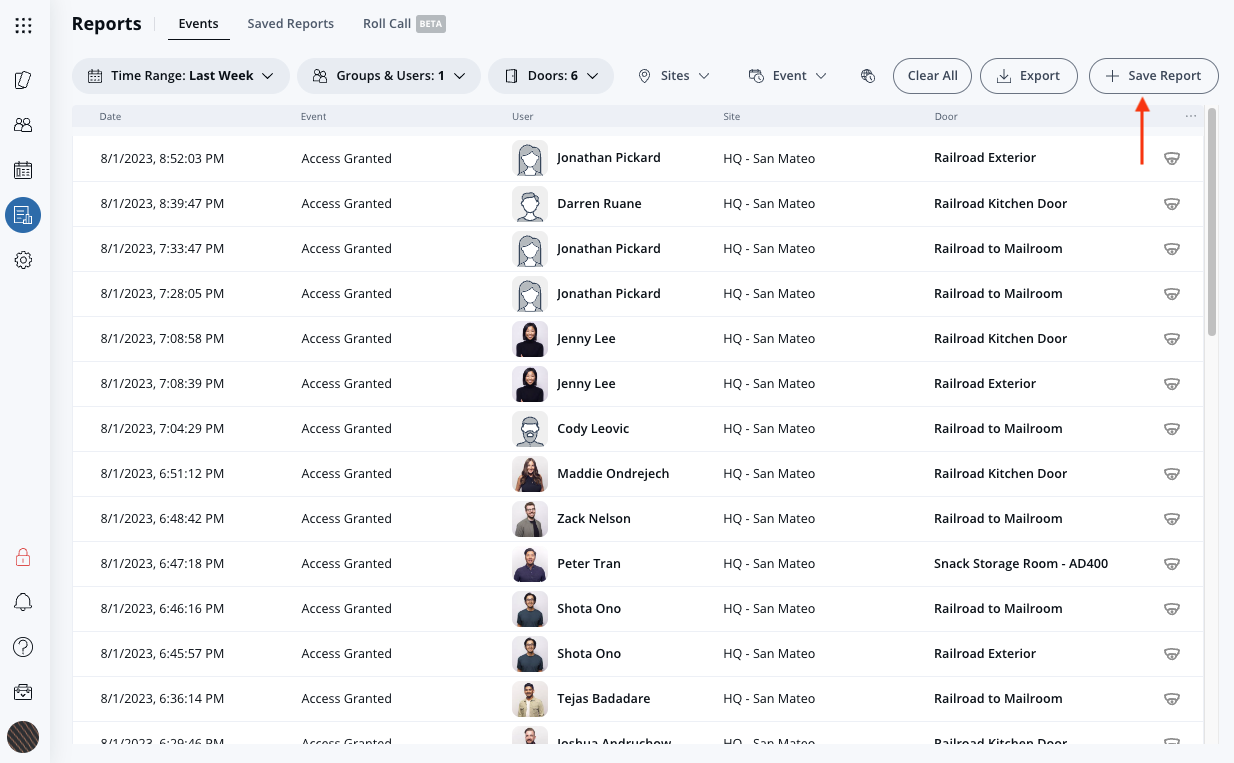
**Select your preferred filters and click Save Report.**
{% endstep %}
{% step %}
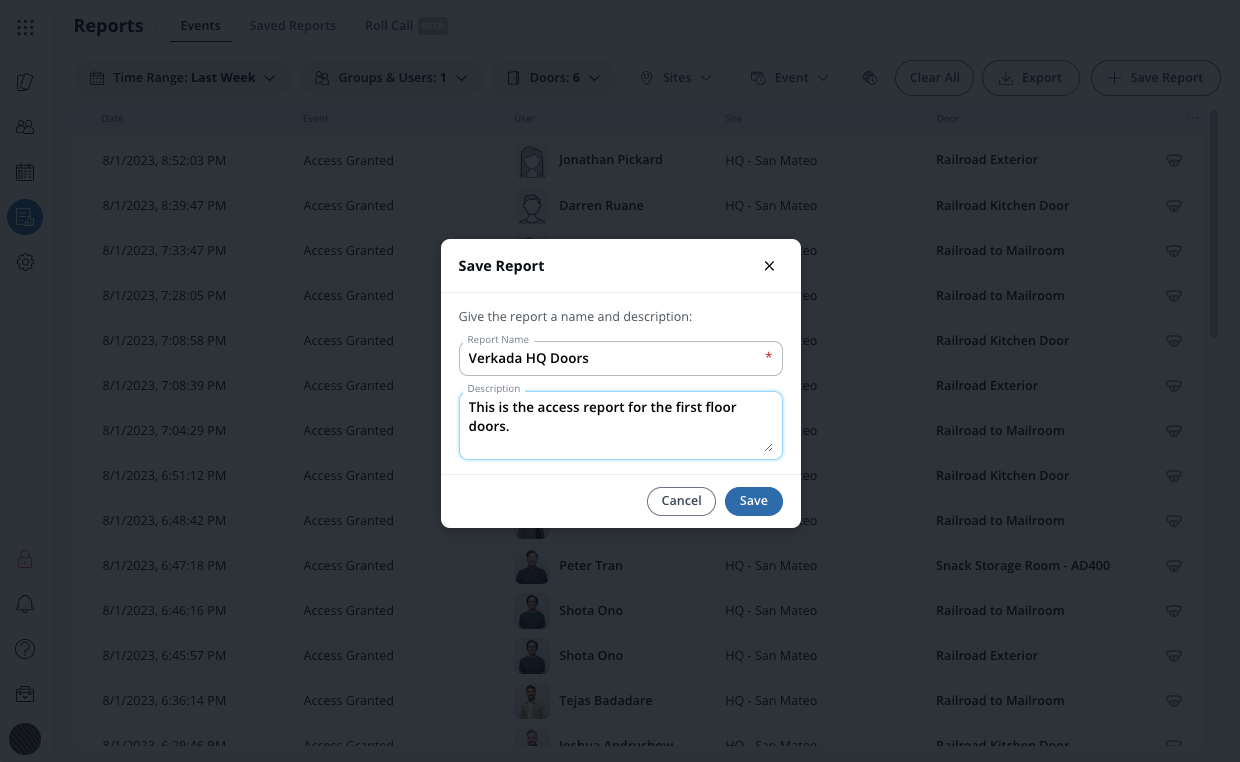
**On the *****Save Report***** dialog, type a Report Name (required) and a description (optional), and click Save. Both can be edited after the creation of the saved report.**
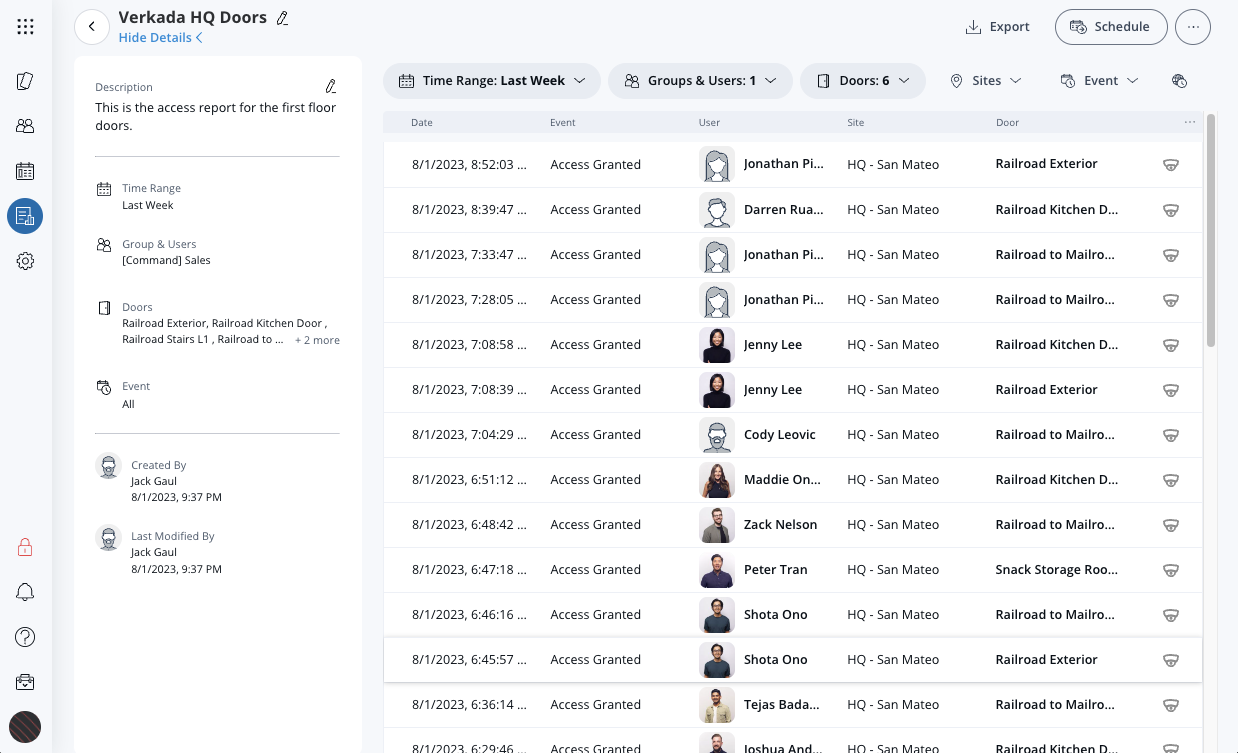
Once the report is saved, the reports page loads. The left pane contains some metadata attached to the saved report. The right pane is the report itself.\
{% endstep %}
{% step %}
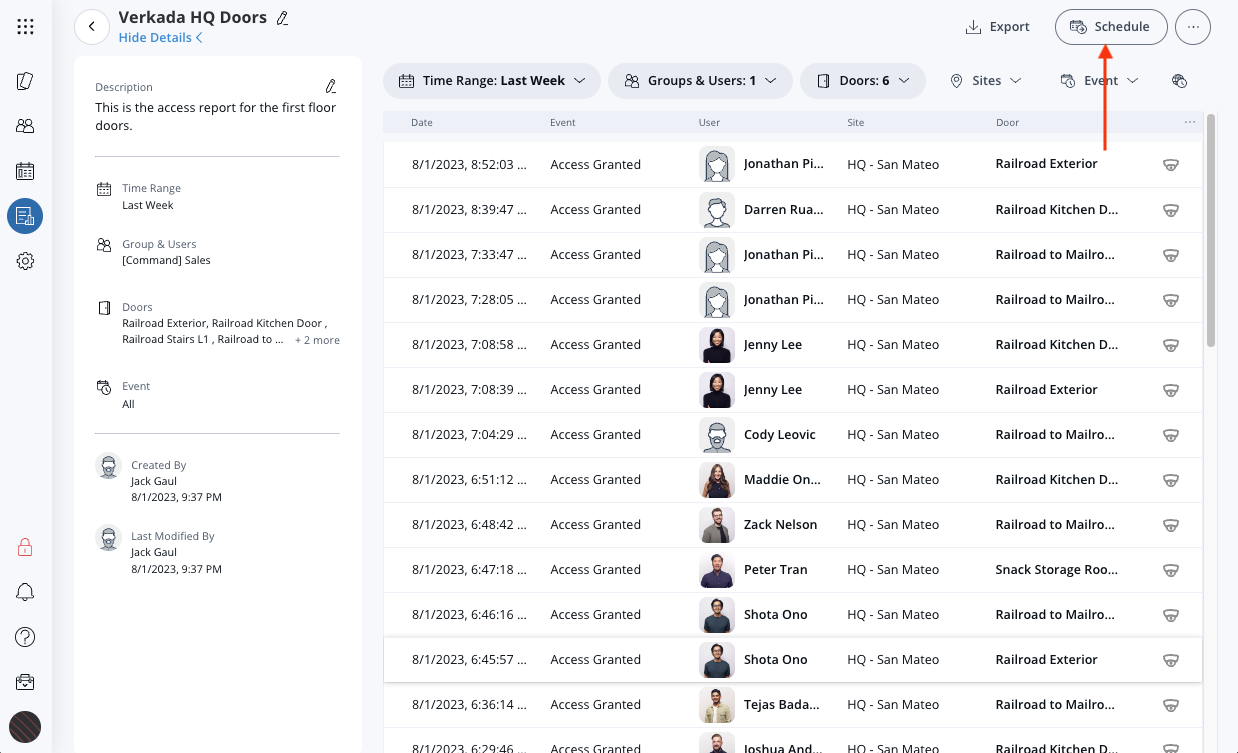
**At the top right, click Schedule to schedule these reports.**
{% endstep %}
{% step %}
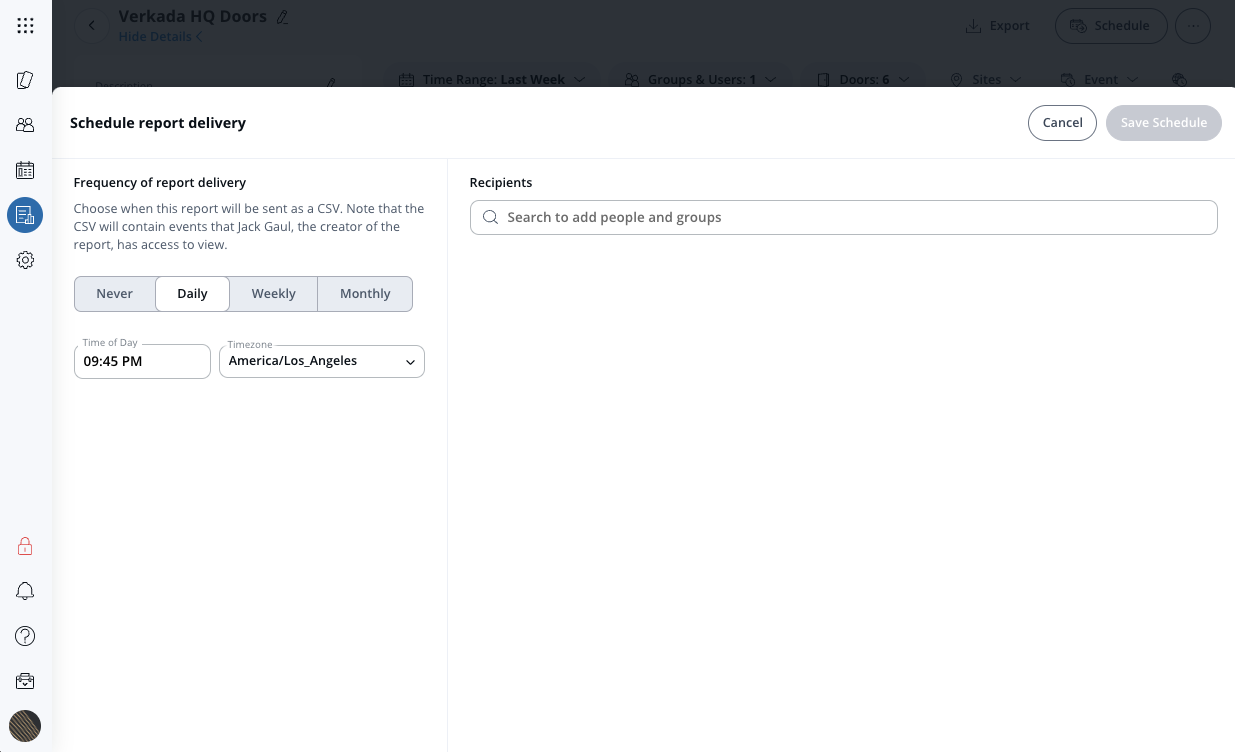
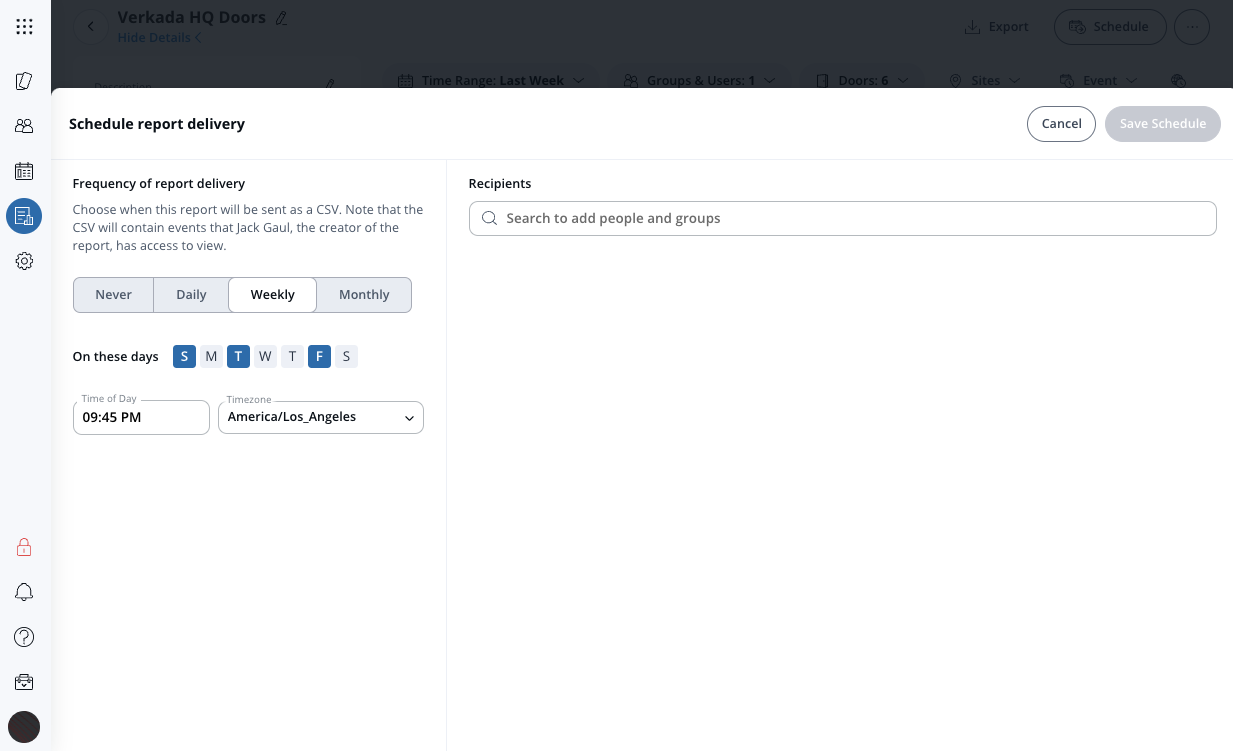
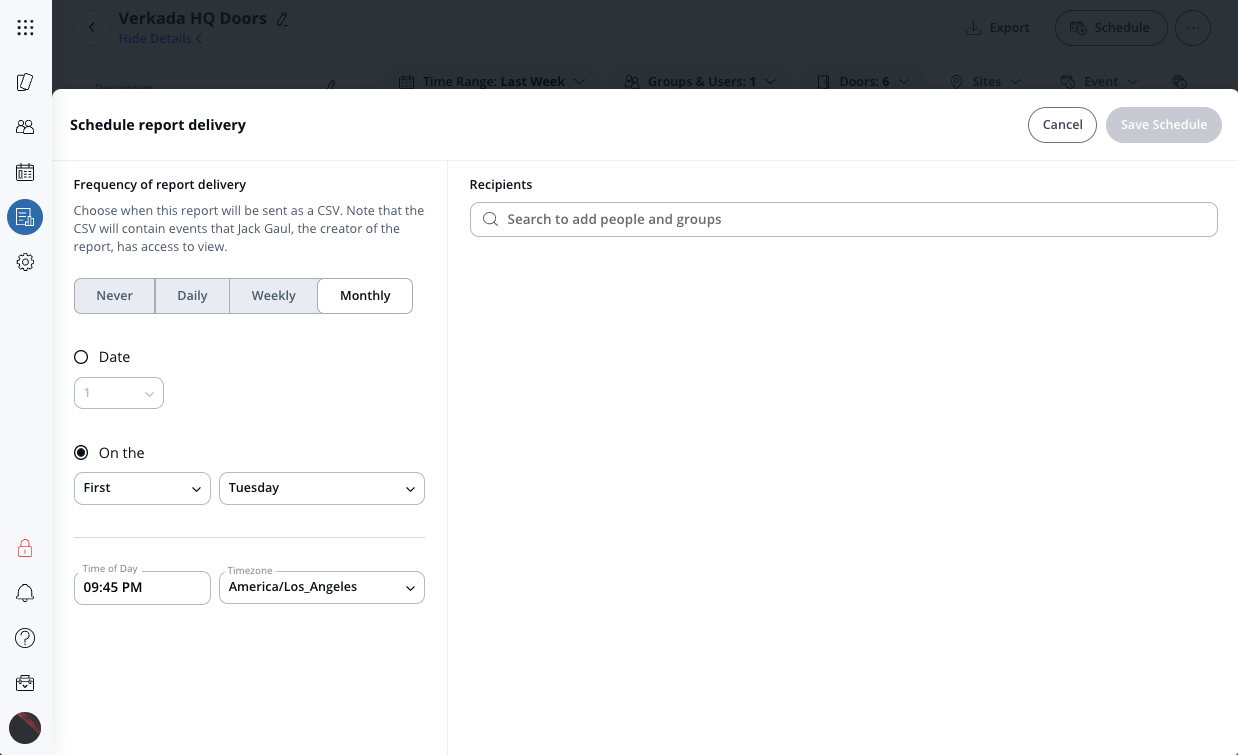
**Choose the schedule frequency for your saved reports: *****Daily*****, *****Weekly*****, or *****Monthly*****.**
\
**Example**: The *Daily* frequency requires a specific time and timezone.
\
**Example**: The *Weekly* option allows for selecting the days of the week you want to send the report. This example has Sunday (S), Tuesday (T), and Friday (F) selected.
**Example**: The *Monthly* option allows you to choose specific date of the month or the week number/weekday.
{% endstep %}
{% step %}
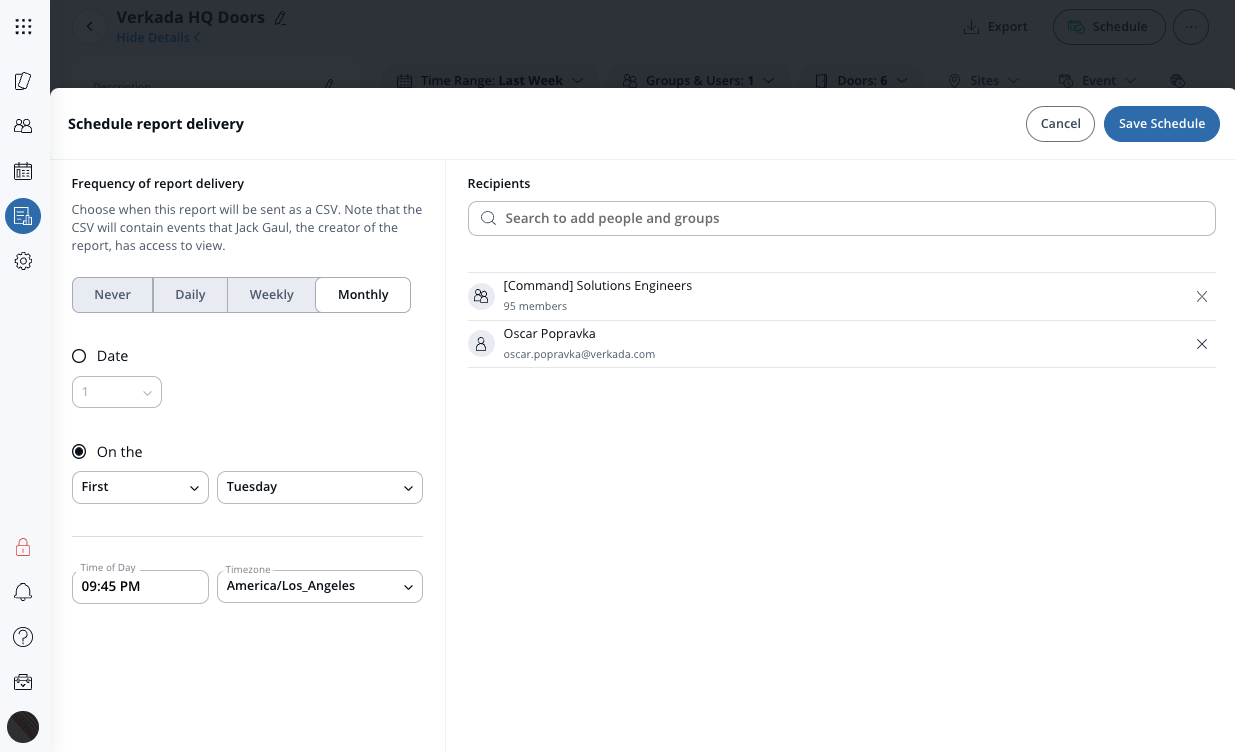
**Choose the recipients of your scheduled report. You can specify both individual users or access groups.**
\
**Example**: User and group specified
\
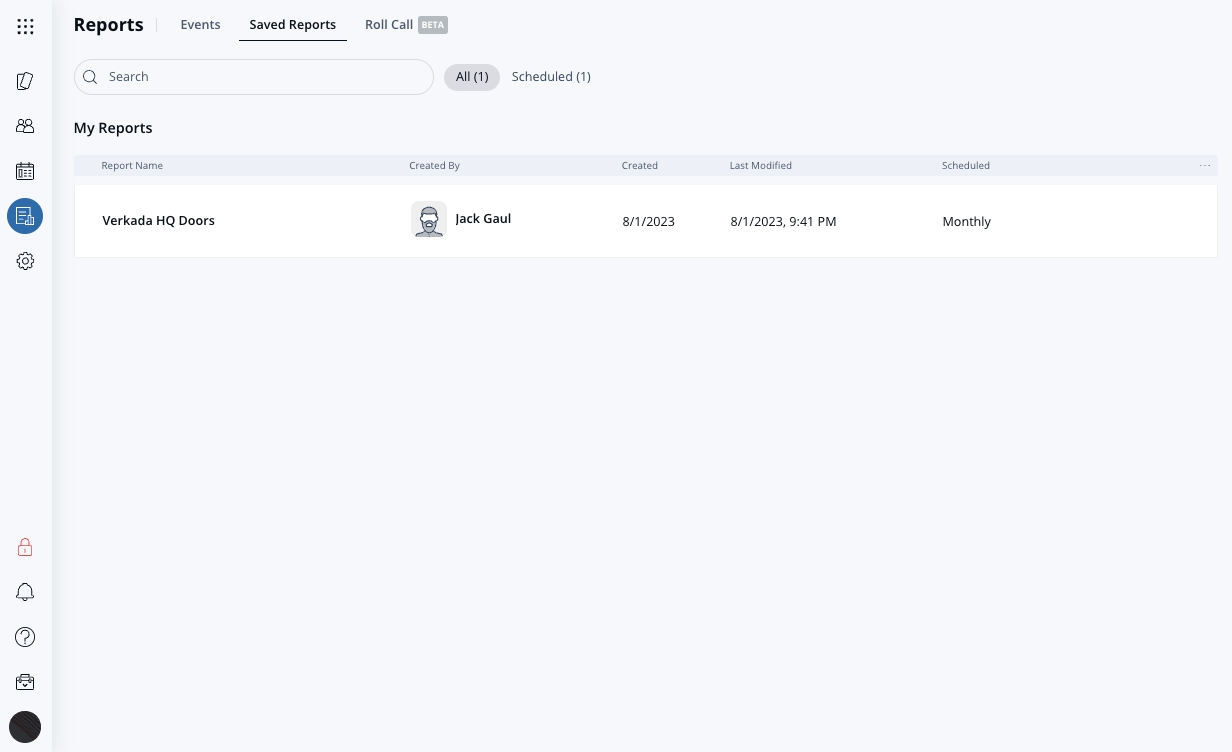
You should see your new saved report in the **Saved Reports** tab.
{% endstep %}
{% endstepper %}
***
## Duplicate an existing report
{% stepper %}
{% step %}
**In Verkada Command, go to All Products > Access.**
{% endstep %}
{% step %}
**In the left navigation, select Reports.**
1. Configure the filters as needed.
2. On the right, click **Save Report.**
{% endstep %}
{% step %}
**On** **Save Report:**
1. Enter a unique name.
2. (Optional) Add a report description.
3. Click **Save.**
{% endstep %}
{% step %}
**After you save the report, it will open on the Saved Reports tab. The left pane displays metadata for the saved report, while the right pane displays the report.**
{% endstep %}
{% endstepper %}
***
## Create a scheduled report
{% stepper %}
{% step %}
**In Verkada Command, go to All Products > Access.**
{% endstep %}
{% step %}
**In the left navigation, select Reports.**
{% endstep %}
{% step %}
**At the top, click Saved Reports > your report.**
1. In the top right, click **Schedule.**
2. Select the schedule frequency for the report:
* **Daily:** Specify the time and time zone for report delivery.
* **Weekly:** Select the day or days of the week to deliver the report.
* **Monthly:** Choose either a specific day of the month or a week number and weekday (for example, the second Tuesday of each month).
3. Choose the recipients of your scheduled report. You can specify both individual users and access groups.
4. In the top right, click **Save Schedule.**
{% hint style="danger" %}
Saved reports are private to the user who created them. Only the report creator can view, edit, or run a saved report, regardless of their Access Control permissions or role. If other users need the same report data, schedule report delivery to send the results to them, or have each user create and save their own report.
{% endhint %}
{% endstep %}
{% endstepper %}
***
## Duplicate an existing report
To create a similar report while keeping the existing filters (but not the schedule), duplicate the report and make any necessary changes.
{% stepper %}
{% step %}
**In Verkada Command, go to All Products > Access.**
{% endstep %}
{% step %}
**In the left navigation, select Reports > Saved Reports.**
{% endstep %}
{% step %}
**Hover over your report and click** :ellipsis: **> Duplicate.**
1. Enter a unique name.
2. (Optional) Add a report description.
3. Click **Duplicate.**
{% endstep %}
{% step %}
**(Optional):**
* Open the report and edit the filters if needed
* [Add a schedule](#create-a-scheduled-report)
{% endstep %}
{% endstepper %}
***
## Export a report
You can export a saved report as a CSV file.
{% stepper %}
{% step %}
**In Verkada Command, go to All Products > Access.**
{% endstep %}
{% step %}
**In the left navigation, select Reports.**
{% endstep %}
{% step %}
**At the top, click Saved Reports > your report.**
1. In the top right, click **Export.**
2. Click **OK** to send the report to your email address.
{% endstep %}
{% endstepper %}
---
# Agent Instructions
This documentation is published with GitBook. GitBook is the documentation platform designed so that both humans and AI agents can read, navigate, and reason over technical content effectively. Learn more at gitbook.com.
## Querying This Documentation
If you need additional information that is not directly available in this page, you can query the documentation by asking a question.
Perform an HTTP GET request on the following URL with the `ask` and `goal` query parameters:
```
GET https://help.verkada.com/access-control/access/door-schedules-and-exceptions/save-reports-and-schedule-automatic-delivery.md?ask=&goal=
```
`ask` is the immediate question: it should be specific, self-contained, and written in natural language.
`goal` is what the user is ultimately trying to achieve, the reason they need the answer. Sharing it helps GitBook give you a better, more relevant answer. A goal is most helpful when it describes the outcome the user wants rather than restating the question. For example, with `ask=how do I create an API token`, a goal like `automate deployments from our CI pipeline` lets GitBook tailor the answer to that use case.
The response will contain a direct answer to the question and relevant excerpts and sources from the documentation.
Use this mechanism when the answer is not explicitly present in the current page, you need clarification or additional context, or you want to retrieve related documentation sections.